nyu

[ITP: Soft Robotics] Soft-enough Materials

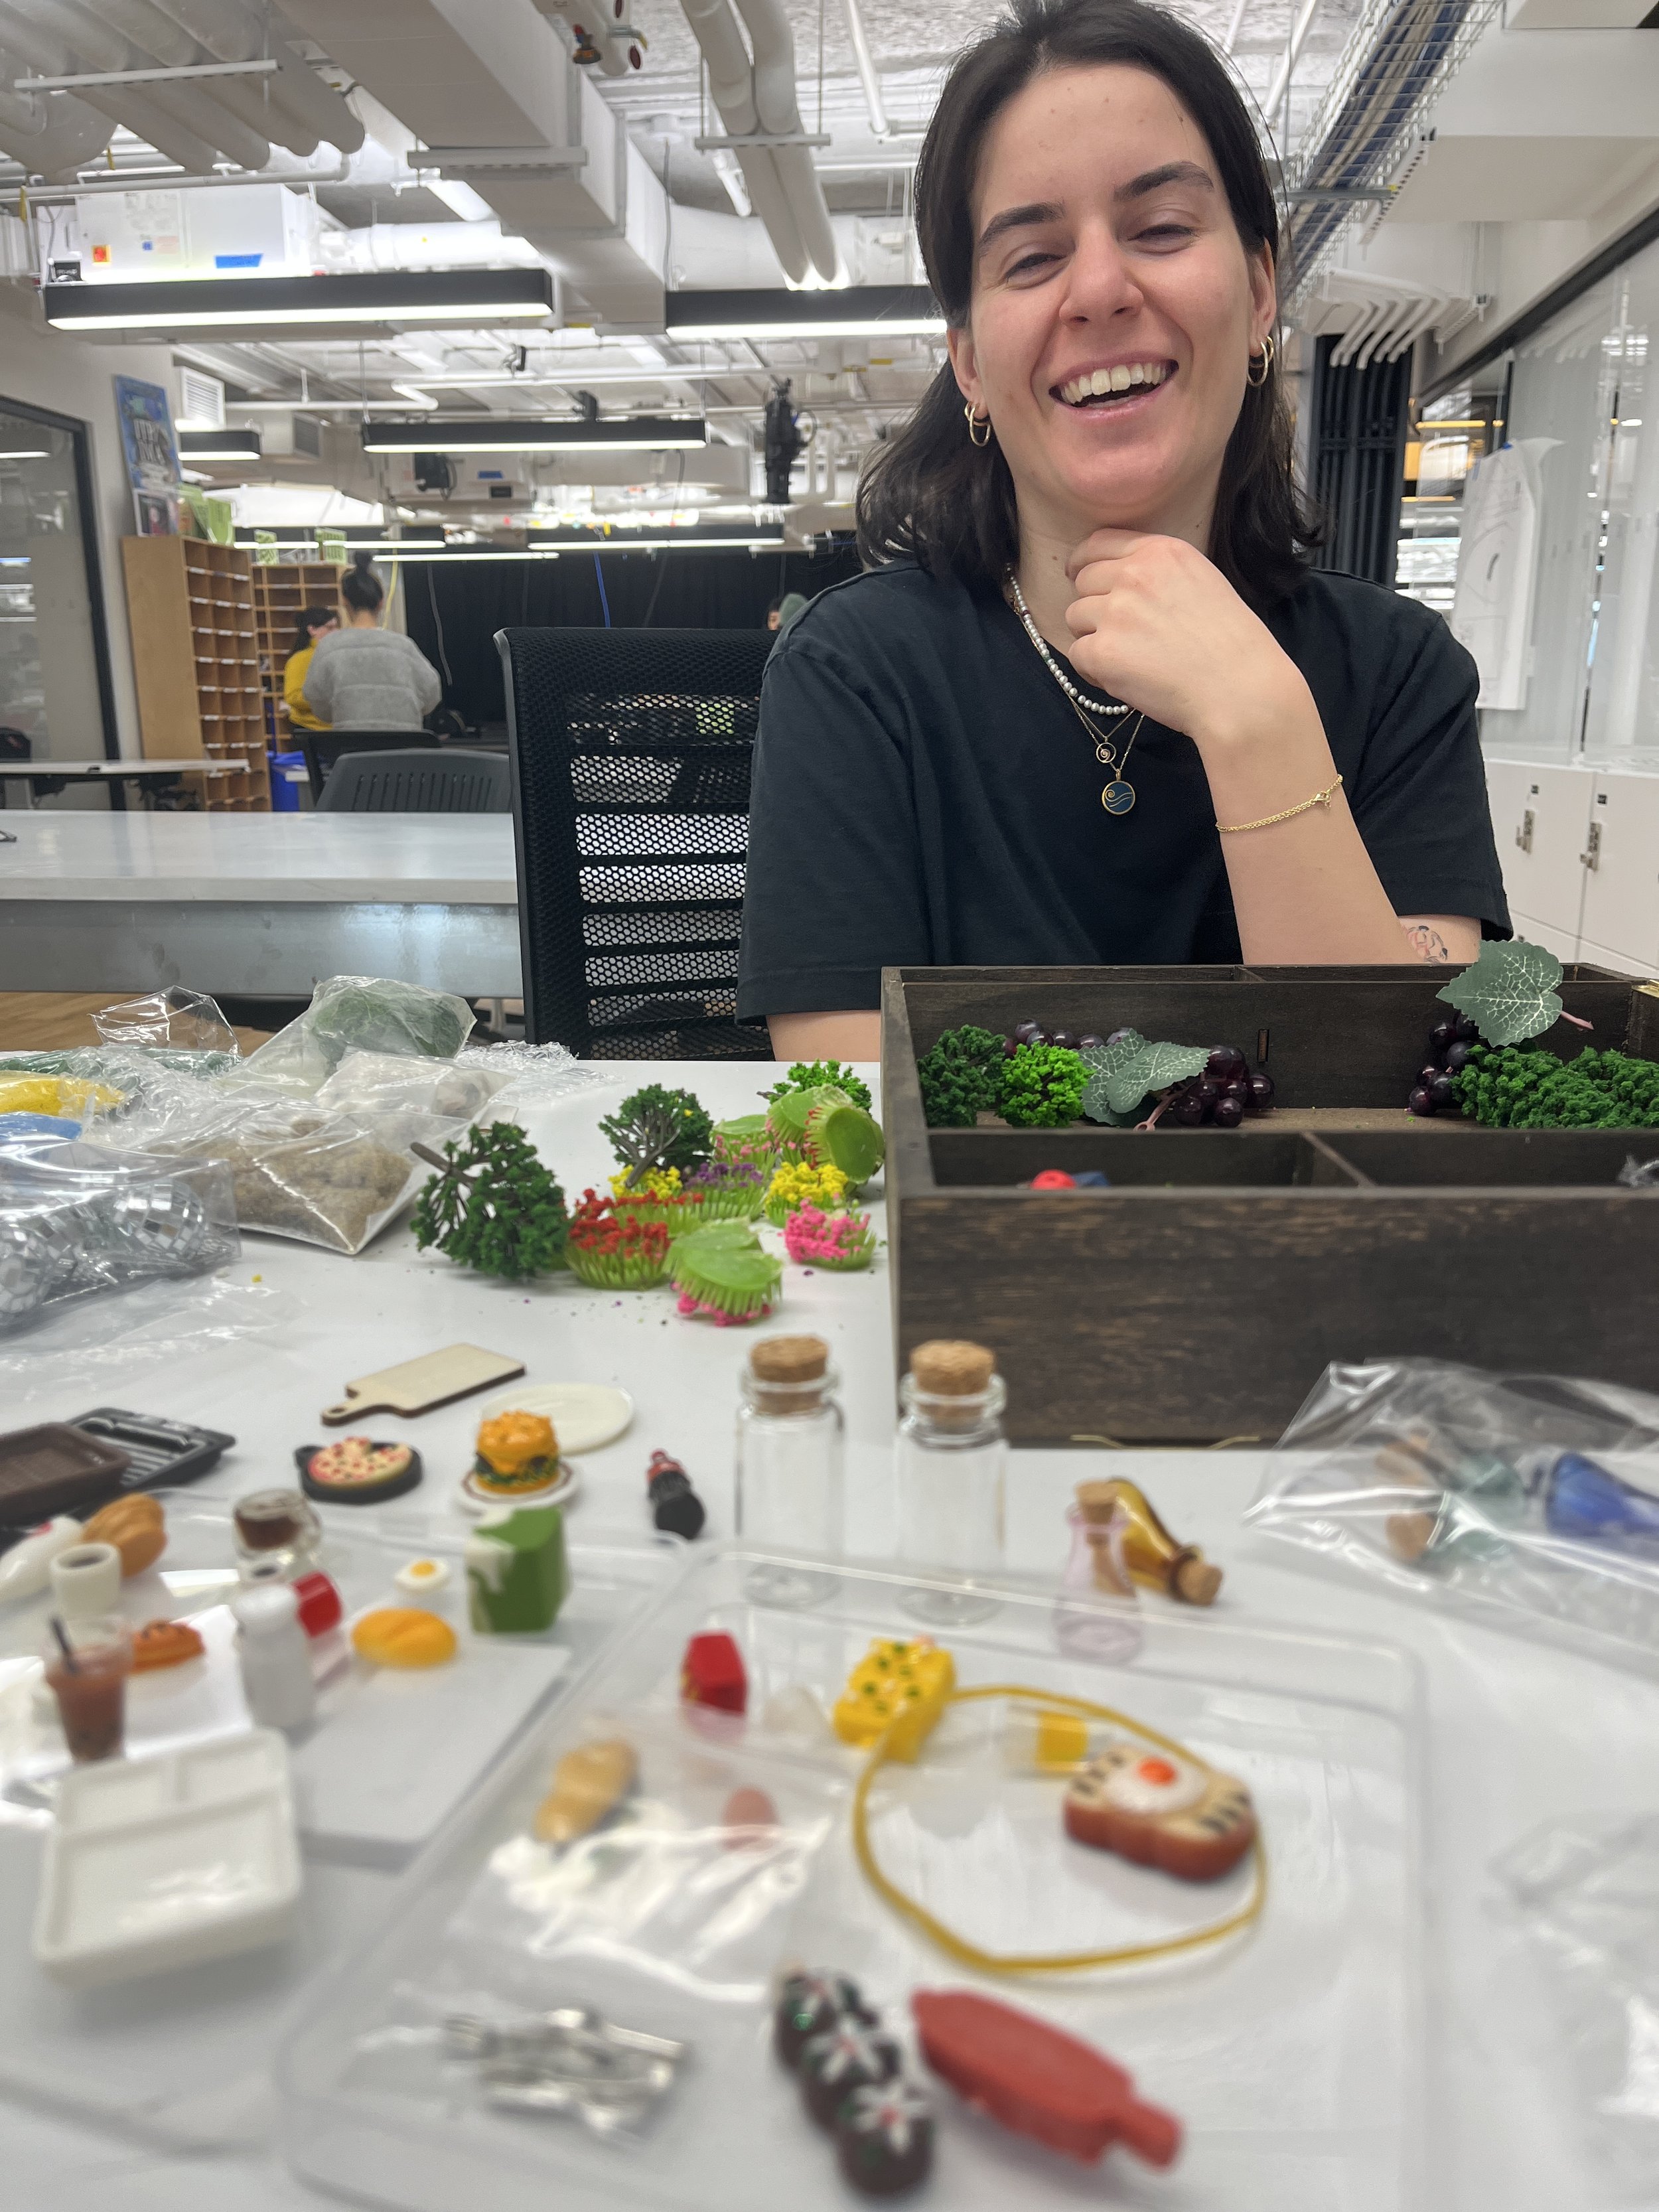
For my exploration of soft materials, I was really captured by the trash I was collecting from my week of being sick. I got a lot of takeout and that comes with many soft materials: bags, napkins, packets of goop, packets of salt… it’s a soft score!

What’s considered soft anyway? From class, we decided that soft meant: bendy, squishy, stretchy, flexibility, compressive, elastic, and deformable. Also, softness can be a factor of an items material properties or its form.

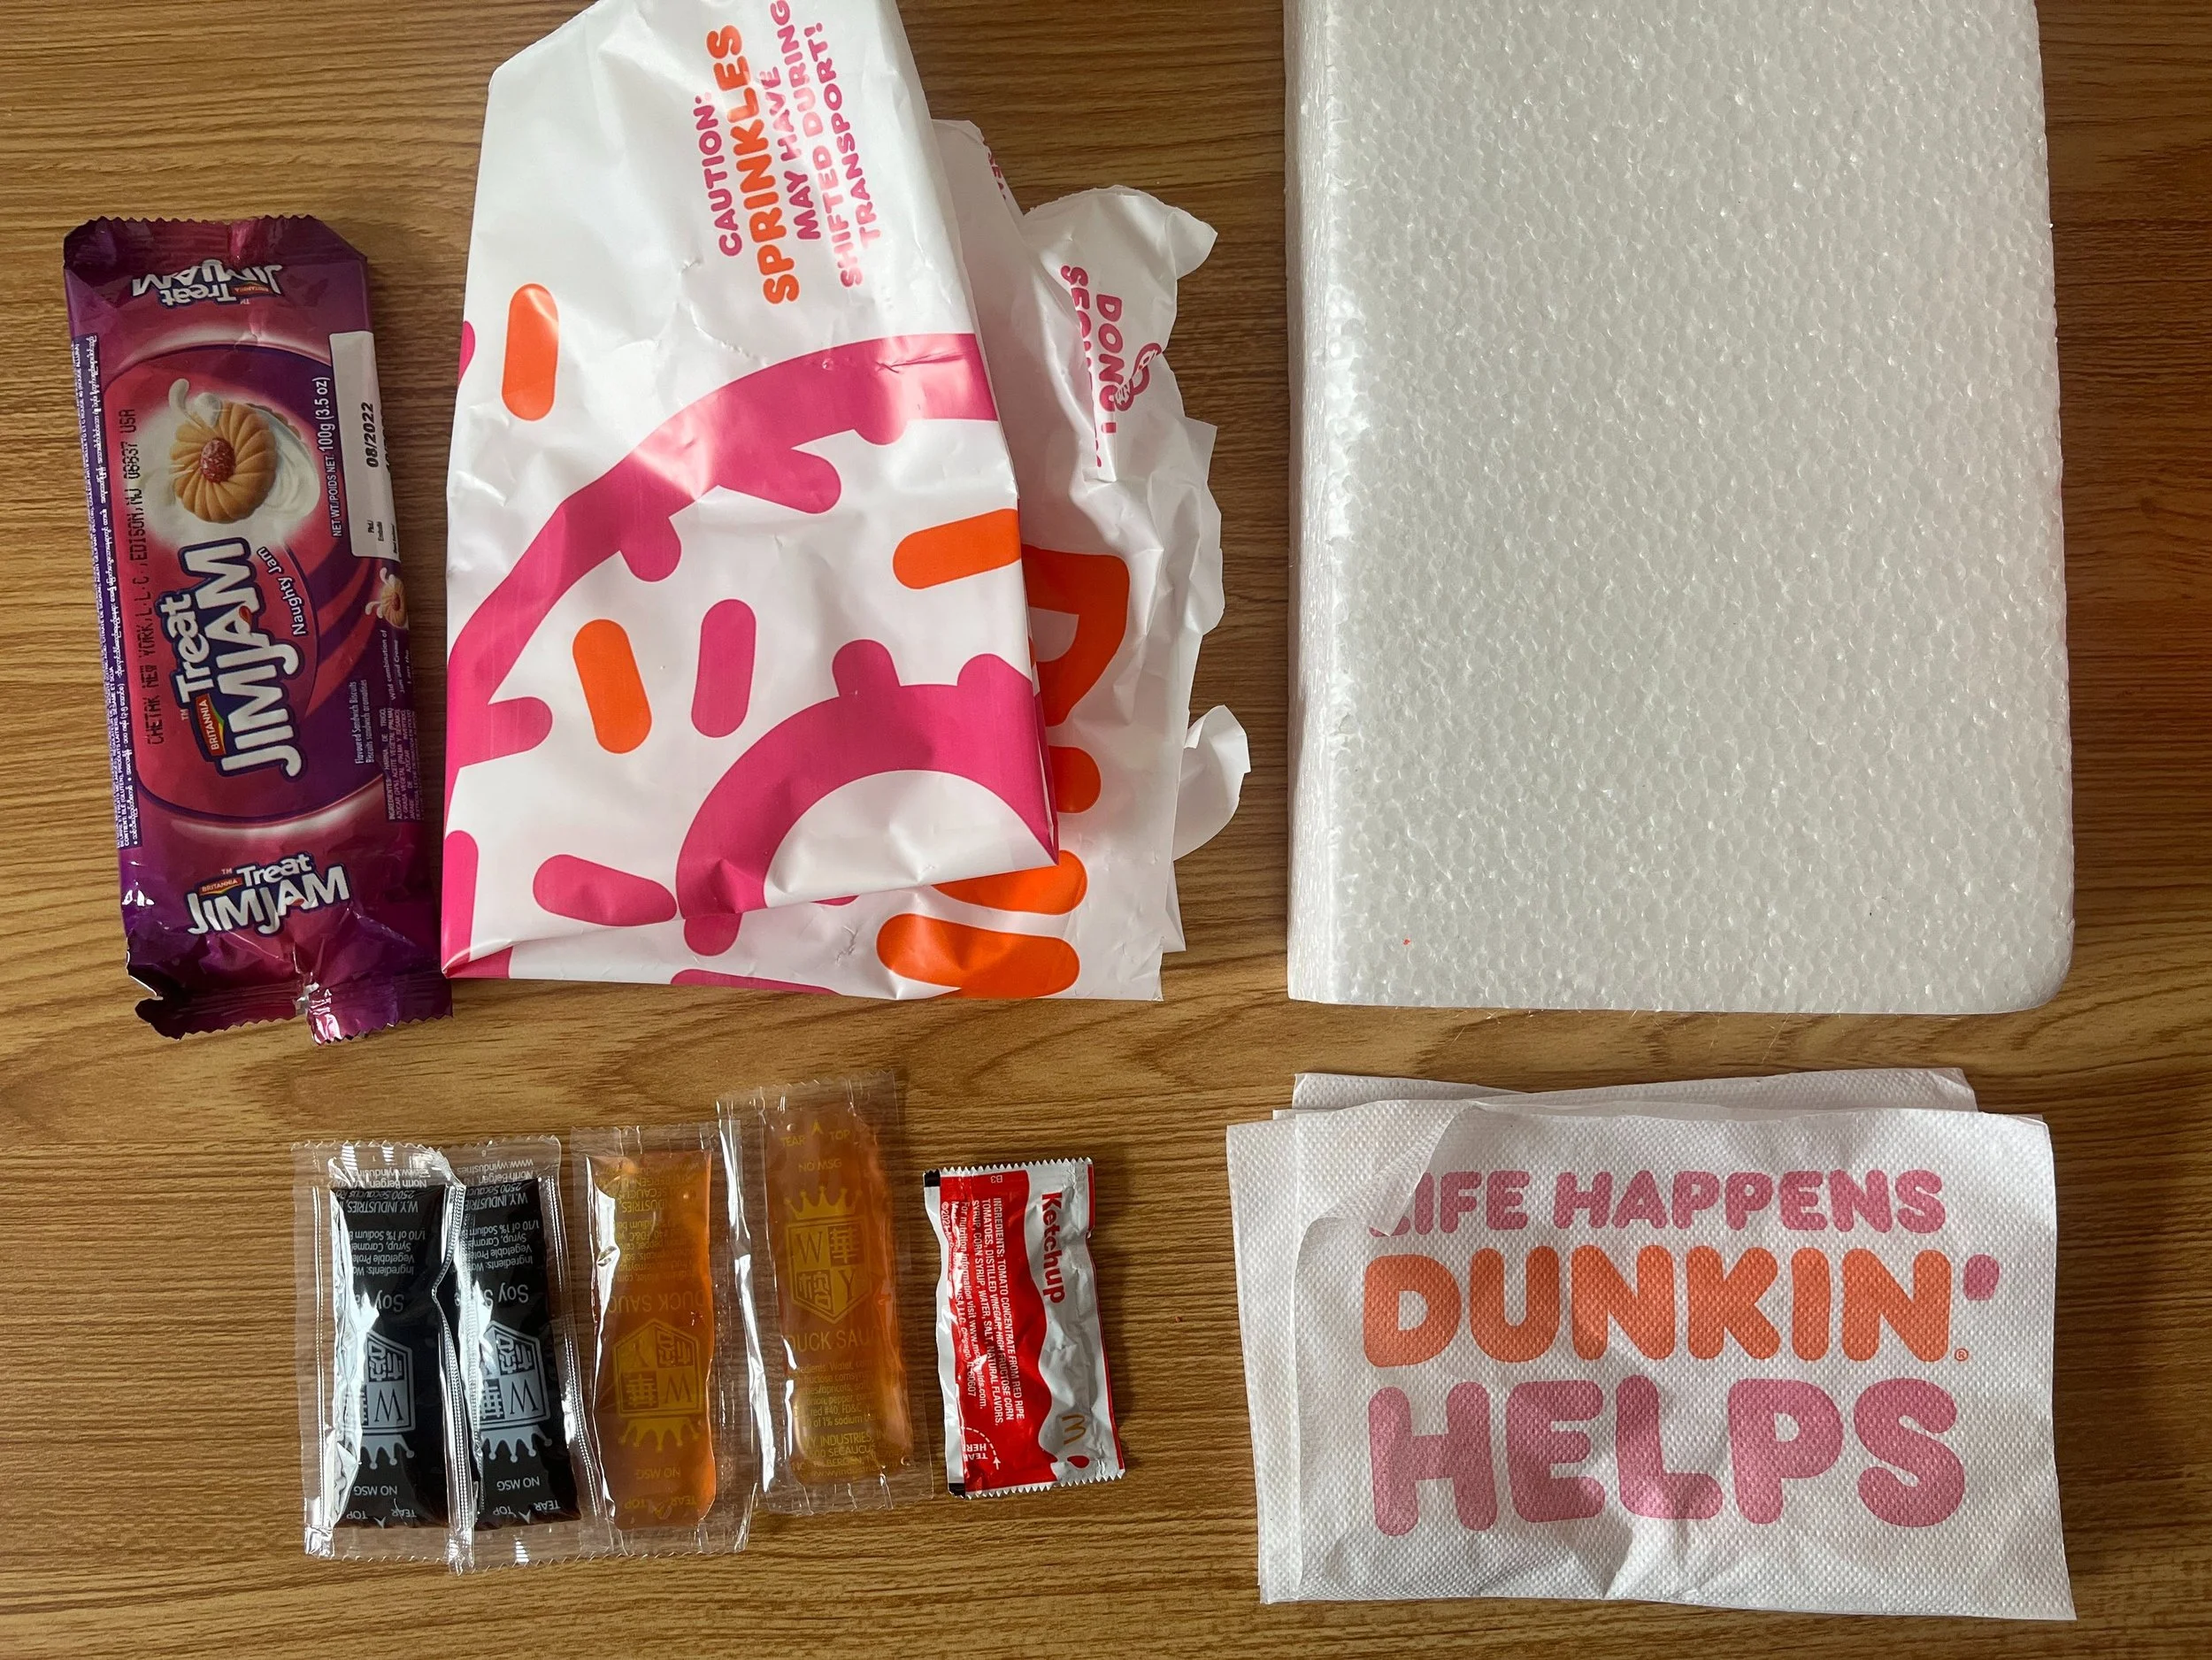
Some soft materials, and funny packaging, I collected last week.

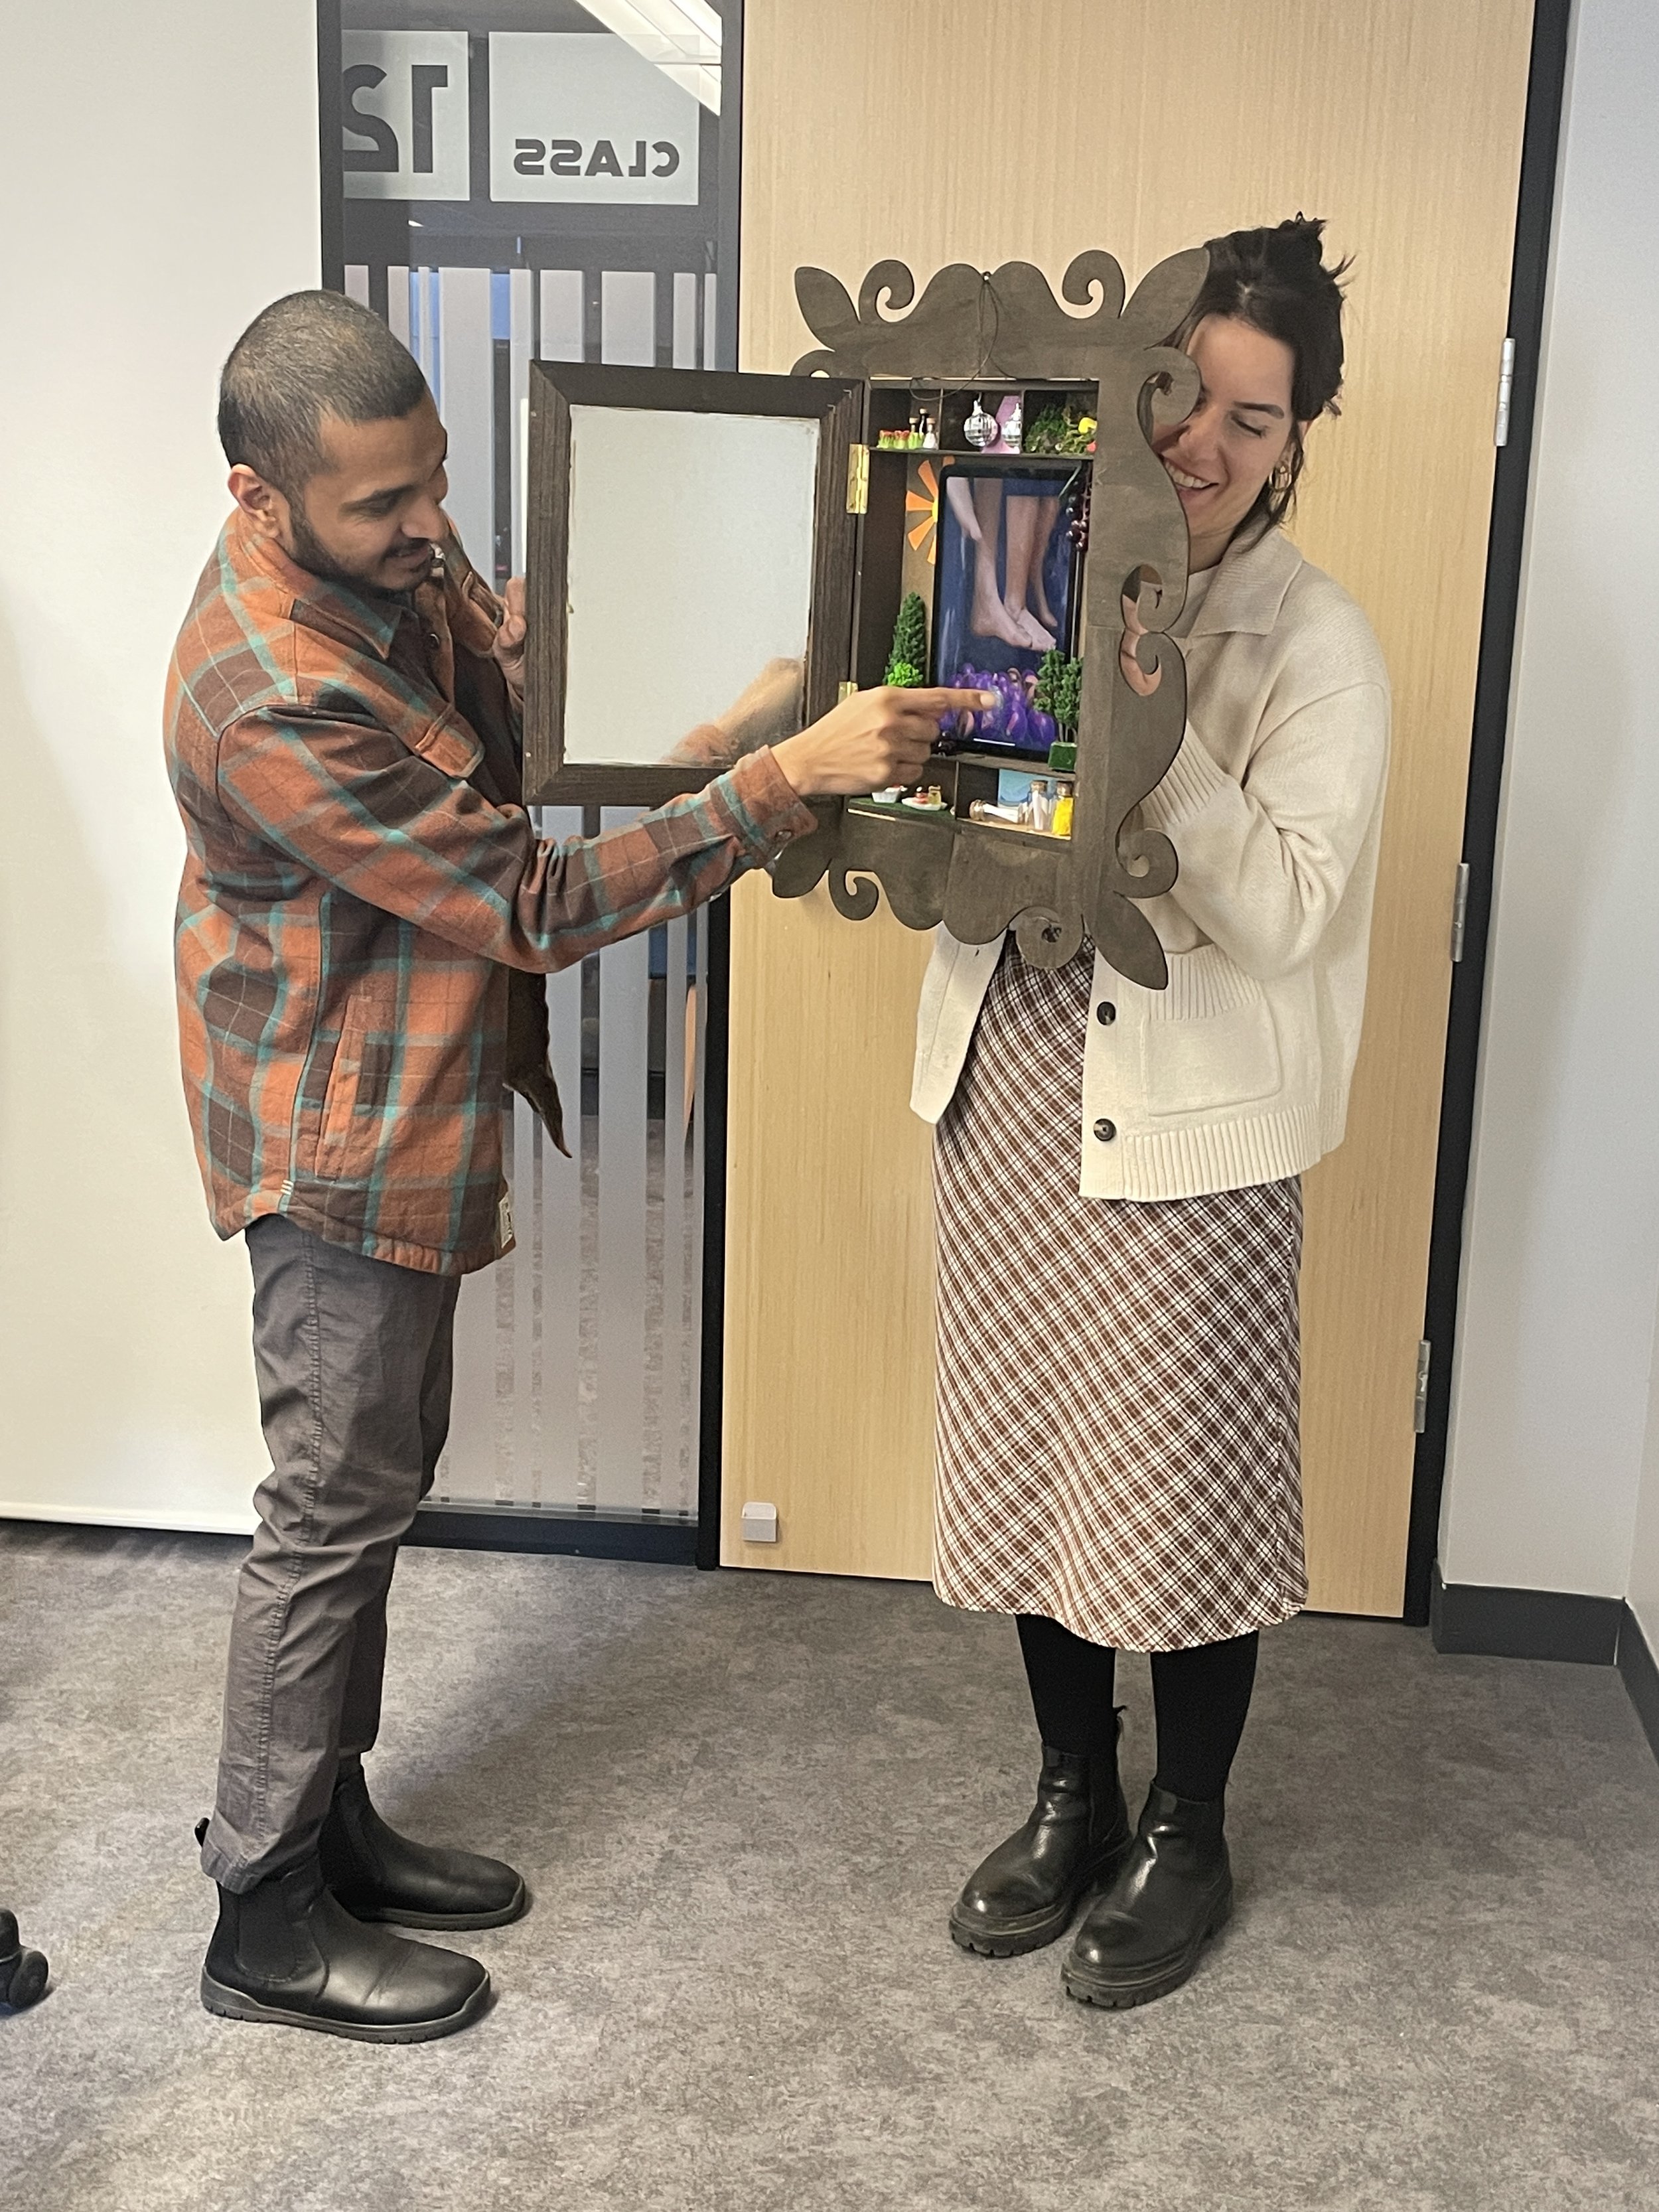
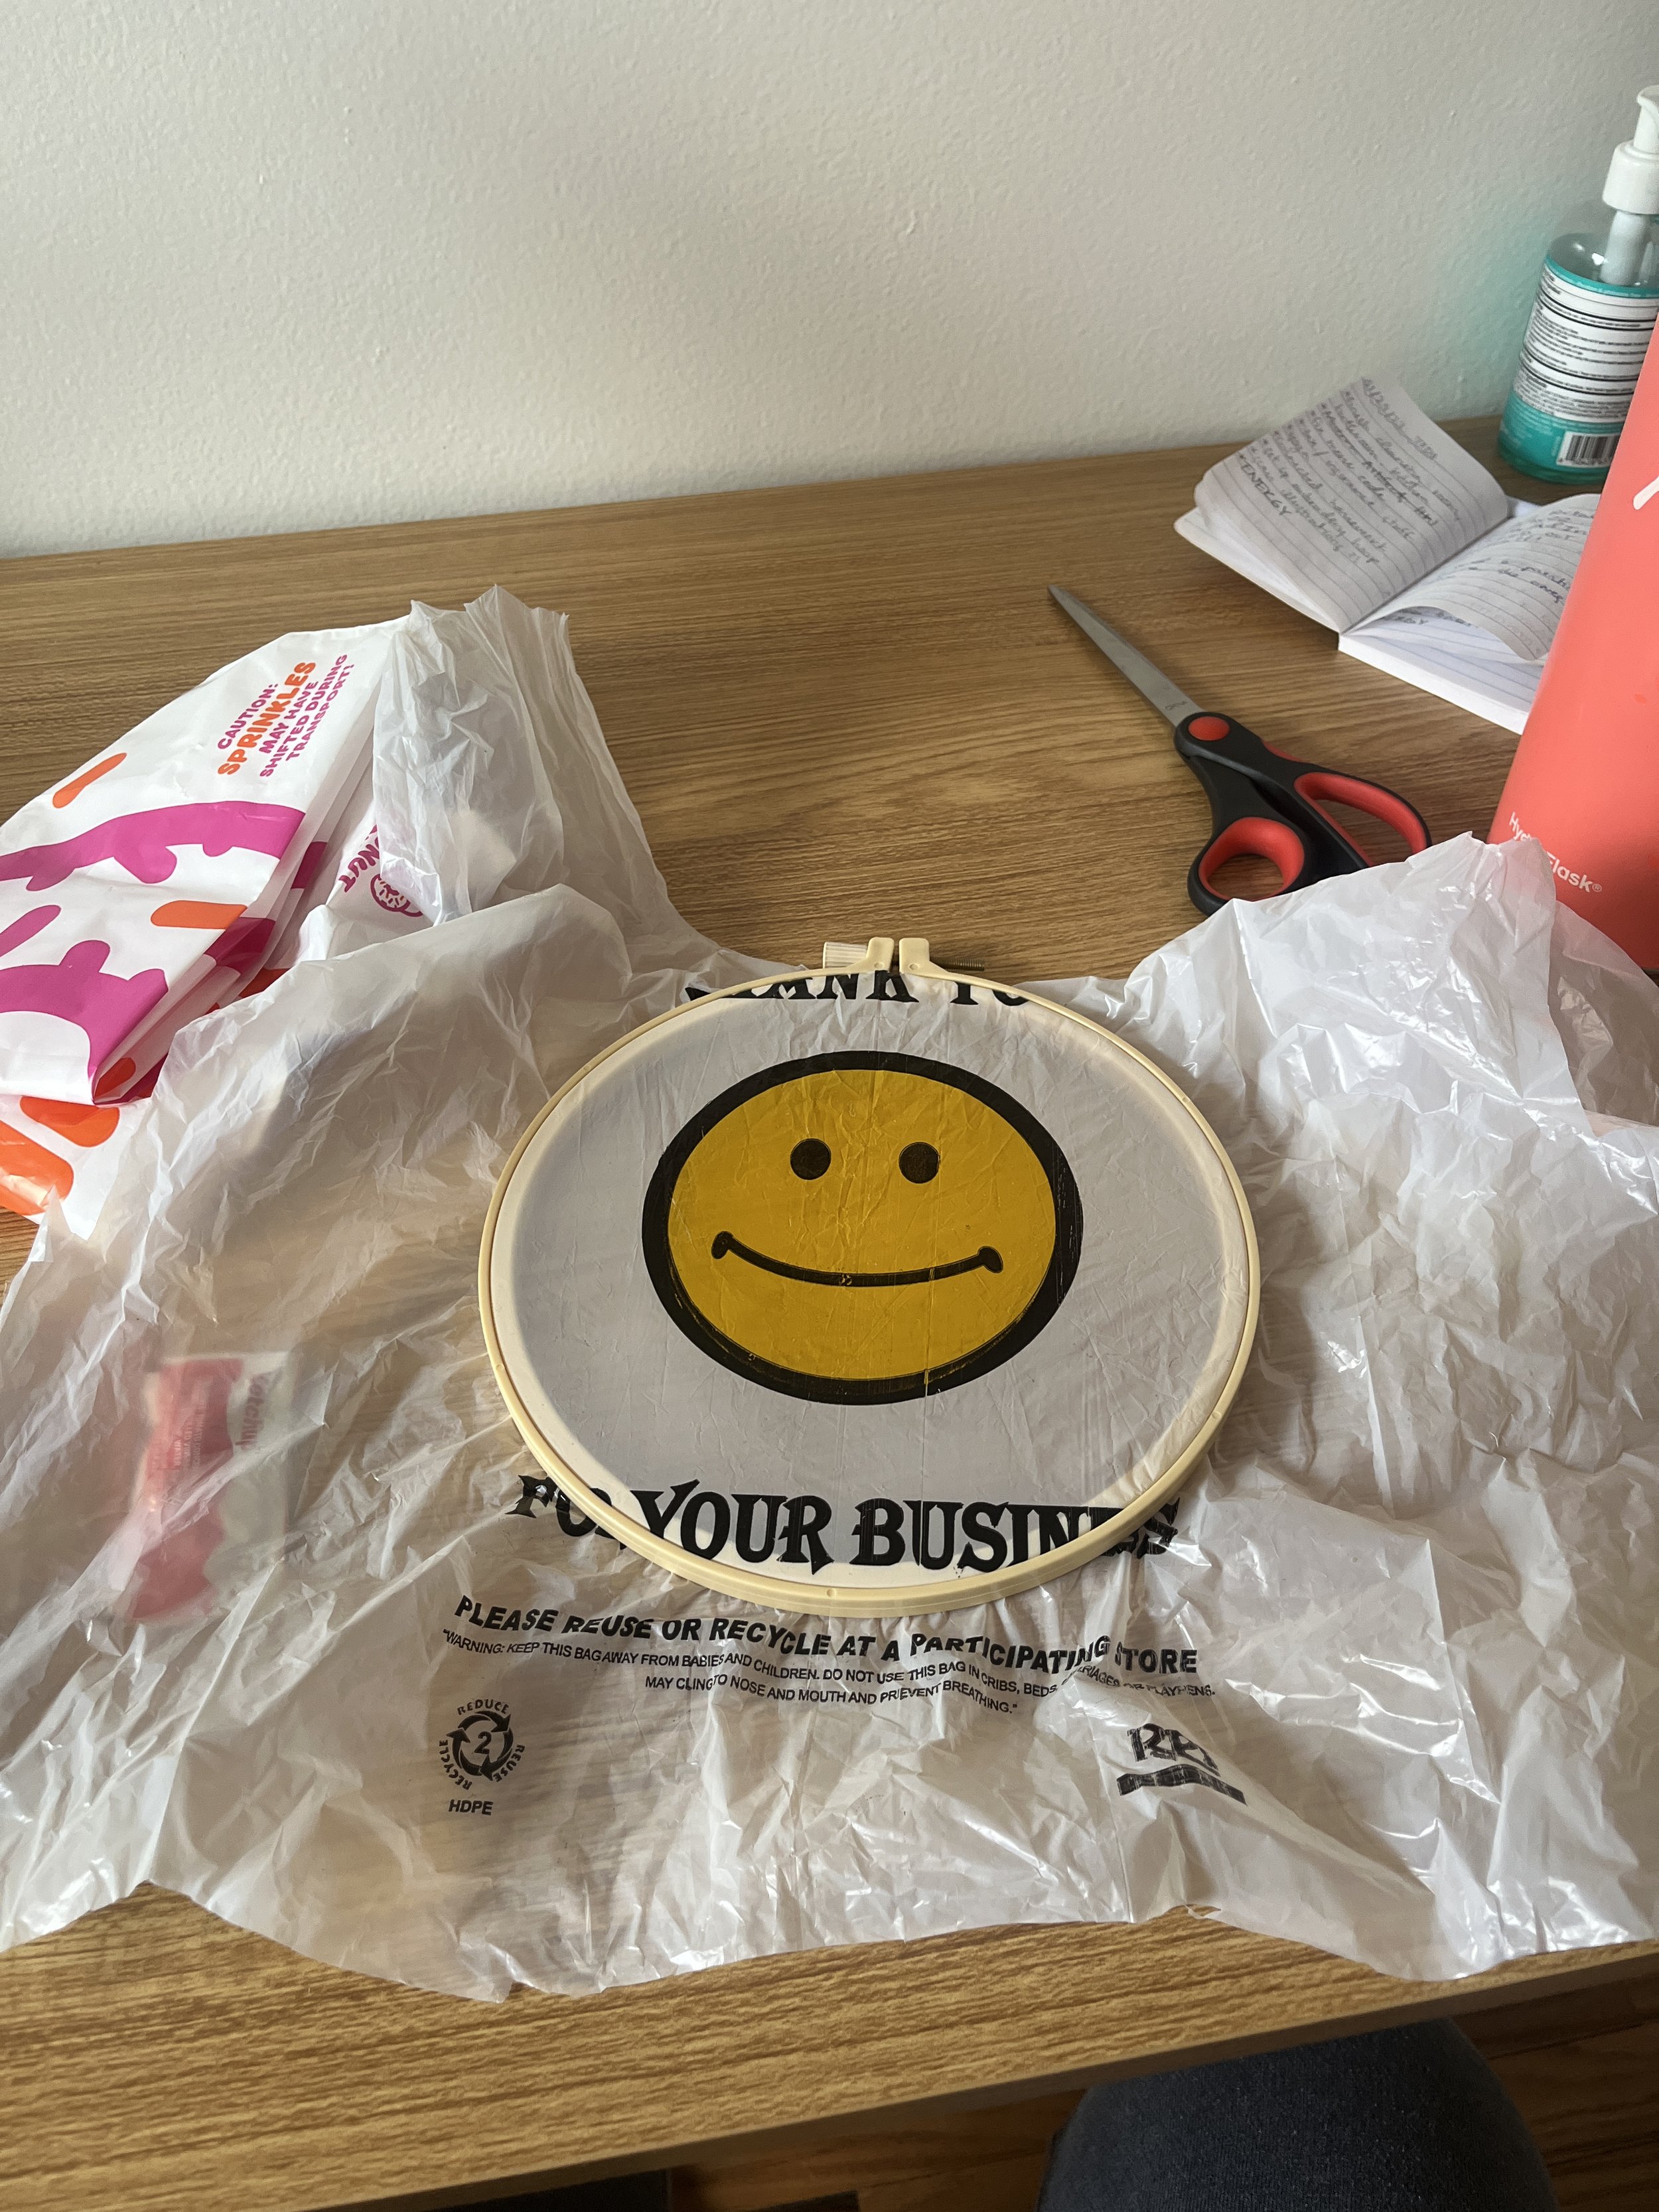
Just holding onto these everyday materials I thought of some crazy experiments I couldn’t get out of my mind. First, can you add some embroidery to a super cute plastic bag? Answer: no.

Well, I guess, I don’t think so. I started by cutting this bag so that it was just one side with the graphics on it. You can see that the holes made by the needle didn’t hold their shape and if I try to pull the stitch tight it rips holes in the bag. I kinda want to try this again but embroidering through both sides of the bag, maybe that will give the stitch a bit more integrity?

OK, this idea haunted my dreams: saucy quilt. These takeout sauce packets reminded me of my favorite toy from the first robotics class, the water wiggler. They also evoked parts of a quilt or crochet squares. It’s this reason I was bent on attaching them together with thread and needle, even though this could have ended up being a big mess if I poked a hole through the sauce part of the packet.

[ITP: Modern Artifacts] Brooklyn Public Art Field Trip

On Monday Ali took the class on a walking tour of downtown Brooklyn to see some public art. Here’s what we saw:

Fred Wilson, Mind Forged Manacles/Manacle Forged Minds

Statues missing from inside cage

???

Hank Willis Thomas, Unity

Lisa Schemer, Beacon

Someone spotted me…

Sherwin Banfield, Sky’s the Limit in the County of Kings

Solar-powered music maker!

Biggie mural in Fort Greene

Spike Lee’s headquarters in Fort Greene

Spike Lee’s headquarters in Fort Greene

Bradley McCallum, Witnessing

[ITP: Hypercinema] "Summer Wine" Cornell Box

Group member: Elif Ergin

See my previous blog post about this project here.

Ideation

Ok, so this project took a weird turn, but it could always be weirder because Elif and my original-original idea was a Zac Efron Cornell Box. So consider yourselves lucky! We kept on thinking about our previously decided theme “summer dream” but no concrete ideas came to mind for what we wanted in our Unity project. What started as a joke ultimately became our project; we were inspired by the song “Summer Wine” and now we are giving our feet pics away for free!

We had done a bunch of research on existing Cornell boxes and it was interesting to see that a lot of different artists made them. We were really inspired by the physical boxes, all their compartments, layered feel, and the use of found objects, so we tried to incorporate some of these aspects in our own piece.

Fabrication

1. Find the perfect box at Michaels.

2. Laser cut embellishments and shelves from 1/8” plywood.

3. Use the orbit sander to remove the burns from the laser cutter.

4. Check that the shelves and the screen (iPad) fit in the box.

8. Reassemble box lid. Install shelves using wood glue. Apply mirrored sheet to glass pane.

11. Assemble!

5. Remove excess saw dust and prep the area for staining all the wood.

9. Collect all kinds of diorama materials.

6. Stain the frame embellishments.

7. Remove the box lid and stain the wood.

10. Collect all kinds of miniature thingies.

Unity

For the digital Cornell box, I was thinking about the summer wine concept and remembered this coke commercial that I always see when going to the movies. It kind of lead the design of the story of our box.

Collect Assets

Neither Elif nor I had much experience working in Unity before this so we started by rounding up assets for our box and hoping it would inspire the final aesthetic. We searched through the Unity Asset Store for free 3D assets that reminded us of summer. It was also important for us to be a part of our Cornell box so we filmed our own eyes and stomping feet (to make the wine). Elif used the magic of Runway to remove the background from our videos.

Create Basic Box

We used the box asset supplied to us in class and made it the same aspect ratio as the iPad. I found some stock sky footage and used that as our box’s wall paper. Then I went on to make all our different grapes.

I made a standard purple and see-through grape material and parented the spheres to the objects floating inside them so that they would always move together. I also found a disco ball material and Elif helped me wrap our eye videos around other spheres as well.

We also got our feet videos to play on planes in front of our box. I really like the surreal style of the 2D feet existing in a 3D world, I think it’s kind of funny!

Scripting

Now, on to making things move! I started with the “InstantiationKeyRandomLocation” script we received in class. I changed it so that a grape would spawn on mouse click instead of pressing the space bar. We were hoping the mouse click would translate to an iPad tap once built for iOS and, spoiler alert, it does!

So after getting one grape to spawn I wanted to update the script to randomly choose one of the grapes we created. I found a really helpful video of how to create an array of GameObjects. On click, the script chooses a random location in this array and spawns that type of grape.

After this, we ran into the issue that spawning too many grapes at once will overload computer and crash Unity. I used a destroy timer to delete grapes a given number of seconds after spawning.

I also thought hard about the foot-grape interaction. Obviously, the ideal solution would be to make the grapes look stomped on over time and some liquid wine appear but this was a stretch for us because of our limited knowledge of working in Unity. I thought the easiest solution would be to make the grapes slowly shrink and disappear into nothing so I wrote a coroutine which would scale the spawned grapes in parallel to running the main loop.

Here are the two functions I wrote to get the interactions working for our box:

Finishing touches

We were able to get some office hours with Gabe and he suggested we add some camera effects in post. We learned in class that we had to download the post processing package from the Unity package manager. We added the chromatic aberration effect which added a blurry dreaminess around the edge of the camera and the ambient occlusion effect which darkened the shadows of the box and added some depth.

Lastly we considered the sound of the piece. We both really liked how each filmed video element played its own sounds and how the sounds layered and multiplied when more grapes were generated. In the background we’re just chatting and talking ourselves through the filming process but there are sound clips where we are discussing summer memories. I decided to add a background squishing sound to evoke the grapes being pressed into wine.

Building for iOS

So that we could display our Unity project on an iPad I followed this tutorial to build our project for iOS. The first step is to install iOS build support as shown in the screen capture below.

Then I needed to download Xcode and accept the Apple developer agreement. This part took the longest.

Once your “File” > “Build Settings” looks like this you’re ready to build for iOS with Xcode. Save the build in your project folder.

Then, I opened my newly built Xcode project by double-clicking the file with the “.xcodeproj” extension. Once in Xcode, I connected my device (in this case, my iPad) to my computer and selected it in the top drop down. I updated the app name, version number, and build but most importantly I chose “Personal Team” on the “Signing & Capabilities” tab. This basically means that I’m making this app for personal use and don’t intend to submit it to the Apple App Store.

All that’s left is to press the play button in the upper left of the window and the Unity app built to my iPad.

When I first tried to use my Unity app I got an “Untrusted Developer” pop up. I was able to trust myself as a developer by going into my iPad’s general settings. I also had this super weird bug in the first couple builds of this project that our feet seemed to be sensored (they weren’t showing up in our app). I had to change the video’s codec in Unity and keep the alpha values to have the iOS build match what I was seeing while developing in Unity on my computer.

Final Product

Conclusion

There are a lot of things to consider when making a multi-media installation like this. We tried to keep the design as self-contained as possible but there are scenarios, like when the iPad needs to be charged, we didn’t think of. Also, the iPad Unity project crashes way quicker than the project on the computer when too many grapes are spawned at once. We could reconsider how viewers interact with our box and how we “make wine” in Unity.

On the fabrication side we had metal brackets for installing the frame on our physical box but didn’t end up all that together yet because we realized we wouldn’t be able to stand the box upright anymore. If this was installed in an exhibit somewhere it would definitely need to be hung on the wall at eye level (with the frame attached).

I kind of really love this weird project we thought up and built! And I also really enjoyed working with Elif! I learned so much about making things in Unity and some more about making things in real life.

Resources

https://www.pexels.com/video/blue-sky-video-855005/

https://www.istockphoto.com/photos/mirror-ball-texture

https://www.youtube.com/watch?v=KG2aq_CY7pU

https://www.youtube.com/watch?v=KlWPedIvwuw

https://www.youtube.com/watch?v=rdvyelwSnLM

https://answers.unity.com/questions/1220094/spawn-an-object-and-destroy-it.html

https://answers.unity.com/questions/1074165/how-to-increase-and-decrease-object-scale-over-tim.html

https://www.youtube.com/watch?v=Z-gija1aAhw

https://stackoverflow.com/questions/65978459/unityengine-videoplayer-not-rendering-video-on-ios-devices

[ITP: Understanding Networks] Semester Reflection

Sadly, Tom’s “Understanding Networks” class is coming to a close. I looked over my notes from the semester and here are my key takeaways:

  • In tech vulnerability is a weakness but in art vulnerability is valuable

  • The internet is PUBLIC space

    • I’m anti- smart-ifying the unnecessary

On the technical side:

  • The client makes the request, the server responds to the request

  • Open System Interconnections model (layers of the internet?!)

Application HTTP
Presentation Unicode
Session ICP
Transport TCP / UDP
Network IP
Data Link WiFi / GSM
Physical WiFi / GSM

Left over questions and concerns:

  • What projects can I build with what I learned in class? I want to learn to collect my own MQTT data and do something with it!

  • What are the implications of networks as large as the internet? Can it be accessible to all? And if not, to whom?

  • What data gets prioritized on the internet? What information can we be certain is true? What happens to our data?

  • What is digital colonialism and can net neutrality actually be achieved?

  • If we are unhappy with how the internet currently works, who has the power to change it?

  • What takes more energy: networks based on cables or networks sustained by satellites? Which impacts the world more negatively?

[ITP: Understanding Networks] Definitions

Evil bit - a fictional IPv4 packet header field proposed to a Request for Comments (RFC) publication for April Fool’s in 2003. The RFC recommended that the last unused bit, the “Reserved bit” in the IPv4 packet header be used to indicate whether a packet had been sent with malicious intent, thus simplifying internet security.

The RFC states that benign packets will have this bit set to 0; those that are used for an attack will have the bit set to 1. Firewalls must drop all inbound packets that have the evil bit set and packets with the evil bit off must not be dropped. The RFC also suggests how to set the evil bit in different scenarios:

  • Attack applications may use a suitable API to request that the bit be set.

  • Packet header fragments that are dangerous must have the evil bit set.

    • If a packet with the evil bit set is fragmented by a router and the fragments themselves are not dangerous, the evil bit can be cleared in the fragments but reset in the reassembled packet.

  • Applications that hand-craft their own packets that are part of an attack must set the evil bit.

  • Hosts inside the firewall must not set the evil bit on any packets. (RFC 3514)

Packet header - Data sent over computer networks, such as the internet, is divided into packets. A packet header is a “label” which provides information about the packet’s contents, origin, and destination. Network packets include a header so that the device that receives them knows where the packets come from, what they are for, and how to process them.

Packets actually have more than one header and each header is used in a different part of the networking process. Packet headers are attached by certain types of networking protocols. At a minimum, most packets that traverse the internet will include a Transmission Control Protocol (TCP) header and an Internet Protocol (IP) header.

For example, the IPv4 packet header consists of 20 bytes of data that are divided into the following fields:

Checksum - a small-sized block of data derived from another block of digital data for the purpose of detecting errors that may have been introduced during its transmission or storage. Checksums are often used to verify data integrity but are not relied upon to verify data authenticity. A good checksum algorithm usually outputs a significantly different value for even small changes made to the input. If the computed checksum for the current data input matches a stored value of a previously computed checksum, there is a very high probability that the data has not been accidentally altered or corrupted.

An inconsistent checksum number can be caused by an interruption in the network connection, storage or space issues, a corrupted disk or file, or a third party interfering with data transfer.

Programmers can use cryptographic hash functions like SHA-0, SHA-1, SHA-2, and MD5 to generate checksum values. Common protocols used to determine checksum numbers are TCP and UDP. As an example, the UDP checksum algorithm works like this:

  1. Divides the data into 16-bit chunks

  2. Add the chunks together

  3. Any carry that is generated is added back to the sum

  4. Perform the 1’s complement of the sum

  5. Put that value in the checksum field of the UDP segement

Resources

https://en.wikipedia.org/wiki/Evil_bit

https://www.cloudflare.com/learning/network-layer/what-is-a-packet/

https://erg.abdn.ac.uk/users/gorry/course/inet-pages/ip-packet.html

https://en.wikipedia.org/wiki/Checksum

https://www.techtarget.com/searchsecurity/definition/checksum

https://www.educative.io/answers/how-does-checksum-work

[ITP: Hypercinema] Cornell Box Planning

Group member: Elif Ergin

Cornell Box Inspiration

Joseph Cornell was an American artist who created little dioramas in shallow wooden boxes using found objects: trinkets, pages from books, birds, etc. They’re surrealist in nature and are meant to keep little wonders.

Ideation

Elif and I met up two weeks ago to come up with an idea for our box. We were trying to brain storm to separate themes: summer and dreams/memory. We just scribbled down the imagery or concepts those ideas evoked. We also both decided having a fabricated part to our project was important to us. Also, the Cornell Boxes we looked at for reference have a kind of dark, spooky, whimsical feel to them, so I think were looking to achieve something like that as well. The wonder!

We refined our ideas and landed on a “Endless Summer” Cornell Box. This was a really free-from collaborative sketch. We want our Cornell Box to live within a mirrored cabinet (not sure if it’s physical or virtual yet). The viewer will be able to navigate through different summer scenes/imagery reflected in a big eye ball. At the end of the animations there will be a ferris wheel (iris) and it will hopefully spin in reverse and start at the beginning of the animation. I’m not really sure if we can make all this work because I don’t have much experience with Unity.

Our next step is to start collecting assets. We will look on the Unity store but we’d also like to include our own personal images and maybe find a way to include real-life found objects in our box composition.

Other

I feel like I’ve got a much better grip on working with Unity after completing the Roll A Ball tutorial. I did not expect to be coding so much to get this game working! I definitely learned a lot, but I don’t think our Cornell Box will be interactive in the way this game is.

I also played Gone Home over break and finished it with my boyfriend. I am not a gamer by any means, so it took me a while to get through. I finished/won the game, but only got 1/10 achievements… can you believe that?! How does that work haha

[ITP: Applications] NYC Experience - Photodom

A couple weeks ago, in my Applications class, I got an invitation to experience Photodom which is a black owned camera store in Bed-Stuy. They also develop film and have a photo studio space they rent out. They simply do it all! I’ve actually been following Photodom on instagram for a couple of years and being new to NYC it was on my list to go visit, so thanks so much to my invite-er! It’s a truly beautiful invitation and I got to go do something I’ve been itching to do for a while.

I wasn’t organized enough to manage to go to Bed-Stuy after school during the week, so I took a nice long subway ride from the East Village on a Sunday.

It’s a little tucked away, but I eventually found the right door. There’s instructions on the door to buzz #310. The store itself is on the third floor and down a winding hallway. It seemed like there were a lot of other studios or creative spaces in the building, so good vibes all around!

I ended up grabbing a couple rolls of color film for my camera. Color film has been really hard to get recently and is super expensive right now. I’ve got a couple rolls stashed away now and can’t wait to have some time to get out, explore the city, and take some pictures. I’m sure I’ll be visiting Photodom again for my future camera needs!

[ITP: Understanding Networks] Packet Analysis

Packet analysis

I downloaded Wireshark and captured traffic for 5 seconds with my computer as it is (running multiple Chrome browsers, iMessage, Spotify, terminal, and Wireshark of course). Packets were captured using the following protocols: UDP, TLSv1.2, TCP, DNS, and TLSv1.3.

I tried to find out where some packets were coming from by searching repeated IP addresses using ipinfo.io.

One source address that I think is responsible for the most packet data is 192.168.1.8. Wireshark shows port 443 as source which is https communication. Ipinfo shows this source is a bogon which is a bogus IP address that falls into a range of addresses that hasn’t been assigned to an entity by the IANA.

Amazon packet traffic. I guess that makes sense, Jeff Bezos is always watching…

This must be google chrome, right?

Now I’m going to repeat this process but close ALL MY RUNNING PROGRAMS😨(except Wireshark). The packet traffic was much slower this time around so I captured data for about a minute.

This time I saw additional protocols I didn’t see last time: ARP and TLSv1.2. It also seems like an apple device is communicating with the network… it’s 192.168.1.8! Not really sure what that means.

Again, I made note of some repeated IP addresses and they were both associated with Amazon as well.

Testing my browser

I used coveryourtracks.eff.org to see how trackers view my browser. This info can be gathered from web headers included in my device’s network requests or using JavaScript code. Here’s just some info my browser is giving away:

  • Time zone

  • Screen size and color depth

  • System fonts

  • Whether cookies are enabled

  • Language

  • What type of computer I’m using

  • The number of CPU cores of my machine

  • The amount of memory of my machine

At least my browsers fingerprint appears to be unique, whatever that means! It conveys 17.53 bits of identifying information, but I’m not sure how you can identify only a portion of a bit.

Testing my websites

Project Blacklight is a Real-Time Website Privacy Inspector. It can reveal the specific user-tracking technologies on a site (Blacklight). Let’s start by trying it out with the site I’ve been working on for this class: priyankais.online.

This is a relief, right? Because I’ve been developing this site from the ground up over the course of this class and we didn’t put any ad trackers in place!

Now let’s try this site, priyankamakin.com, which is hosted by Squarespace.

Hmm… not really sure why my site is sending data to Adobe. At first I remembered that I’ve probably linked to different Adobe products in my blog posts but I realized that is not the same as what Blacklight is looking for. I’m personally not using the Audience Manager or Advertising Cloud products above but maybe Squarespace is?

Let’s see if we can find something a little bit more interesting! I don’t really find myself browsing the internet for leisure anymore, I’m usually doing homework or streaming tv. I know my dad’s doom scrolling on npr a lot, so is a news source mining its anxious readers for their data? The answer is: hell yES.

Among the long list of companies Blacklight found npr.org interacted with, there are some I’ve never heard of and their names put a weird feeling in my stomach: comScore, IPONWEB, Lotame, or Neustar. Who are these companies and why do they care about me (or my dad)?

Resources

https://coveryourtracks.eff.org/

https://themarkup.org/series/blacklight

https://www.youtube.com/watch?v=OU-A2EmVrKQ&t=13s

[ITP: Understanding Networks] MQTT Client

I feel like I’m a week behind in this class because I’ve had 1 credit weekend classes over the last two weekends. Admittedly, I also ordered my sensor a bit too late, so I’ll try to send a few more days worth of data collection over Thanksgiving when I’m home in AZ.

What is MQTT?

MQTT is the standard for IoT messaging. It is designed as an extremely lightweight publish/subscribe transport that is ideal for connecting remote devices with a small code footprint and minimal network bandwidth. (https://mqtt.org/)

Get RGB Color Sensor Working with Arduino

I wanted to harness my inner Tom Igoe, so I ordered the TCS34725 RGB Sensor from Adafruit. I soldered on the included headers so that I could attach it to my bread board and connected it to my Arduino Nano 33 IoT using some jumper wires. In the Arduino IDE, I installed the Adafruit TCS34725 Arduino library and uploaded the “tcs34725.ino” example sketch.

Send Sensor Data over MQTT

Now that I’ve got my sensor working consistently, I can try to connect to the network. I started with the “MqttClientSender.ino” example. To be sure I’m sending my data to the correct place, I made the broker “test.mosquitto.org”, the topic “undnet/makin-stuff”, and the client “makinClient”.

To get my sensor data to send, I made sure to include the Adafruit library, create an instance of the Adafruit_TCS34725 object, and call it’s begin() function in setup(). In loop() I use the library functions to get lux and color temperature data from the sensor. I had to format the data in JSON to send over the MQTT client.

One cool tip I stole from Suraj is using the built in LED of the Arduino to indicate whether I’m still connected to the broker or not. Thanks Suraj!

Now that things are working I can check that it’s logging data using MQTT Explorer. Haha, there I am!

I let the sketch run for some time and periodically checked in on the debug statements. After about an hour or so I saw these error messages in the IDE and my built in LED turned off indicating that I lost connection to the broker.

I was also unable to connect to my land lady’s network at home. I figured I would try again when I got to my parents house for fall break and I wasn’t able to connect to their network as well which was super concerning. I tried out the “ScanNetworks” sketch from the WiFiNINA library and saw that the signal strength of my parents network was very poor (~-80dBm). I had glued down my antenna too good! I carefully removed some hot glue with a razor blade and more networks became available to my Arduino. It seems really straightforward, but it was also really satisfying to see the signal strength go up as I brought my Arduino closer to the router. Fingers crossed, I think removing the glue fixed my connectivity issues!

Setting up my Microservice

So I’m starting with Tom’s “MqttNodeClientFileWriter” example. I edited the client.js to fit my MQTT client by updating the “clientId” and “myTopic” variables to match my Arduino sketch. I also made sure the broker was the same, test.mosquitto.org. I also copied the package.json, package-lock.json, and an empty data.txt file to my folder because I figured it would be important. I pushed all this to github so that I could pull on my Digital Ocean host.

I cloned my repo on my Digital Ocean host, but I guess the linux terminal does not like spaces in names! Had to put an underscore in “Understanding_Networks” part of my repository’s name.

I made a copy of the folder on the home directory and installed dependencies with “npm install package.json”.

When I run the script in its directory with “node client.js” my Arduino seems to disconnect from the broker. It reconnects when I quit running my script. Super weird!

For now, I’m putting this exploration on pause. I thought it would be interesting to access the MQTT sensor data myself and do something with it. It’s not required for the assignment, so I’ll revisit this once I complete all the other assignments!

(Semi) Permanent Setup

Helpful Terminal Commands

“cd ../” = go up a directory

“sudo git pull” = to pull the latest from a github repository

“sudo rm -r [directory]” = remove a folder and all its contents

“cp -R [path to directory that’s being copied] [path to where you want your directory copied to]” = copy + paste

References

https://learn.adafruit.com/adafruit-color-sensors/overview

https://docs.arduino.cc/hardware/nano-33-iot

https://tigoe.github.io/mqtt-examples/

https://github.com/tigoe/mqtt-examples

https://github.com/makin-stuff/ITP/tree/main/Understanding_Networks/MQTT

https://www.screenbeam.com/wifihelp/wifibooster/wi-fi-signal-strength-what-is-a-good-signal/

[ITP: Understanding Networks] Cute Game Controller Update

This is a continuation of my previous blog post. In this article I will show you how I finished up development for my game controller.

I need my Arduino for the next assignment regarding exploring MQTT communication so I’ve got to wrap up my networked controller! I was getting pretty unreliable readings from the encoders in my game controller and I also wasn’t exactly sure if I could see it working in the in-class game play demo’s, so here I am testing it out.

Update code with new rotary encoder library

Tom Igoe let me know that the encoder library I was using doesn’t work really well with the Arduino Nano 33 IoT. I re-wrote my code using this library. The updated code is v2.0 in this repo.

Get Ball Drop Game working on my computer

When getting the game up and running I referenced Tom’s documentation quite frequently. I downloaded his repo and ran the game locally by running the Mac OS application in the BallDropServer folder. To connect to the game you have to be sure that the Arduino is connected to the same network as the machine running the game by updating the “arduino_secrets.h” file. In my case, that’s the experimental network “sandbox370” here at ITP. Also be sure to update the “server” variable in the Arduino code to match the IP address of the Ball Drop Game Server as shown below. And voila! The game controller is networked!

Final Product

Issues

I’m really happy that I got my controller up and running consistently. The button connection was unreliable so I had to glue it into place even though I wanted to have the option to detach the top of the lid from the circuit.

Also, sometimes while playing the game the communication lags so the paddle doesn’t move all that smoothly. Before realizing this I thought there might still be something wrong with my controller. And, I think the game play doesn’t work with long continuous movements that well. It seems like the paddle position is only updated once the server has stopped reading messages or something. But short quick movements (turns of the encoders) seems to make the paddle movement respond really well.

Resources

https://itp.nyu.edu/physcomp/labs/lab-using-a-rotary-encoder/

https://tigoe.github.io/BallDropGame/

[ITP: Lo-Fi/High Impact] Recap

Day 1

On the first day we learned how use the Cameo cutters (paper/vinyl). We downloaded different shaped boxes from templatemaker.nl and imported the .dxf files into Silhouette Studio to cut on the Cameo. I made a coffin and a dodecahedron. This was harder than it looks like, I definitely messed up cutting the coffin twice before I finally got it!

Day 2

On the second day we learned how to fold three different types of books from 8.5 x 11 paper. We also had a tutorial on wheat pasting which we did with wall paper adhesive, but I guess you can do with flower as well.

We then had some free work time to make whatever we wanted from what we learned about in class. I wanted to make a simple stencil. This wasn’t super successful because the Cameo blade didn’t cut all the way through my paper.

Silhouette Studio

I had some scanned in film photos from my last couple of weeks in Boulder. I printed those out in black and white and glued together a quick collage and added some stickers. I actually really appreciated this super sped up timeline to create something. Time hasn’t really been my friend with my recent ITP projects. It felt really good to just be free, not focused on a final outcome, and just create something organically. And I also kind of like what I came up with!

[ITP: Textile Interfaces] Digital Swatchbook 2

This blog post is a continuation of my digital swatchbook. Click here to see my first post.

Planning

Button Switch

Materials

  • Green and purple felt

  • Conductive thread

  • Conductive fabric

  • Laser cut acrylic buttons

  • LED

  • Embroidery thread

  • Coin cell battery

  • Alligator clips

Process

Laser cut some buttons out of fun acrylic.

Prep LED by creating loops out of the legs. Note the anode/cathode orientation.

Here are the two completed pieces of this button.

Once I had all the pieces are prepped, I started with sewing the blue button onto the first piece of felt. The trick is that I ironed a piece of conductive fabric under the button. On the other piece of felt, I cut and embroidered a button hole and sewed in the LED. Again, I was sure to use two separate pieces of conductive thread on either end of the LED. And then I just spruced up this piece by adding another faux button and some more embroidery.

Interaction

Button the blue heart into the purple piece of felt and watch the LED illuminate.

Tips and Troubles

I could’ve mentioned this in a previous swatch, but it can get kind of hard to embroider through two pieces of material, like the felt with the conductive fabric on top. Also, I didn’t know how to embroider a button hole! It turned out disgusting!

Possible Futures

This was one of my favorite swatches. It felt super exciting to LASER CUT MY OWN BUTTONS?! Like that was the last thing I thought I would be doing on the laser cutter. Now I can make all the custom buttons my future projects will need.

Potentiometer

Materials

  • Blue felt

  • Conductive thread

  • Conductive fabric

  • Acrylic paint

  • Beads

  • Shrinkydink paper

  • Digital multimeter

Process

First I cut the felt and conductive fabric and ironed on the tabs and petals. I also painted the flower and double checked the petals would still be conductive with my DMM. I sewed the circuit around the edge of the felt and used a separate piece of conductive thread down the middle. I threaded some beads on the thread coming out of the middle and I made a bee bead using some shinky dink paper. I glued some more conductive fabric onto the back of the bee.

Interaction

As the bee travels around the petals of the flower the amount of metal or the length of the circuit increases the resistance of the sensor increases as well. It could also be used in a “tilt” scenario which might move the bee around the flower as well.

Tips and Troubles

I found that this tilt potentiometer was inconsistent at best. I did hook up my resistance meter to the leads of the sensor and got inconclusive readings. Also, the bee definitely needs to be pressed down onto the petals to get good contact, so I’m not really sure what I made would really work in a tilt situation…

Possible Futures

I don’t want to think about it, I couldn’t get mine to work lol

Tilt Sensor

Materials

  • Blue felt

  • Conductive thread

  • Conductive fabric

  • 3 LEDs

  • Embroidery thread

  • Beads

  • Yellow yarn

  • Coin cell battery

  • Alligator clips

Process

Iron on conductive fabric and sew circuit with conductive thread. Don’t forget to add the LEDs and be sure that they are all in the same orientation.

Create a pom pom with some yarn and conductive thread. I followed this tutorial.

Finish up sewing the circuit and attach the conductive pom pom. Add some embroidery fluff for FUN!

Interaction

Move the pom pom from one sun spot to the next and watch the flowers “bloom”.

Tips and Troubles

Like with the potentiometer, the pom pom connection doesn’t really work unless there’s some pressure applied to it. Also making a pom pom wasn’t as easy as it looked to me at first!

Possible Futures

This is my favorite swatch I think! Also not really sure if this sensor works that well in a tilt context because textile/fabric kind of sticks to itself. Lots of friction. I loved making these embroidered swatches.

[ITP: Textile Interfaces] Digital Swatchbook 1

Planning

Hand Sewn Circuit

Materials

  • Blue felt

  • Conductive thread

  • Embroidery thread

  • LED

  • Coin cell battery

Process

Hand sew the circuit using conductive thread. Be sure to cut the conductive thread and start with a separate piece at either end of the LED. Sew circular pads for the coin cell battery.

Interaction

One line of thread connects to one side of the LED and the other line thread connects to the other side. The battery is placed on the circle and the corner is folded over to complete the circuit.

Tips and Troubles

The conductive thread is kind of tacky, it sticks to itself a lot. This makes it kind of hard to sew, it can get bunched up or not pull all the way through. Just need to keep a careful eye on the back of the fabric so that nothing gets tangled.

Possible Futures

Wow! This is the first circuit I’ve sewn and as an electrical engineer and an embroiderer this was totally exciting to me! I’m curious about sewing more complicated circuits.

Push Button

Materials

Process

First, paint the black neoprene with your design.

Cut the button shape three times out of the neoprene. Cut a large hole out of the middle neoprene layer. Cut a similar shape out of the conductive material. Make two of those with tabs.

Remove the heat and bond paper backing from the conductive material. Apply them to the fabric side of the neoprene using a hot iron.

Here are the completed layers. Glue them together using a glue gun.

Connect one tab to the GND pin of the Circuit Playground Express and the other to A5 (D2) using alligator clips. The code that I’m running in the video below can be found here.

Interaction

Press the squishy Elmo button and listen.

Tips and Troubles

One thing I ran into was the acrylic paint I bought didn’t really mesh well with the neoprene. The white cracked a bit and the red wasn’t opaque enough for the look that I wanted. Acrylic paint (or the ones I specifically bought) may have not been the right medium for coloring this material. Also, I did run into some sound issues while working in p5.js but it ended up being my browser window blocking the sound.

Possible Futures

I already am a lover of buttons! It can be so satisfying to press them: the feeling, the sound, the feedback. I think this is the first squishy button I’ve made. There is something kind of comforting about pressing a large button that squishes. It kind of reminds me of stuffed animals that you press and they make sound. I wonder what kind of complex controllers could be made out of only soft buttons.

Textile Force Sensor

Materials

  • White felt

  • Conductive fabric with heat and bond as backing

  • Velostat (pressure sensitive material)

  • Acrylic paint

  • Alligator clips

  • Adafruit Circuit Playground Express

Process

First, paint your image on the felt using acrylic paints. Remove the paper backing from the conductive fabric and iron it on to the felt. Make sure to leave some tabs that will stick out on opposite sides of your sensor. Use a glue gun to stick the velostat on top of the conductive fabric. Then, glue the other piece of felt with conductive fabric on top. The stack up should be like this: felt, conductive, velostat, conductive, felt. The code for this swatch can be found here.

Interaction

The velostat is a resistive material so the harder you press down on it the more freely electrons can flow and the less resistive the sensor becomes. As a user presses down on the sensor, the Circuit Playground reads the analog voltage across the conductive fabric and that value affects the playback rate of the “meow” track.

Tips and Troubles

I made this sensor right after the Elmo button so I didn’t run into many issues building this sensor.

Possible Futures

I really liked trying out painting on the felt. It gives the image a really fun almost hairy texture. I wonder what other outputs could possibly be controlled by these analog values.

Multiple Buttons

Materials

  • Black neoprene

  • Conductive fabric with heat and bond backing

  • Conductive thread

  • Embroidery thread

  • Adafruit Circuit Playground Express

  • Alligator clips

Process

Cut out neoprene shapes and cut three holes for the buttons on the middle layer. Cut conductive fabric and iron it into place on the inside of the top and bottom layers. With the conductive thread, I connected all the conductive shapes to be connected to ground. I used the conductive thread to make “tabs” on the sides of the alien head to attach the alligator clips to. I then added some fun embroidery and glued the three layers together. I used the Circuit Playground Express to light up some LEDs. The code for these buttons can be found here.

Interaction

The user can push any of the buttons located in the eyes with the end of an alligator clip. This in turn will light up different LEDs.

Tips and Troubles

The conductive thread tabs on the sides didn’t really work with the neoprene. I think when I clipped the edges it squished the neoprene layers and make a permanent connection so I had “press” the button with the alligator clip itself.

Also, embroidering all these fabrics really made me miss my embroidery hoop for sure!

Possible Futures

If I did this exact sensor again, I would try to make conductive fabric tabs like in the Elmo button and force sensor.

[ITP: Hypercinema] Characters in AR

Group members: Olive Yu and Manan Gandhi. You can see my previous blog post here.

From Adobe After Effects into Adobe Aero

Now that the animations were done we could think about getting them into Aero. To do that, you need to render the animation as a PNG image sequence with the RGB + alpha channels enabled so that it’s on a transparent background. This will export as a folder with a bunch of png images.

Those folders need to be zipped up and transferred into your phone’s Aero files folder. In Aero you can place your character on top of a surface and “play images” (the animation) on a given trigger. Below are some simple tests:

Below is the design tree I wanted cross walk man to follow in our AR app but it wouldn’t prove to so simple. The three animations are separate and there’s no way to change animations on a given trigger. So you have to populate the AR app with all three animations and show/hide them at the right trigger points which is kind of buggy.

With that in mind, this is what the state machine actually becomes. It’s much more complex!

Working within Aero on my iPhone proved to be kind of difficult. It was kind of difficult placing the animations in space and lining them up was never perfect. The stack up would look different in different environments/scales. Also when previewing the app, the walking animation would regularly bug out. Below is the sequence I ended up with for the app.

Finishing Touches

Lastly, I added in the sound that the NYC crosswalk signals make. I wanted to make the crosswalk man move in space as the walking animation was playing but I wasn’t quite sure if I should do that in After Effects or in Aero.

Field testing it was funny. I felt kinda awkward setting up Aero scenes in public, I didn’t want people thinking I was trying to film them or something. The table-top app didn’t translate super well to the real world or on the street.

table top app didn’t translate super well to real-world, on the street

aero didn’t want to grab onto the horixontal surface of the cross walk sign. doctored the video in after effects

Final Product

Here’s a link to the final app. I also created this little composition with my animations in Aero to depict a possible day in the life of the cross walk man. All the scenes were recorded in Aero but the it didn’t recognize the horizontal surface of the sign itself, so I did doctor that clip in After Effects. Ta da!

[ITP: Hypercinema] Character Design

Group members: Olive Yu and Manan Gandhi

Inspiration

For this project we wanted to bring the signs of New York City to life. I decided to choose the cross walk man as my character contribution. I first found a reference image online and drew it up in Adobe Illustrator, making sure each part of the character was on its own layer for animating later. I wouldn’t say drawing complex images in Illustrator is my strong suit, so this simple walking man was good for me to start with.

When designing a character you have to think about its personality, wants, needs, and how it interacts in the world. We knew this project would ultimately end in an augmented reality (AR) app/experience so I thought through the possible interactions. Obviously my cross walk man needed to walk. I also thought it would be kind of funny if these cross walk characters were easily angered or impatient because they direct traffic all day and New Yorkers don’t seem to listen to them. And to switch it up, cross walk man could show some happy emotions as well. So the animations were: walking, angry, and dancing.

Animating in Adobe After Effects

Ok, I really didn’t know ANYTHING about After Effects until having to do this project. The tutorials linked below were super helpful to teach me how to use the intimidating interface and how to rig and animate my character.

I’ve not done much animating in the past but I didn’t find the interface extremely intuitive. Basically the process involves updating parameters for specific items and creating keyframes on the time line. For the walking animation, I mostly moved and rotated the separate layers (body parts) of my character and recorded their position in time. I did some parenting so that specific body parts would move with others like real bodies do. I also applied the “easy ease” effect to the position parameters so that the body movement had an organic velocity.

Making sure that all the body part movements lined up and that the final animation looped took some time. This was the hardest sequence to animate.

The following animations were easier. The angry man movement came out of some messing around with the puppet position pin tool. You can set an anchor point and After Effects creates a mesh on the character’s image. I also didn’t need to record keyframes for this animation because there’s a handy function that can record your puppet pin movements in real-time!

I followed a tutorial to get the dancing man wiggle for the last animation. I used the “wave warp” effect. This dance routine was inspired by Squidward ofc.

Walking man

Dancing man

Angry man

Here are my completed animations. I will say it is really important to know the difference between a project, composition, and pre-composition in After Effects. I think I had an issue with animating my man in the pre-composition editor and was super confused about why my composition was messed up…

Side Quest

I didn’t really feel like this was the most compelling character I could’ve designed, so I kind of tasked myself with doing this same project with a character that was a bit more complex and would teach me a few more Illustrator skillz.

I am basically my mom’s personal story illustrator and I thought an AR app could be a really interesting piece of marketing material. She wrote this really cute short story about a sleepy, hungry, semi-corporate sloth and it was fun making up what this character would look like in his world. Like any good illustrator I did my research and pulled from people I know personally to design this character.

Here’s the final result! I really wanted to explore adding different textures and patterns digitally. I partially used my iPad to draw Mr. Sloth. I can be a graphic designer too! Now let’s see if I ever get around to animating him and putting him into AR…

[ITP: Understanding Networks] RESTful Microservices

Background

Web services or microservices are used to refer to parts of a website that are run by scripting tools or languages like node.js. The proxy_pass directive in Nginx lets you configure Nginx to expose your web application to the world while keeping privacy control. If a node script is listening on port 8080, for example, Nginx handles the HTTPS requests and passes them by proxy to your script on 8080. The server runs a Node.js application managed by PM2 and provide users with secure access to the application through an Nginx reverse proxy.

Build a “hello world” server

Start by downloading node.js and the npm package manager and install the build-essential package. This screen shot shows two terminals running at the same time. The first is running the “hello.js” node script. The second terminal window is connecting to the localhost at port 3000 using the “curl” function. It got a “Hello World!” statement in response from the node script.


Next, I installed PM2 which is a process manager for node.js applications. This manager makes it possible to daemonize applications so that they will run in the background as a service. Applications that are running under PM2 will be restarted automatically if the application crashes or is killed. Below is the output from PM2 which shows that my “hello.js” script is currently running.

I also created a systemd unit that runs pm2 for your user on boot which will run my “hello.js” script whenever my host is running.

Now that my application is running on localhost, I setup reverse proxy server so that it can be accessed from my site. Accessing my url via a web browser will send the request to my hello.js file listening on port 3000 at localhost.

Success! Working node.js application!

Setup location blocks

I can add additional location blocks to the same server block to provide access to other applications on the same server! By modifying the “sites-available” file for priyankais.online like this makes it so that I can access the hello.js script from priyankais.online/hello.

Getting Tom’s NodeExamples running

Start by “cd”-ing into the NodeExamples directory on the host and run a “sudo git pull” to update the local files. I’m going to be working with the getPost.js example in the “ExpressIntro” folder. Repeat the same steps from the section above:

1. Navigate into that directory and “sudo npm install package.json”

3. Set up the microservice to automatically run on boot using PM2

2. Run the server by typing “node getPost.js” which should return with “server is listening on port 8080”. In another terminal window type “curl http://localhost:8080” which prints out the html of the page I think.

4. Setup the reverse proxy server within Nginx

5. And here it is working! priyankais.online/data but I’m not exactly sure how it is supposed to work.

I found this helpful site that describes URL search parameters and so I figured out how to use the getPost script. In the search bar you can type something like this: “https://priyankais.online/data?name=prinki&age=69” and the html will update according to our script.

Create a custom microservice for my site

Now that I know how the getPost.js script works, I’m going to edit it to do something … interesting?! To me? Using Tuan’s code as a reference, I updated the script to take parameters from the URL and create a response.

Below is my updated getPost.js script. I’ve also uploaded it github. You can reach it at priyankais.online/initiation.

Questions / Definitions

Sometimes I need to restart my application using pm2, why is that? I thought we configured it to always be running…

Express.js = a library that simplifies the making of RESTful interfaces

Curl = a command line tool that developers use to transfer data to and from a server. At the most fundamental, cURL lets you talk to a server by specifying the location (in the form of a URL) and the data you want to send.

Resources

https://itp.nyu.edu/networks/setting-up-restful-web-services-with-nginx/

https://adamtheautomator.com/nginx-proxypass/

https://www.digitalocean.com/community/tutorials/how-to-set-up-a-node-js-application-for-production-on-ubuntu-20-04

https://developer.ibm.com/articles/what-is-curl-command/

https://flaviocopes.com/urlsearchparams/

https://github.com/tuantinghuang/und-net-F22/blob/main/simple-node/server.js

[ITP: Understanding Networks] Setting up node.js

I was able to secure Nginx using Let’s Encrypt last week. The process is documented in my last post.

Node.js

Node.js is a programming language that runs javascript on the command line. You can use node.js to write servers. Install it by typing “sudo apt install nodejs”.

I also installed git and the node examples from Professor Igoe’s github repo. I imagine they’ll be helpful in the future!

Field Trip Notes: 325 Hudson - Carrier Hotel

It has long been on my to-do list to add my notes from the field trip on 10/4 to my blog. Since this was a short assignment, I can organize some of my fractured thoughts here!

  • Design facilities for physical layer access

    • A space for new cables to come in

    • Real estate / rent for duct access

  • Interexchange provider

  • NETWORK neutrality, not internet neutrality

  • No construction needed to expand the network, room for expansion

  • The city owns the streets and what’s underneath them

  • POE = layer 0, holes to access the fibre

  • Carrier hotel = heart of the internet

  • Meet-me room = telecommunications companies can physically connect with each other and exchange data

    • Rack unit (RU) = 1.75 inches

    • Optical time-domain reflectometer (ODTR), light reader

    • Third party neutral arbiter

[ITP: Understanding Networks] Setting up Nginx Web Server

What is Nginx?

Nginx is a popular web server that hosts many high-traffic sites on the internet.

Process

Setting up the Nginx Server

I am following this tutorial from Digital Ocean to set up my Nginx server. First, I updated the “apt” packaging system and then “sudo apt install nginx”. For some reason I am still running into this error and am not sure why because I’ve definitely rebooted my Droplet.

Next, I needed to adjust the firewall and luckily Nginx registers itself with ufw (uncomplicated firewall) upon installation. The instructions for this assignment said to configure our server for both HTTP and HTTPS requests so that would mean opening up both port 80 and 443.

Looks like Nginx is running!

Here are some basic Nginx commands I tried out.

Setting up server blocks

Server blocks can be used to encapsulate configuration details and host more than one domain from a single server. The directory “/var/www/html” is enabled by default to serve documents.

I followed the tutorial to create the “your_domain” directory, configure permissions, and create a starter html page. I created a new default configuration file in the “/etc/nginx/sites-available/your_domain”.

Basic html page

Configuration file

If you look closely at my configuration file above, you can see I had a typo! This caused the Nginx test to fail. The right image below shows the output of running the test after I’ve fixed my configuration file typo.

Failed Nginx test

Successful Nginx test

Here’s where I’m lost. Obviously “http://your_domain” is not a domain that I own or exists, so this whole “Setting up server blocks” section didn’t really get me anywhere. Do I need to get a new domain for this class/assignment? I own the domain “priyankamakin.com”, could I make a new page on that and point it to my virtual host? How would I do that? How would the two things know of each other?

So, what I ended up doing was editing the “index.html” file in “/var/www/html” and this is what the browser looks like when I put my host’s IP address into the web address bar.

Cave and get a domain

I ended up getting the custom domain “priyankais.online” from NameCheap for a whopping $1.66/year. The first image shows how I pointed the domain registrar to DigitalOcean name servers and the second image shows the DNS record on DigitalOcean

I removed the “your_domain” directory and redid the “set up server blocks” section with my brand new domain… and drum roll… priyankais.online. Woo hoo!


Let’s Encrypt

I followed this tutorial to set up TLS/SSL certificates.

TLS/SSL certificates are used to protect both the end user’s information while it’s in transfer, and to authenticate the website’s organization identity to ensure users are interacting with legitimate website owners. Let’s Encrypt is a certificate authority (CA) which makes it easy to install free TLS/SSL certificates. A software client called Certbot automates almost all of the required steps.

First, I installed CertBot and confirmed the Nginx configuration file server block was pointing to my new domain name. Then I verified that HTTPS was allowed through the firewall. I obtained an SSL certificate by typing the command “sudo certbot —nginx -d priyankais.online -d www.priyankais.online”.

Voila!

Terminal and Nginx Notes

  • There are two primary directories on the host: /var and /etc

  • The server block I just tried to set up lives in “/var/www/your_domain/html” and that’s where the web content is saved.

  • “ls” = lists the files in a given directory, “less” = shows a file’s contents on screen at a time, “nano” = command line text editor

[ITP: Feeling Patterns] Patterns in Practice - New Yuck

Inspiration

Throughout this class I’ve been primarily fixated with observing the patterns of New York. They are fast, loud, and exponential. For me, they can sometimes be sensory overload and leave me a bit anxious and overwhelmed. At the same time, they are inherently beautiful and offer so much variation and intricacy.

For this project I knew that p5 wasn’t the right medium for me to convey what I wanted to; it didn’t work for me in the last assignment. I work as a freelance illustrator, and have been missing painting recently, so I decided I wanted to paint some patterns. I also love experimenting with childhood crafts and I remembered that one of the easiest book-making techniques are accordion books. The fact that you can flip through an accordion or lay it flat and see it all at once makes it seem like it could possibly go on forever!

Drawings

Materials and Tools

  • Watercolor paper

  • Watercolors

  • Tape

  • Ruler

  • Adobe Illustrator

  • Cardboard, scissors, glue

Process

  1. Watercolor painting

Create all the subway car number signs and alternate windows. I sprinkled these into the final composition using Illustrator.

2. Photograph the painting and create book pages in Adobe Illustrator.

3. Construct the book.

Printed pages and cardboard box

Cut out book covers from a cardboard box

Cut out pages

Cut tabs to attach the pages using glue

Accorion!

Final Product

Conclusion

I really loved getting my hands on this project. Although I love a good pun, yuck is sometimes how I feel in the city. There’s a lot to take in at any moment, it’s not always pleasant. But it really is a term of endearment like calling someone you love “Stinky”. It’s like 2% true 98% love; the yuck-factor is what makes NYC so special.

This was really a way for me to incorporate patterns into my art practice. Starting with observing patterns, illustrating patterns, digitizing patterns, and also book assembly forced me to execute many patterns.

It might be really interesting to continue this project with more New York patterns. Some other ideas I had written down in my notebook are elevators, streets/crosswalk, or something more natural like Central Park trees or flowers but I guess those aren’t really New York-y.

Resources

https://www.youtube.com/watch?v=_sMvTkoy1os

https://www.youtube.com/watch?v=QjQPZPtDXX0

[ITP: Hypercinema] Stop Motion

Group member: HyungIn Choi

You can find my brainstorming blog post here.

Process

For this assignment, HyungIn and I were tasked with creating two looping stop motion animations. To optimize our time, effort, and to be sure we both got to get our hands onto the animation and creative process we both kind of designed and directed our own animations and helped each other with execution and filming.

Following my story board from last week, I wanted to make a jack-o-lantern loop. Short of getting a physical pumpkin, paper seemed like the medium of choice. At first it was daunting to hand cut all the shapes for my animation but it ended up not being so bad. Hand cutting the shapes for each frame gave me more control in how smooth animation ended up. I was able to tape certain parts down and move one thing frame by frame. I shot the images using my iPhone and an overhead tripod.

HyungIn and I were working in parallel and took over a full classroom over the weekend. We helped each other ideate and shoot our photos. Below are some BTS shots of the aftermath of shooting our stop motion loops.

Premier

I followed this tutorial to make my video in Adobe Premier instead of Stop Motion Studio. Here are the settings I used:

  • Still image default duration: 4 frames

  • 23.976 frames per second

  • Frame size: 720 by 480 (4:3)

  • Exported as a .gif and QuickTime (.mov, “Apple ProRes 422 HQ”)

Final Product

Here’s the animation that Hyungin directed. It’s in a completely different style using found objects but the effect it has is more organic, abstract, and lively than the pumpkin piece.

Conclusion

I really enjoyed making this stop motion loop with paper. It was much easier than I thought it would! One thing I’ve been consistently having issues with is lighting photos properly. As you can see in the loop, the lighting changes and by the end the color balance is totally different than in the beginning of the loop. I’m also running into this issue when taking pictures of my ITP projects in general. Whenever I try to take a straight-above portfolio picture on the floor there’s always a shadow no matter where I move my setup.

Resources

https://www.youtube.com/watch?v=82RM7ZpldxM

https://www.youtube.com/watch?v=6isAwak22O4