
This article was featured on SparkFun’s site.
Summary
For my creative technology class final project, I wanted to build an idea I had living in my brain since the beginning of the pandemic. My background in electrical engineering and art has helped me venture into the field of kinetic sculpture and in this article I will describe how I designed and built the Kinetic Column.
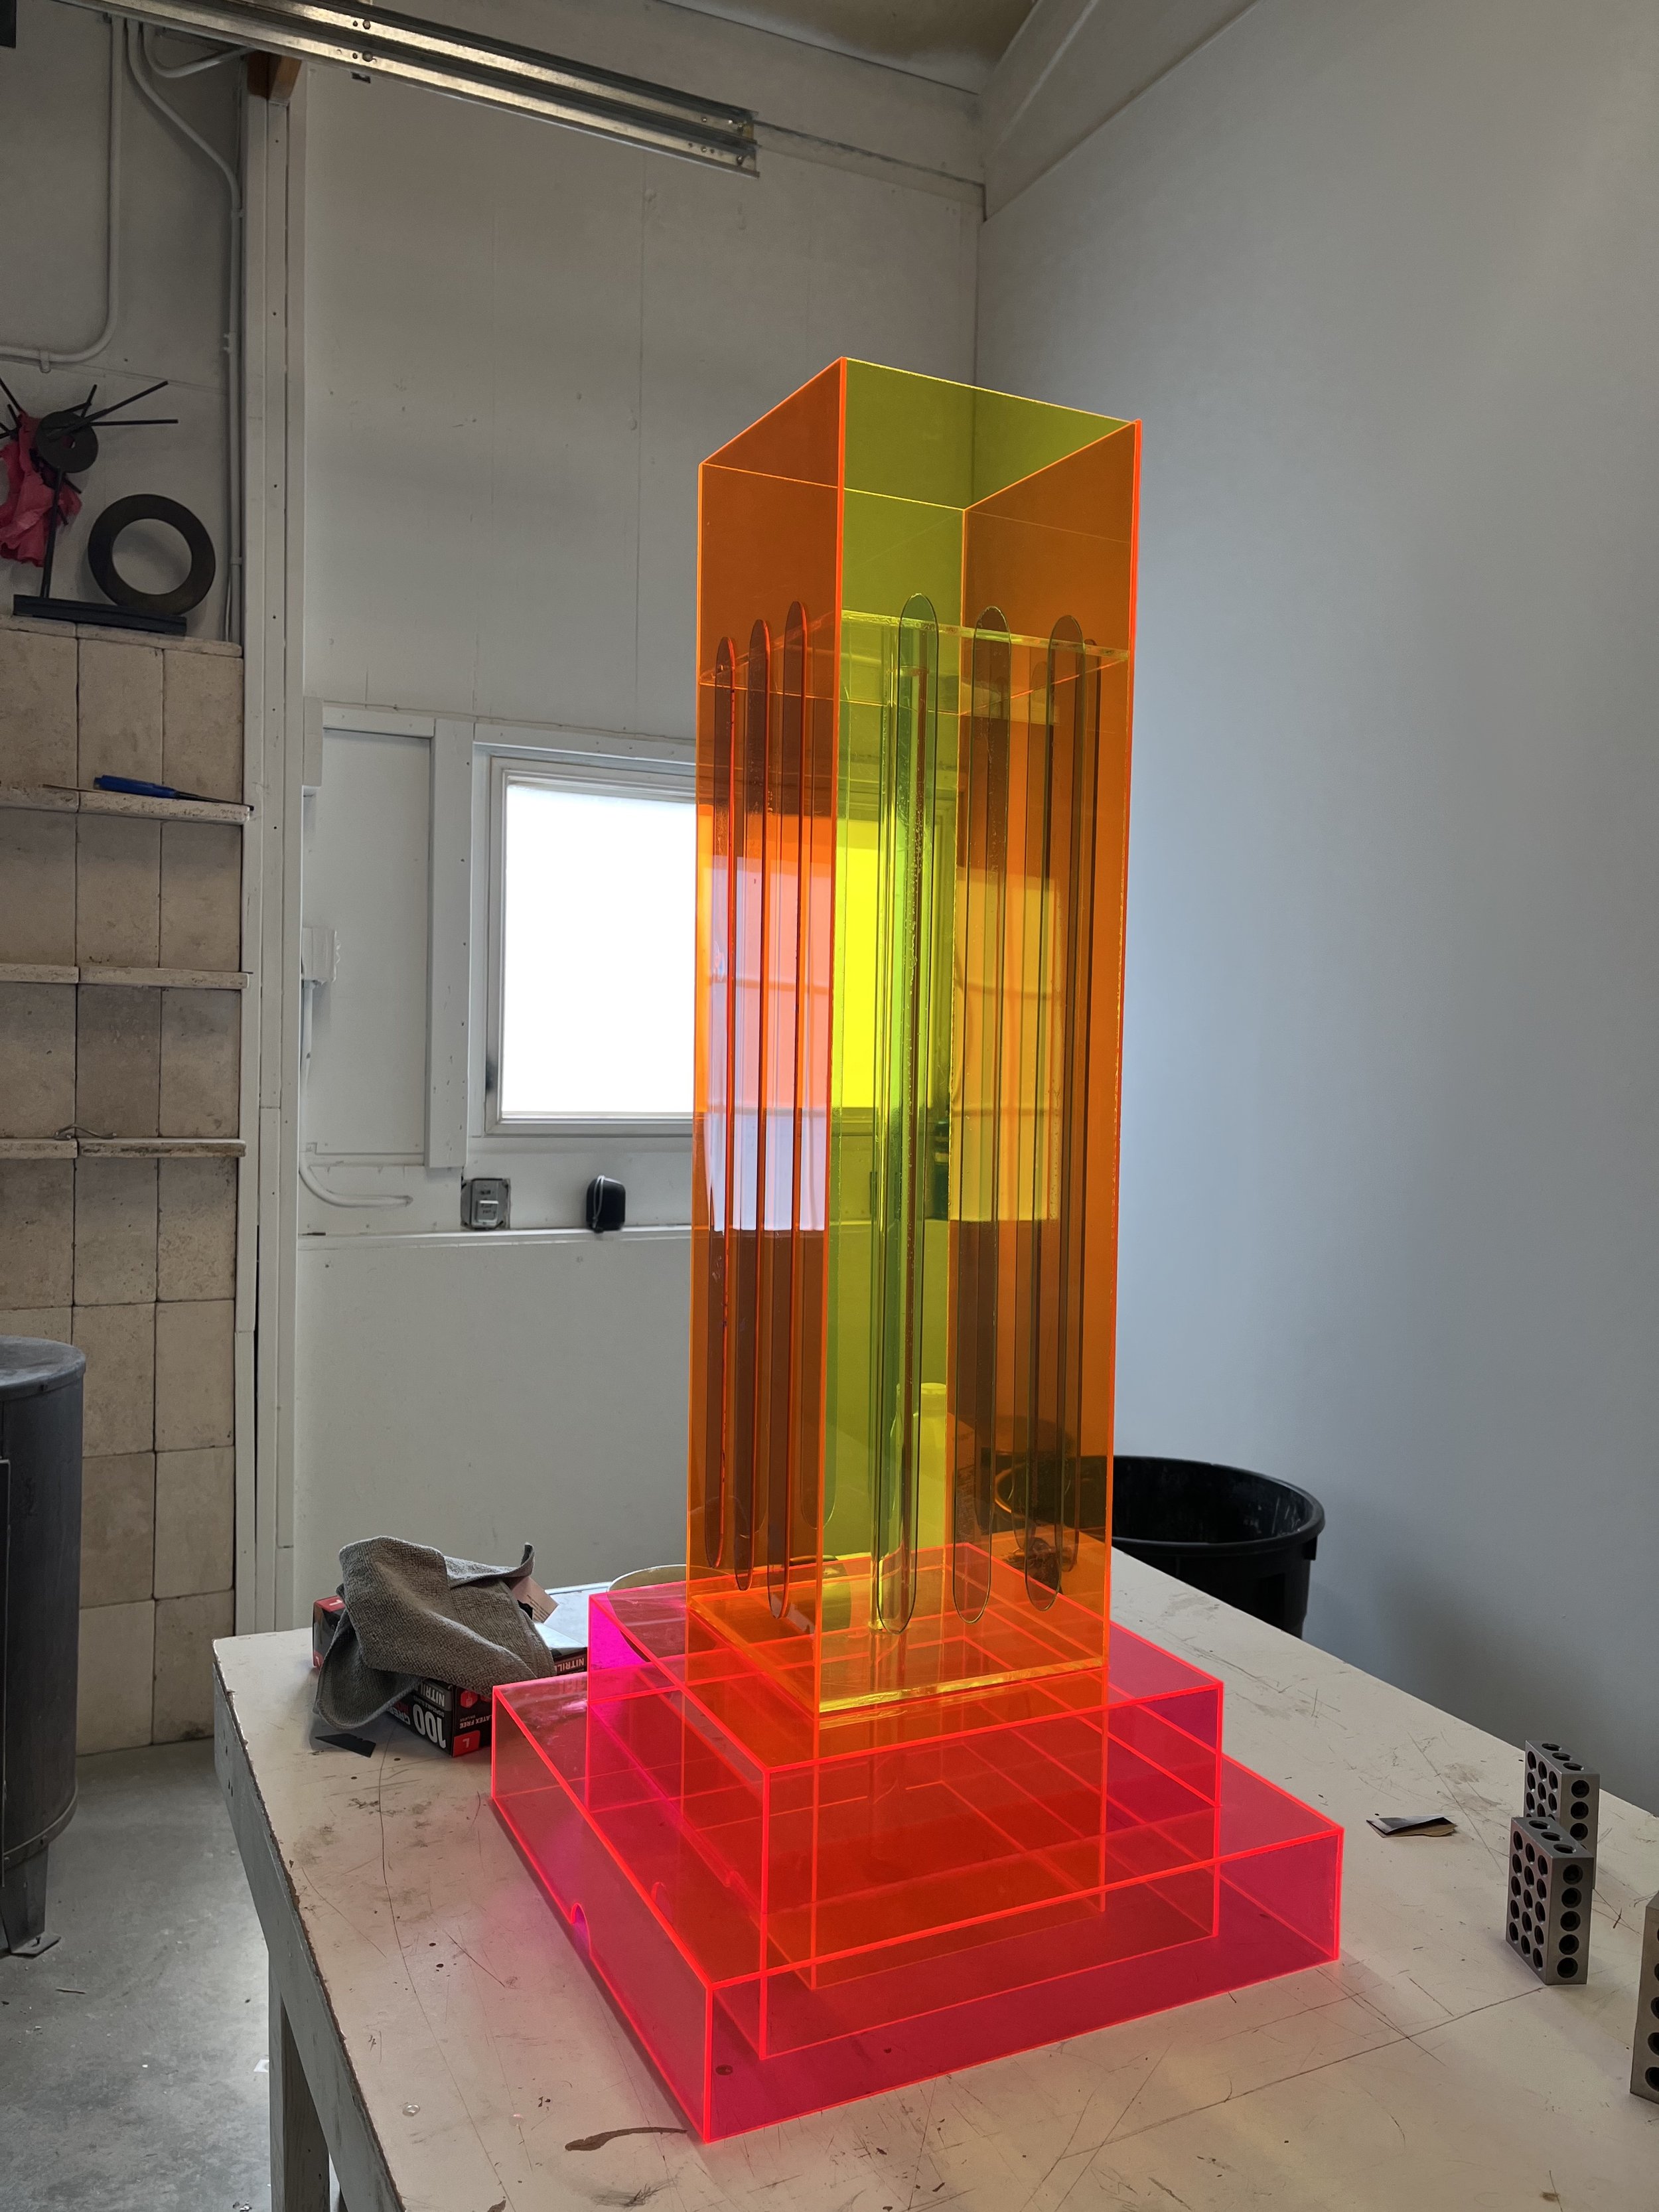
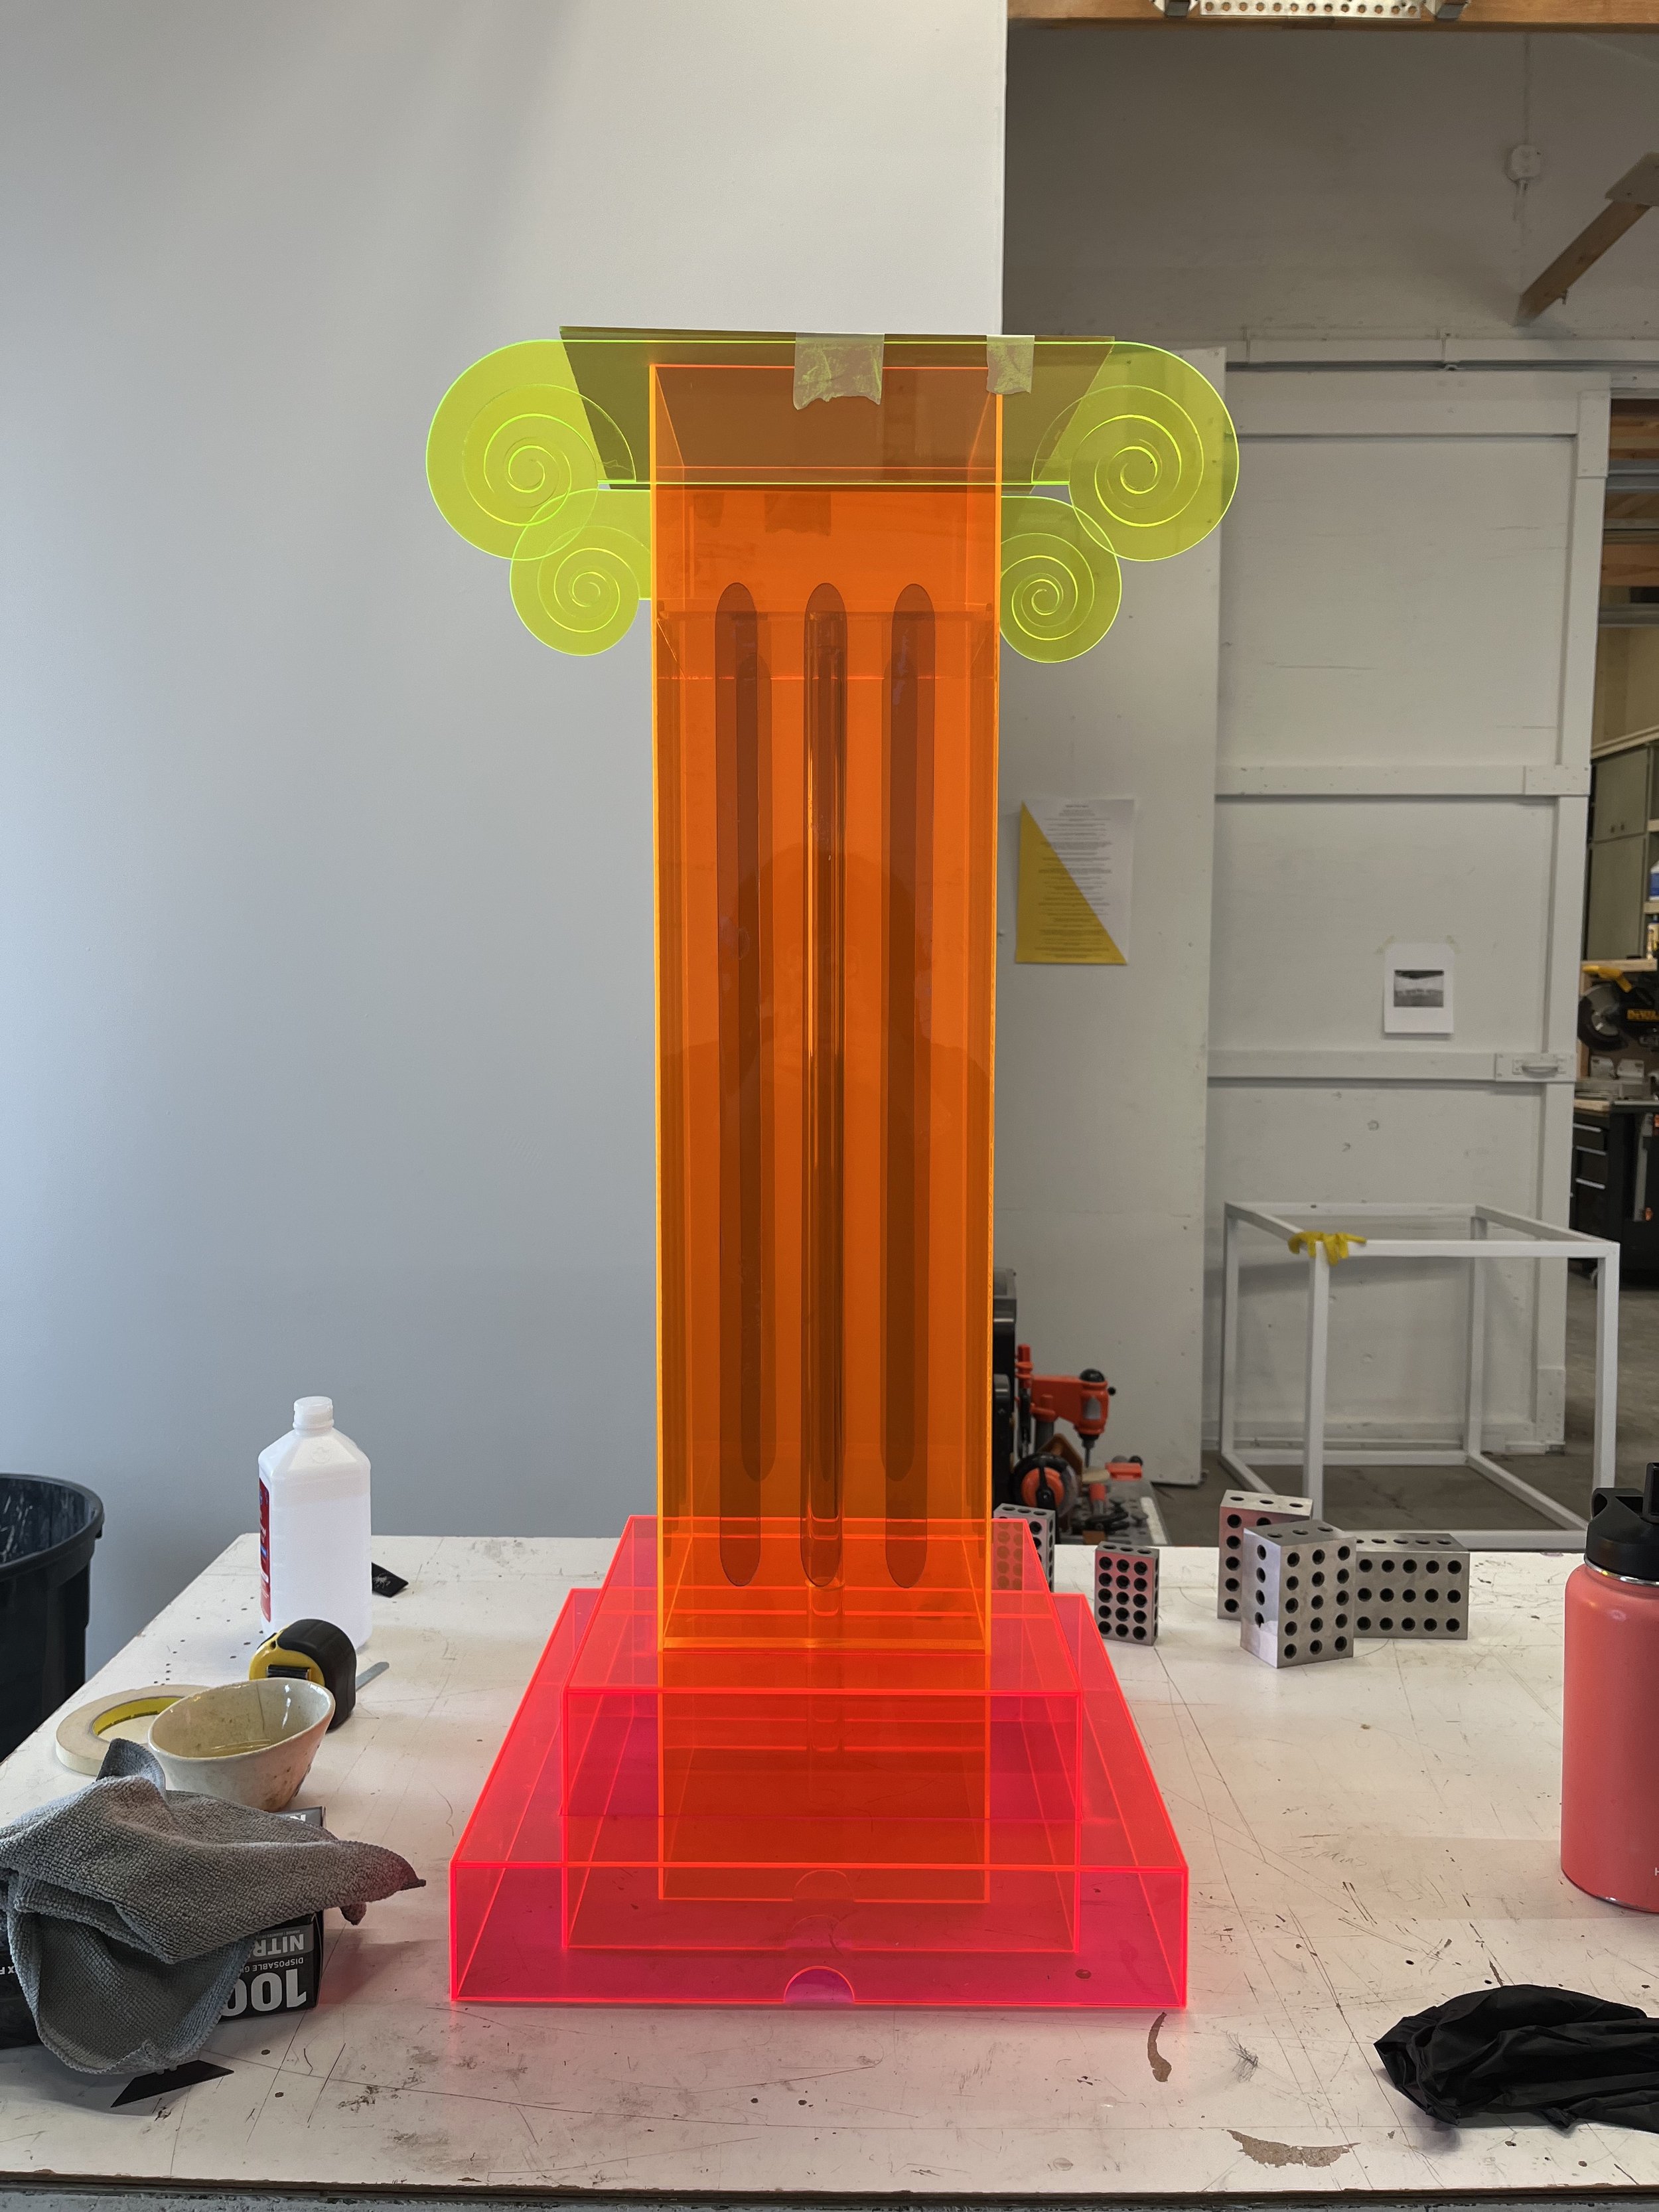
Kinetic Column is my modern take on an iconic, historical relic. It's completely built out of neon acrylic sheets. The transparency and bright colors contrast the white stone columns we traditionally know. The top platform is meant to resemble the turning pedestals you would see in home shopping TV shows. An amphora vase cut and etched on iridescent acrylic serves as the topper.

Background
I’ve always been inspired by the intersection of art and engineering. I’ve had a couple of opportunities to help local artists bring movement to their sculptures. This kind of work in kinetics really sparked my interest and I created my first piece, Nature Mobile, last year. I used that project as an experiment with using the laser cutter and, what is now probably one of my most favorite mediums, neon acrylic.
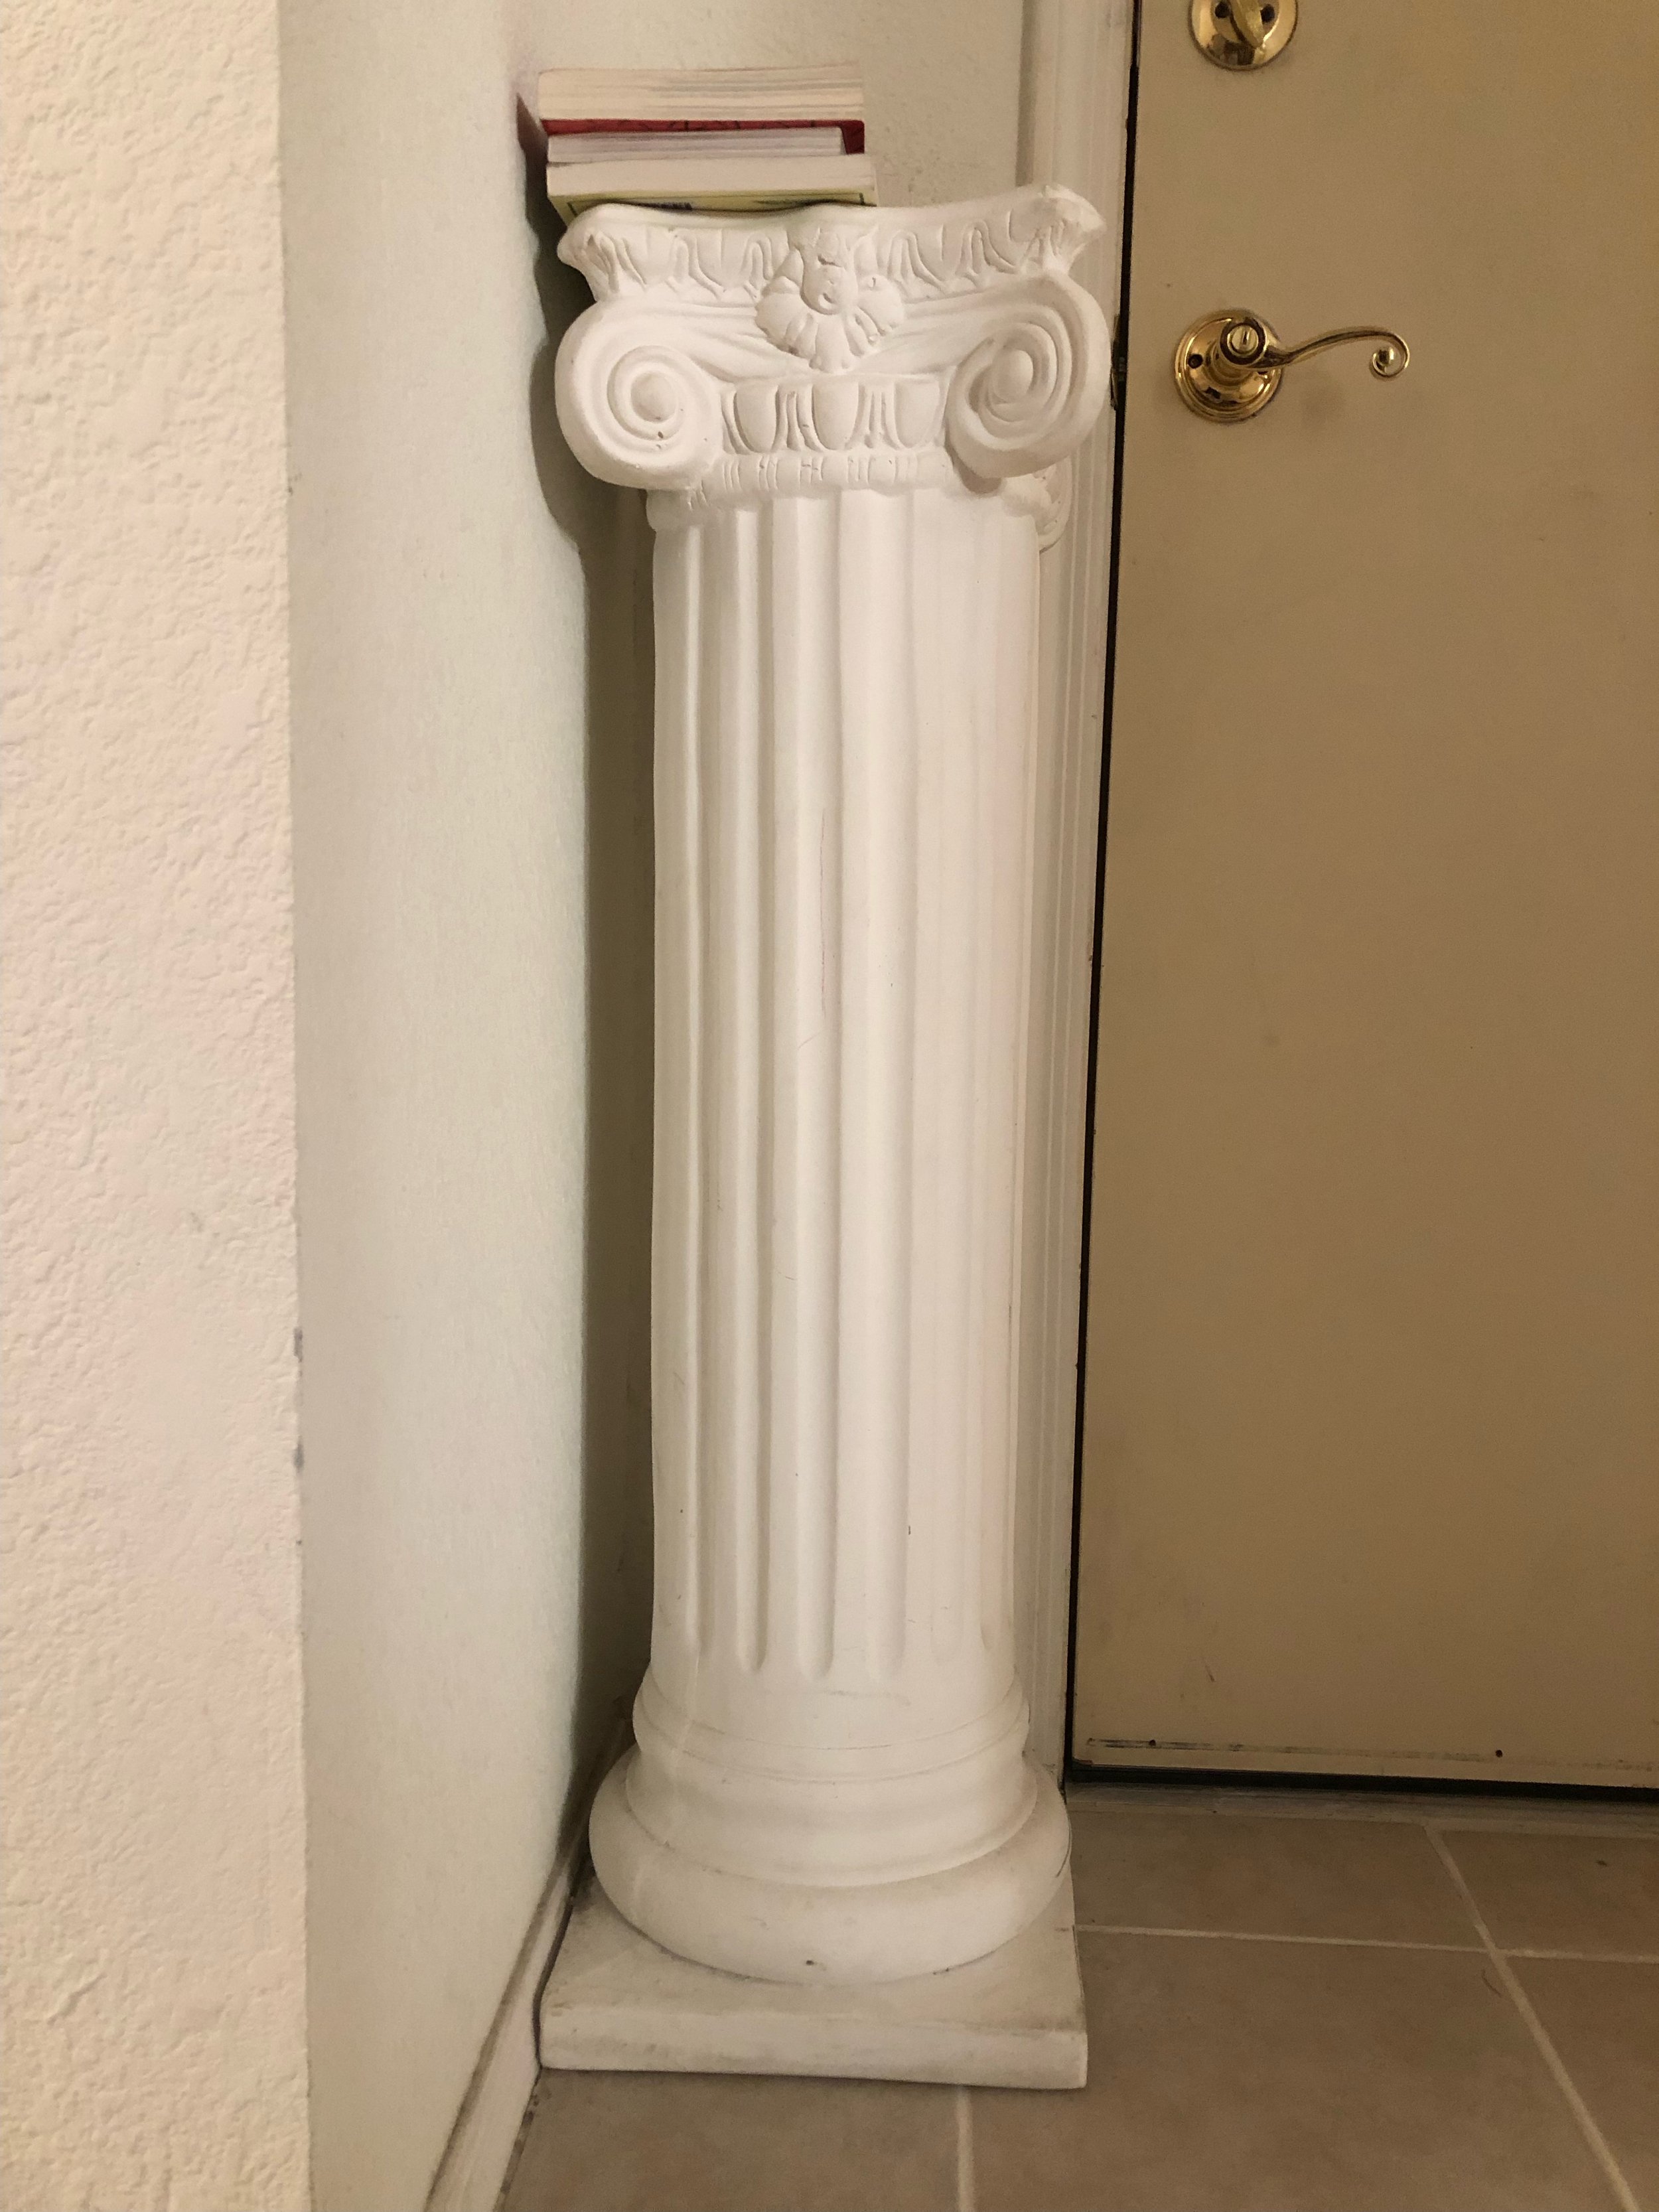
Column pedestal from childhood home
My original idea for this piece was a bit more complicated than what I ended up with (or so I thought). Originally, I wanted to contrast the classical with the modern, plaster with plastic, neutral with color. I was inspired by this weird column pedestal that’s lived in my parent’s home for as long as I can remember and never served any purpose.
At first, I wanted to cut a similar plaster pedestal in parts and replace the middle section with an acrylic mosaic cube. That cube would rotate around its center and embedded LEDs would essentially turn the middle section into a colorful disco ball. Again, an ulterior motive of creating this art piece was to learn some new skills, like laser etching, 3D printing, workshop skills, etc. The sketchbook excerpts below show the evolution of my idea. Some changes were based on feasibility, cost of material, and construction know-how. I finally landed on a rectangular pedestal design of all neon acrylic and a turning top-plate.

Ideation


Historical Context
Architectural columns date way back to 2600 BC ancient Egypt. This structural element has had practical uses in architecture styles all over the world. Egyptian columns were carved to reflect the organic form of bundled reeds. Greek and Roman cultures most famously made use of columns in their structures. The Parthenon is an example of ancient Greek columns that are still standing today. Columns historically marked places of authority or importance.
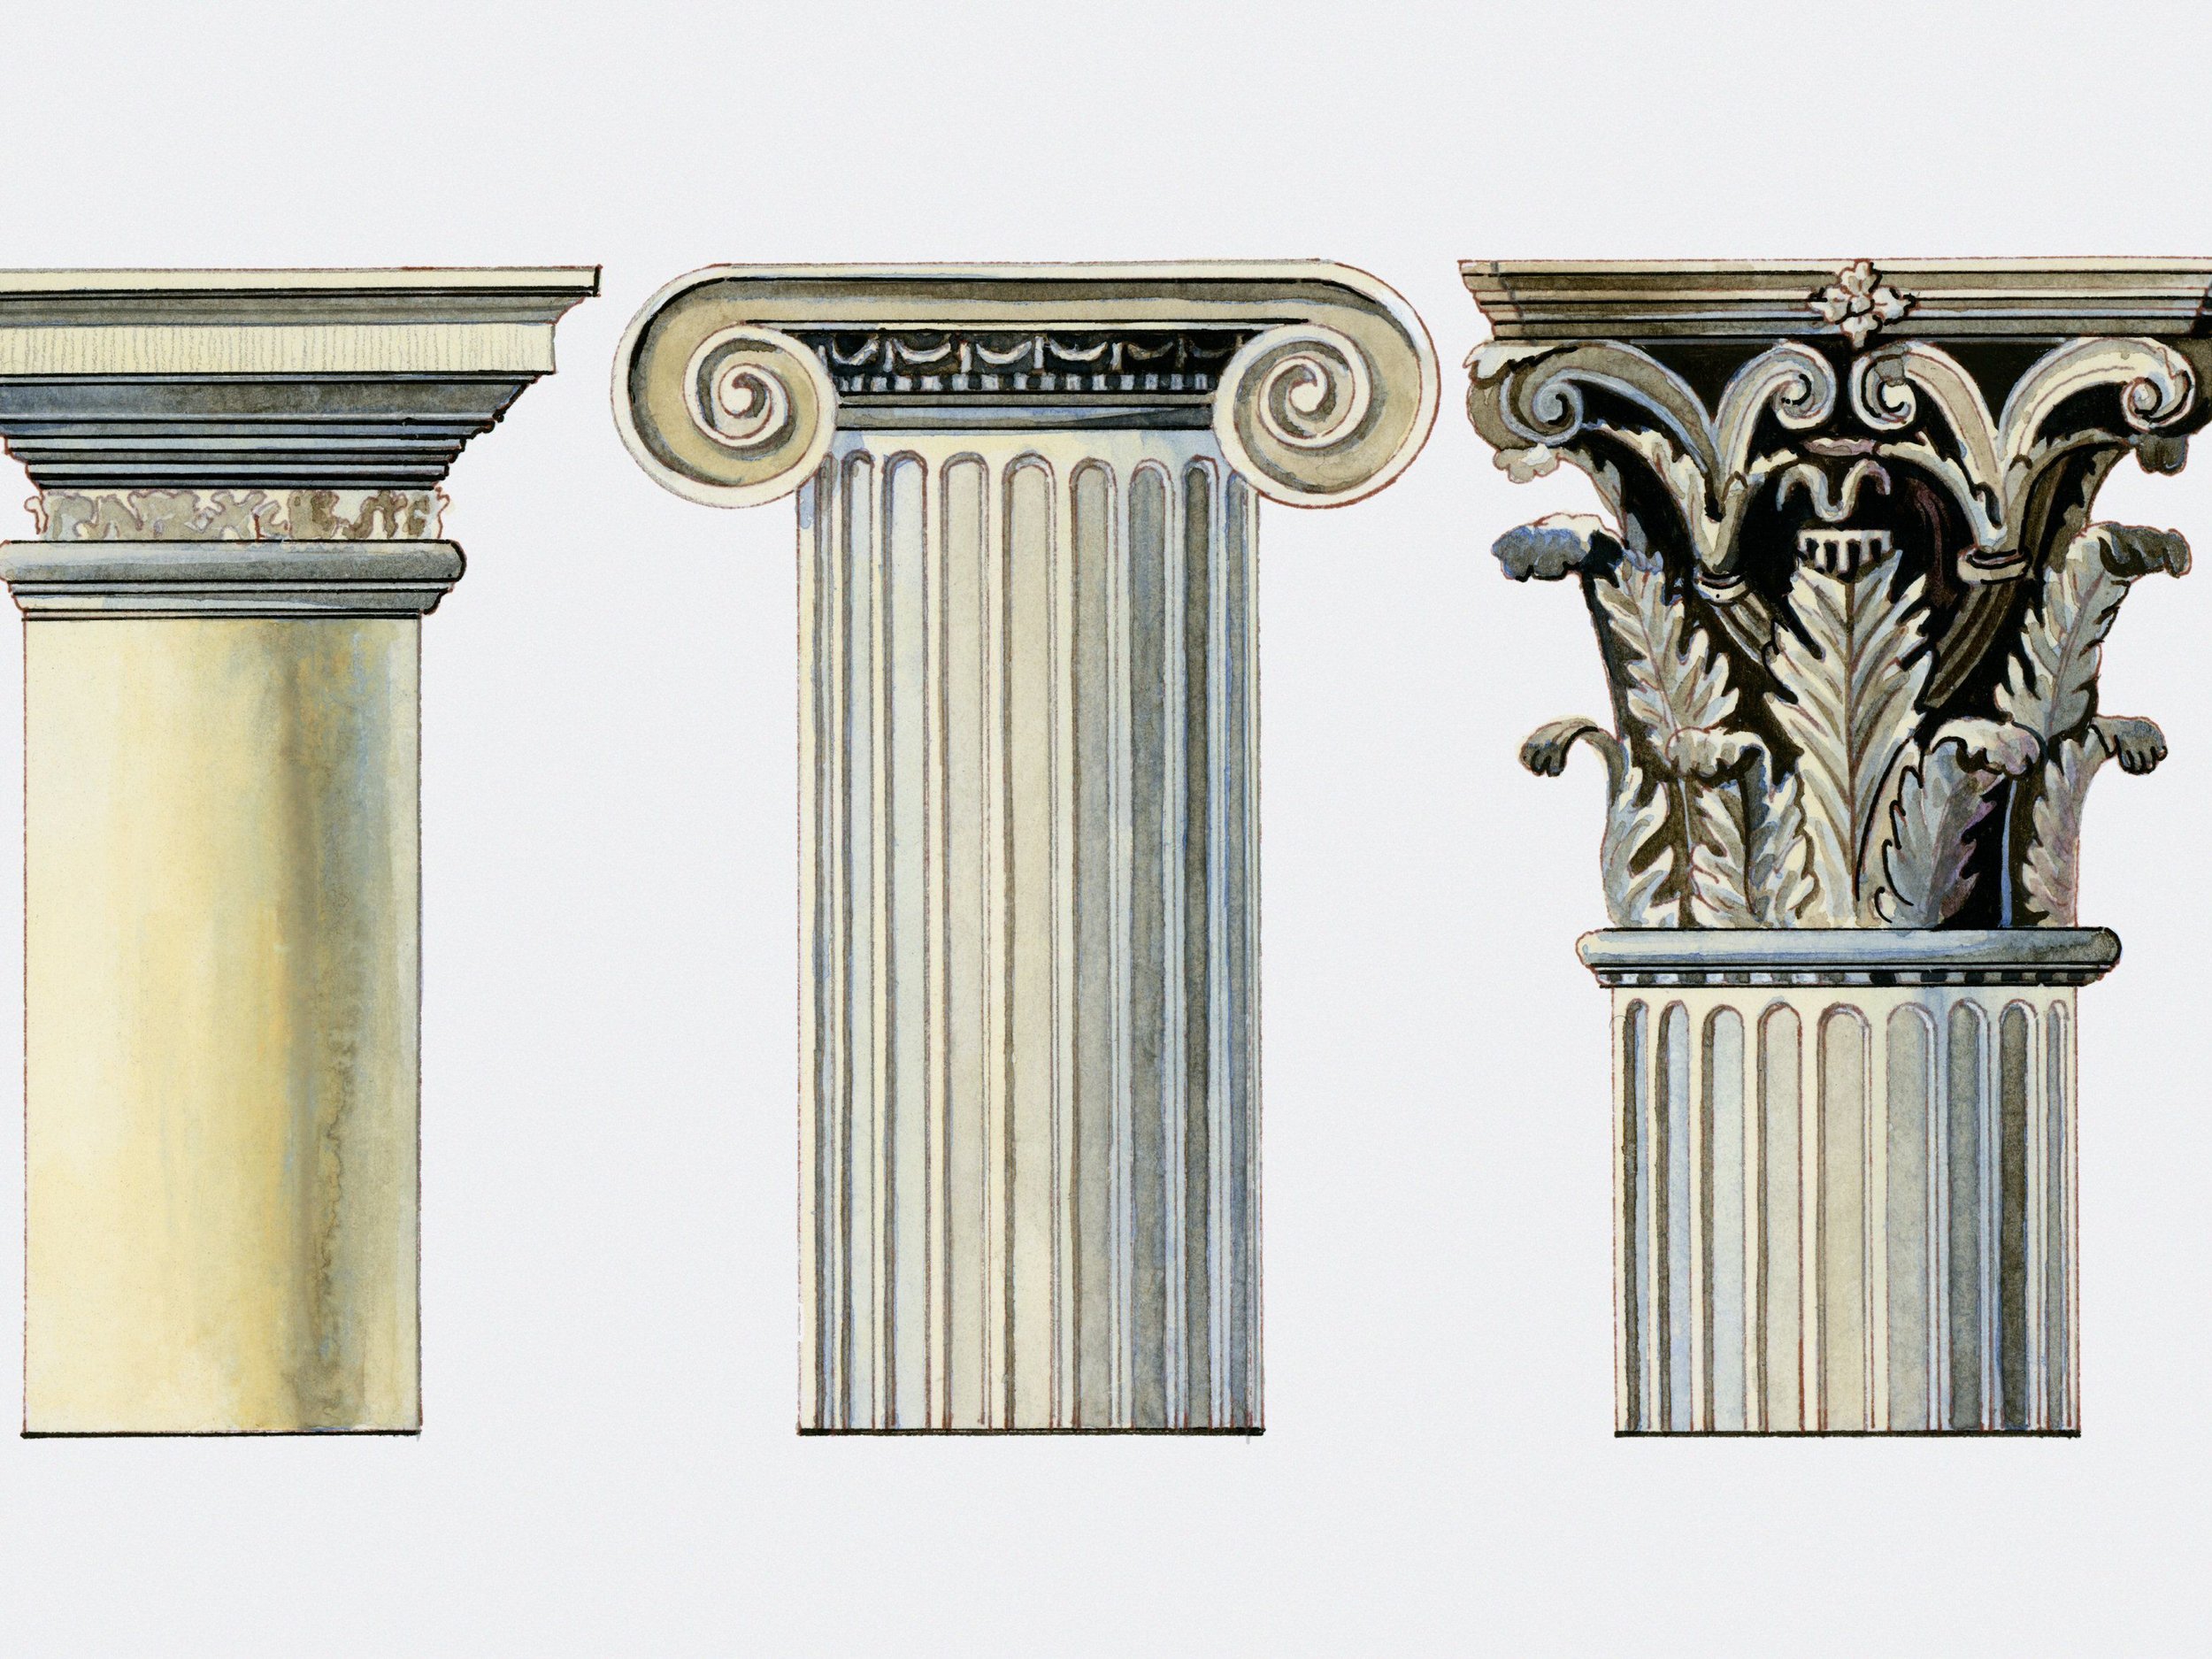
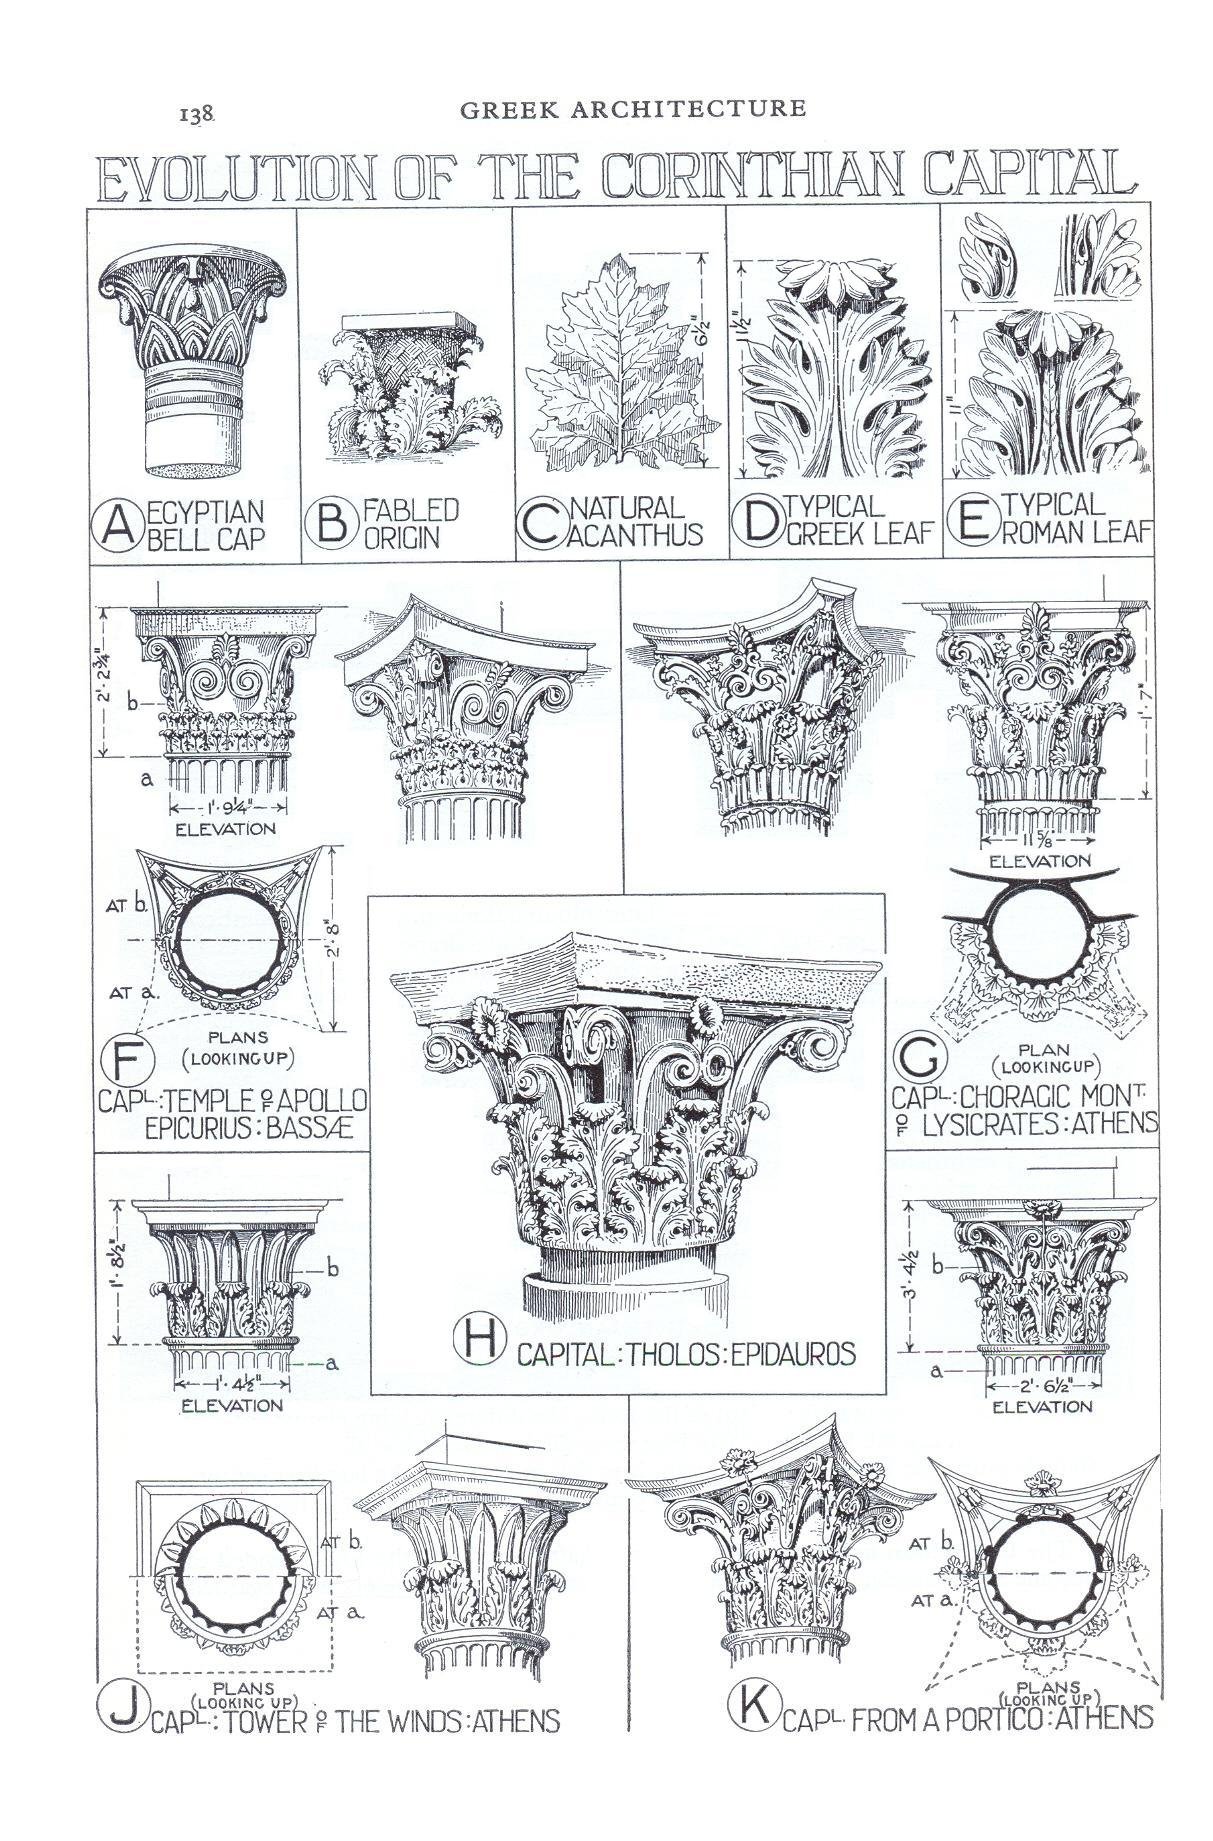
Generally columns are made of stone, however older iterations could feature a tree trunk as support. They have a standard anatomy of a base, shaft, capital, and sometimes fluting. The design of a column’s capital defined the different orders of classical architecture. The Doric order is the oldest and simplest and is customarily a plain column that’s wider at the bottom than the top. Next is the Ionic order which is characterized by its volutes or scrolls. The most intricate order is Corinthian which is identifiable by the acanthus leaves growing around the votive basket and is considered the feminine order.


Materials
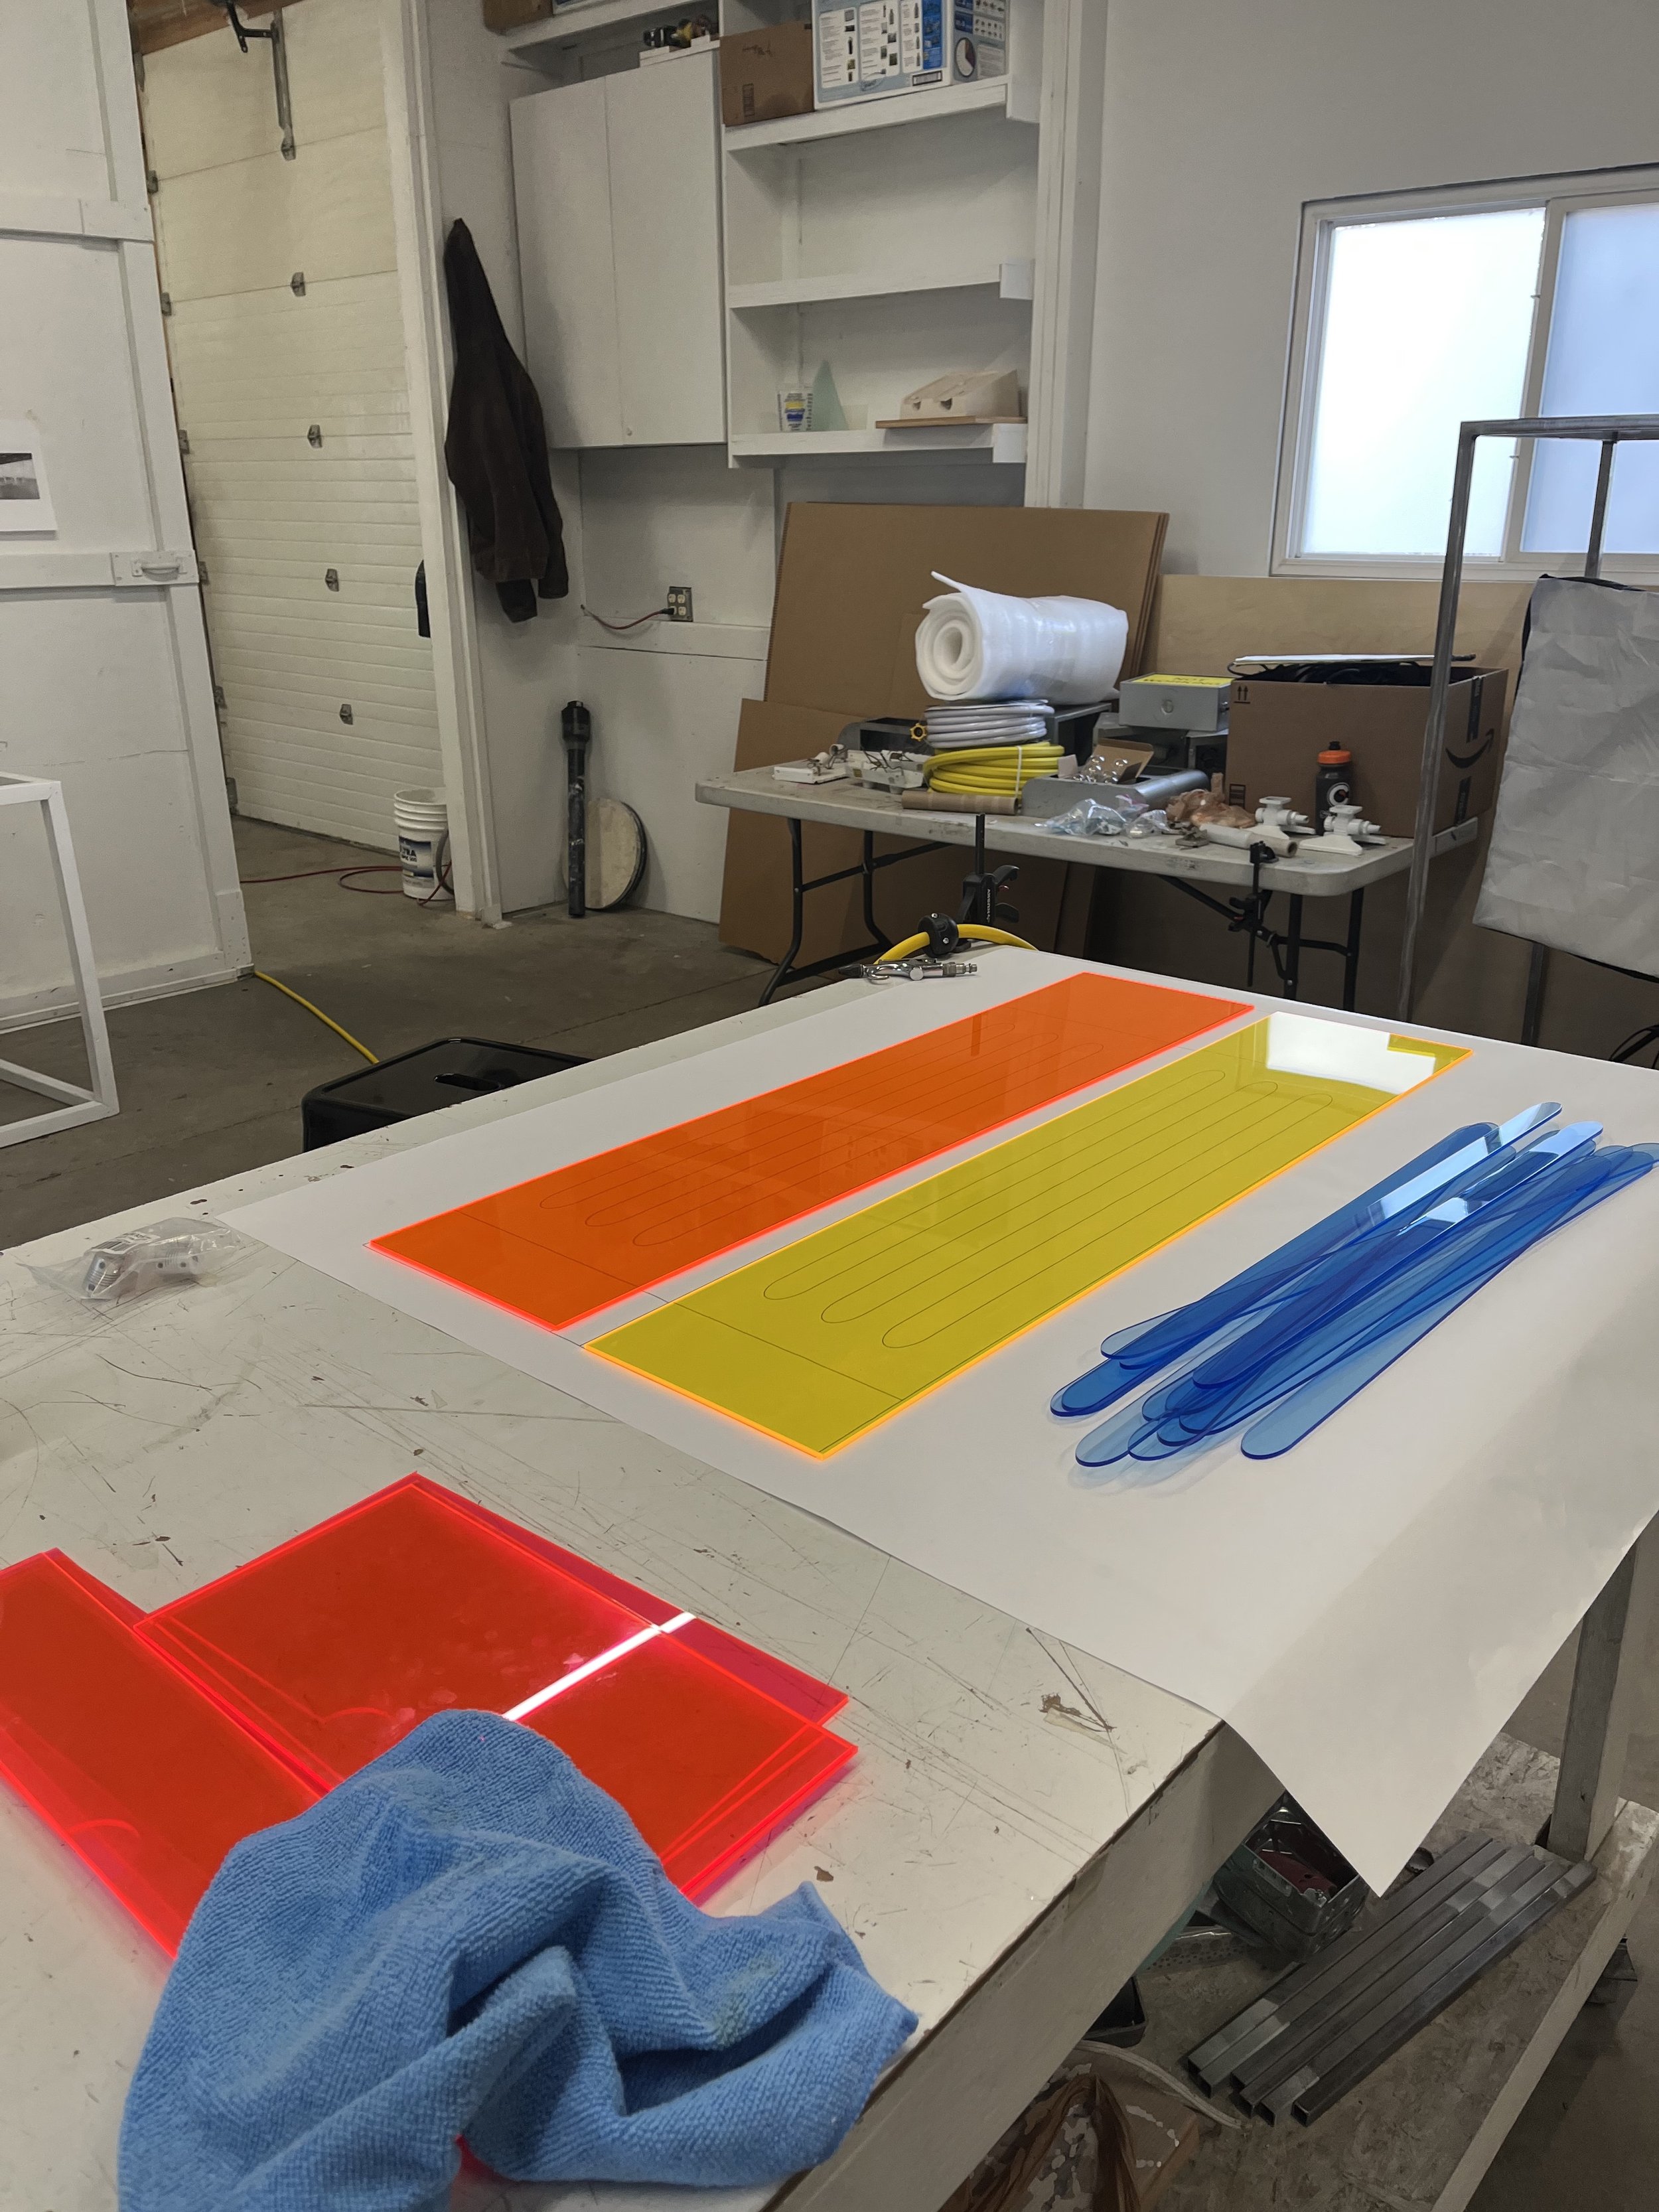
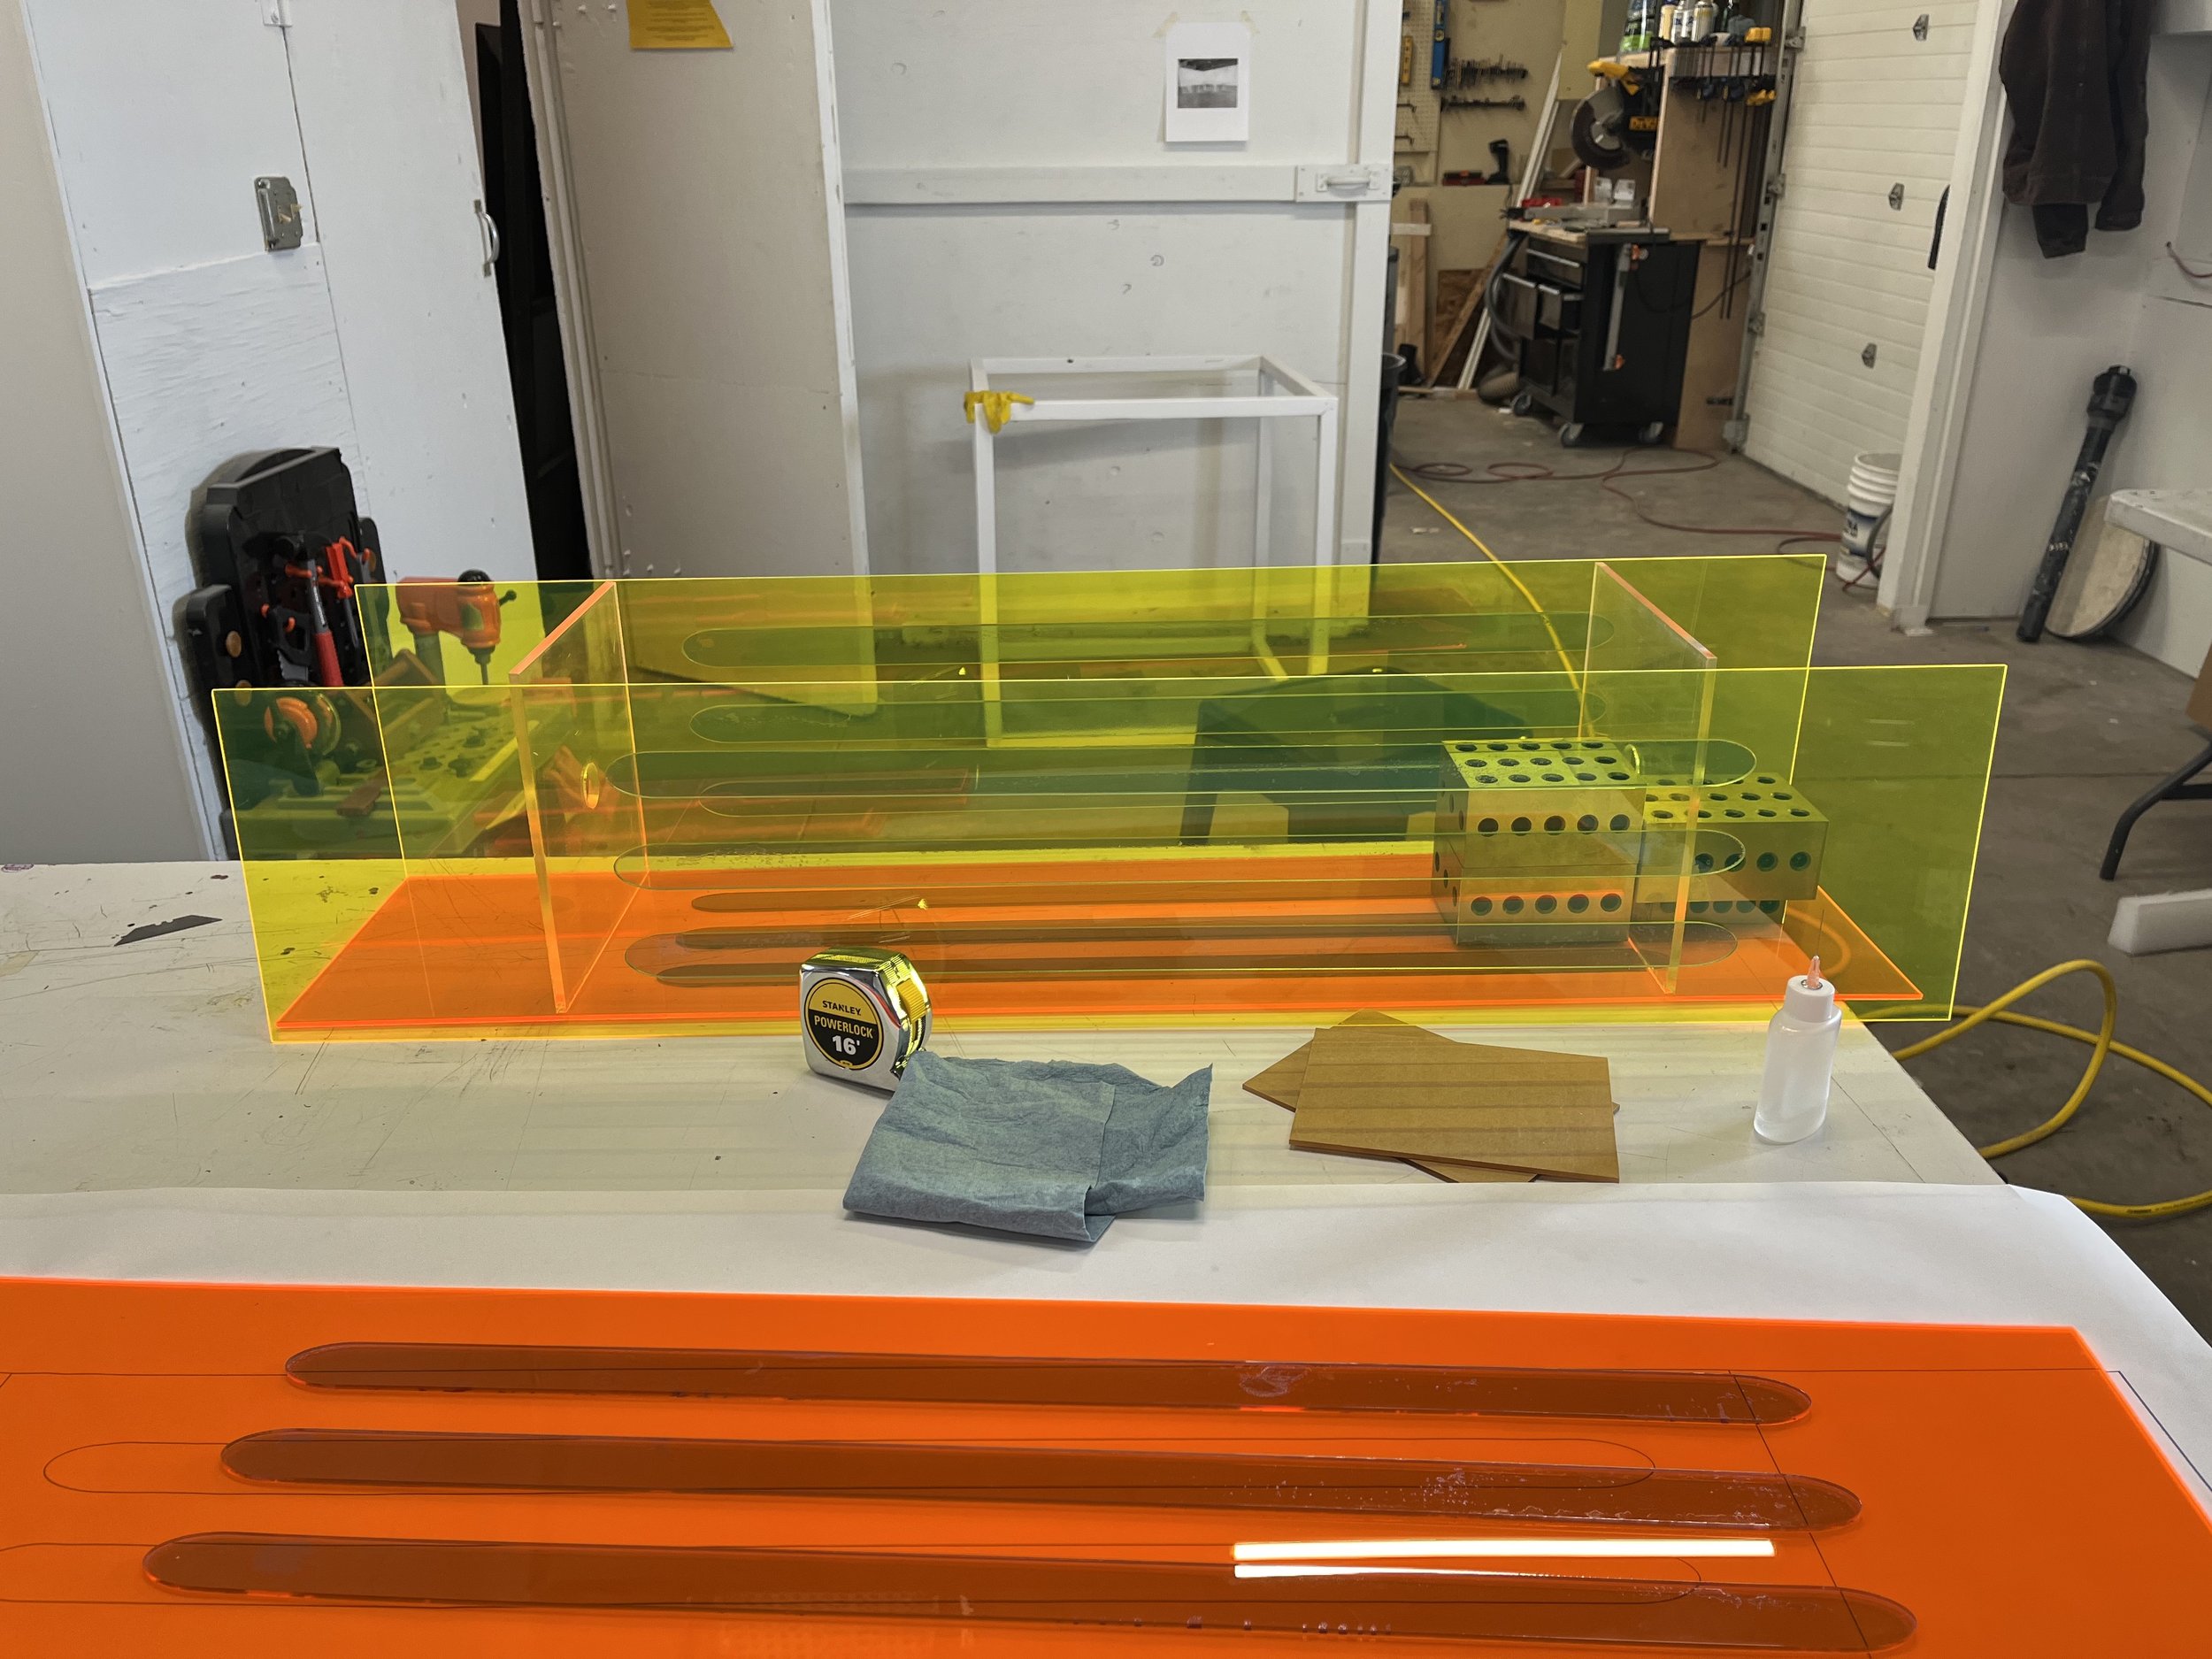
I wanted to build this column out of neon acrylic because of its special luminescent properties. This material lights up all on its own, especially at its edges. When natural light passes through a piece of colored acrylic, the shadows it casts takes on the color of the plastic and makes for a really interesting effect. I bought all my acrylic sheets, including the clear rod for wires and the iridescent sheet, online from Delvie’s plastics. To save some time at the laser cutter, I’d recommended getting what you can cut to size from your supplier.

These are the materials needed for sculpture construction:
Weld-on 3 or 4 with needle point applicator bottle
Respirator
Gloves
Sand paper
Tape
Isopropyl alcohol
Microfiber cloths
Clamps of various sizes
1-2-3 blocks for squaring off corners
Heat gun

These are the materials needed for the electrical system:
Build Process
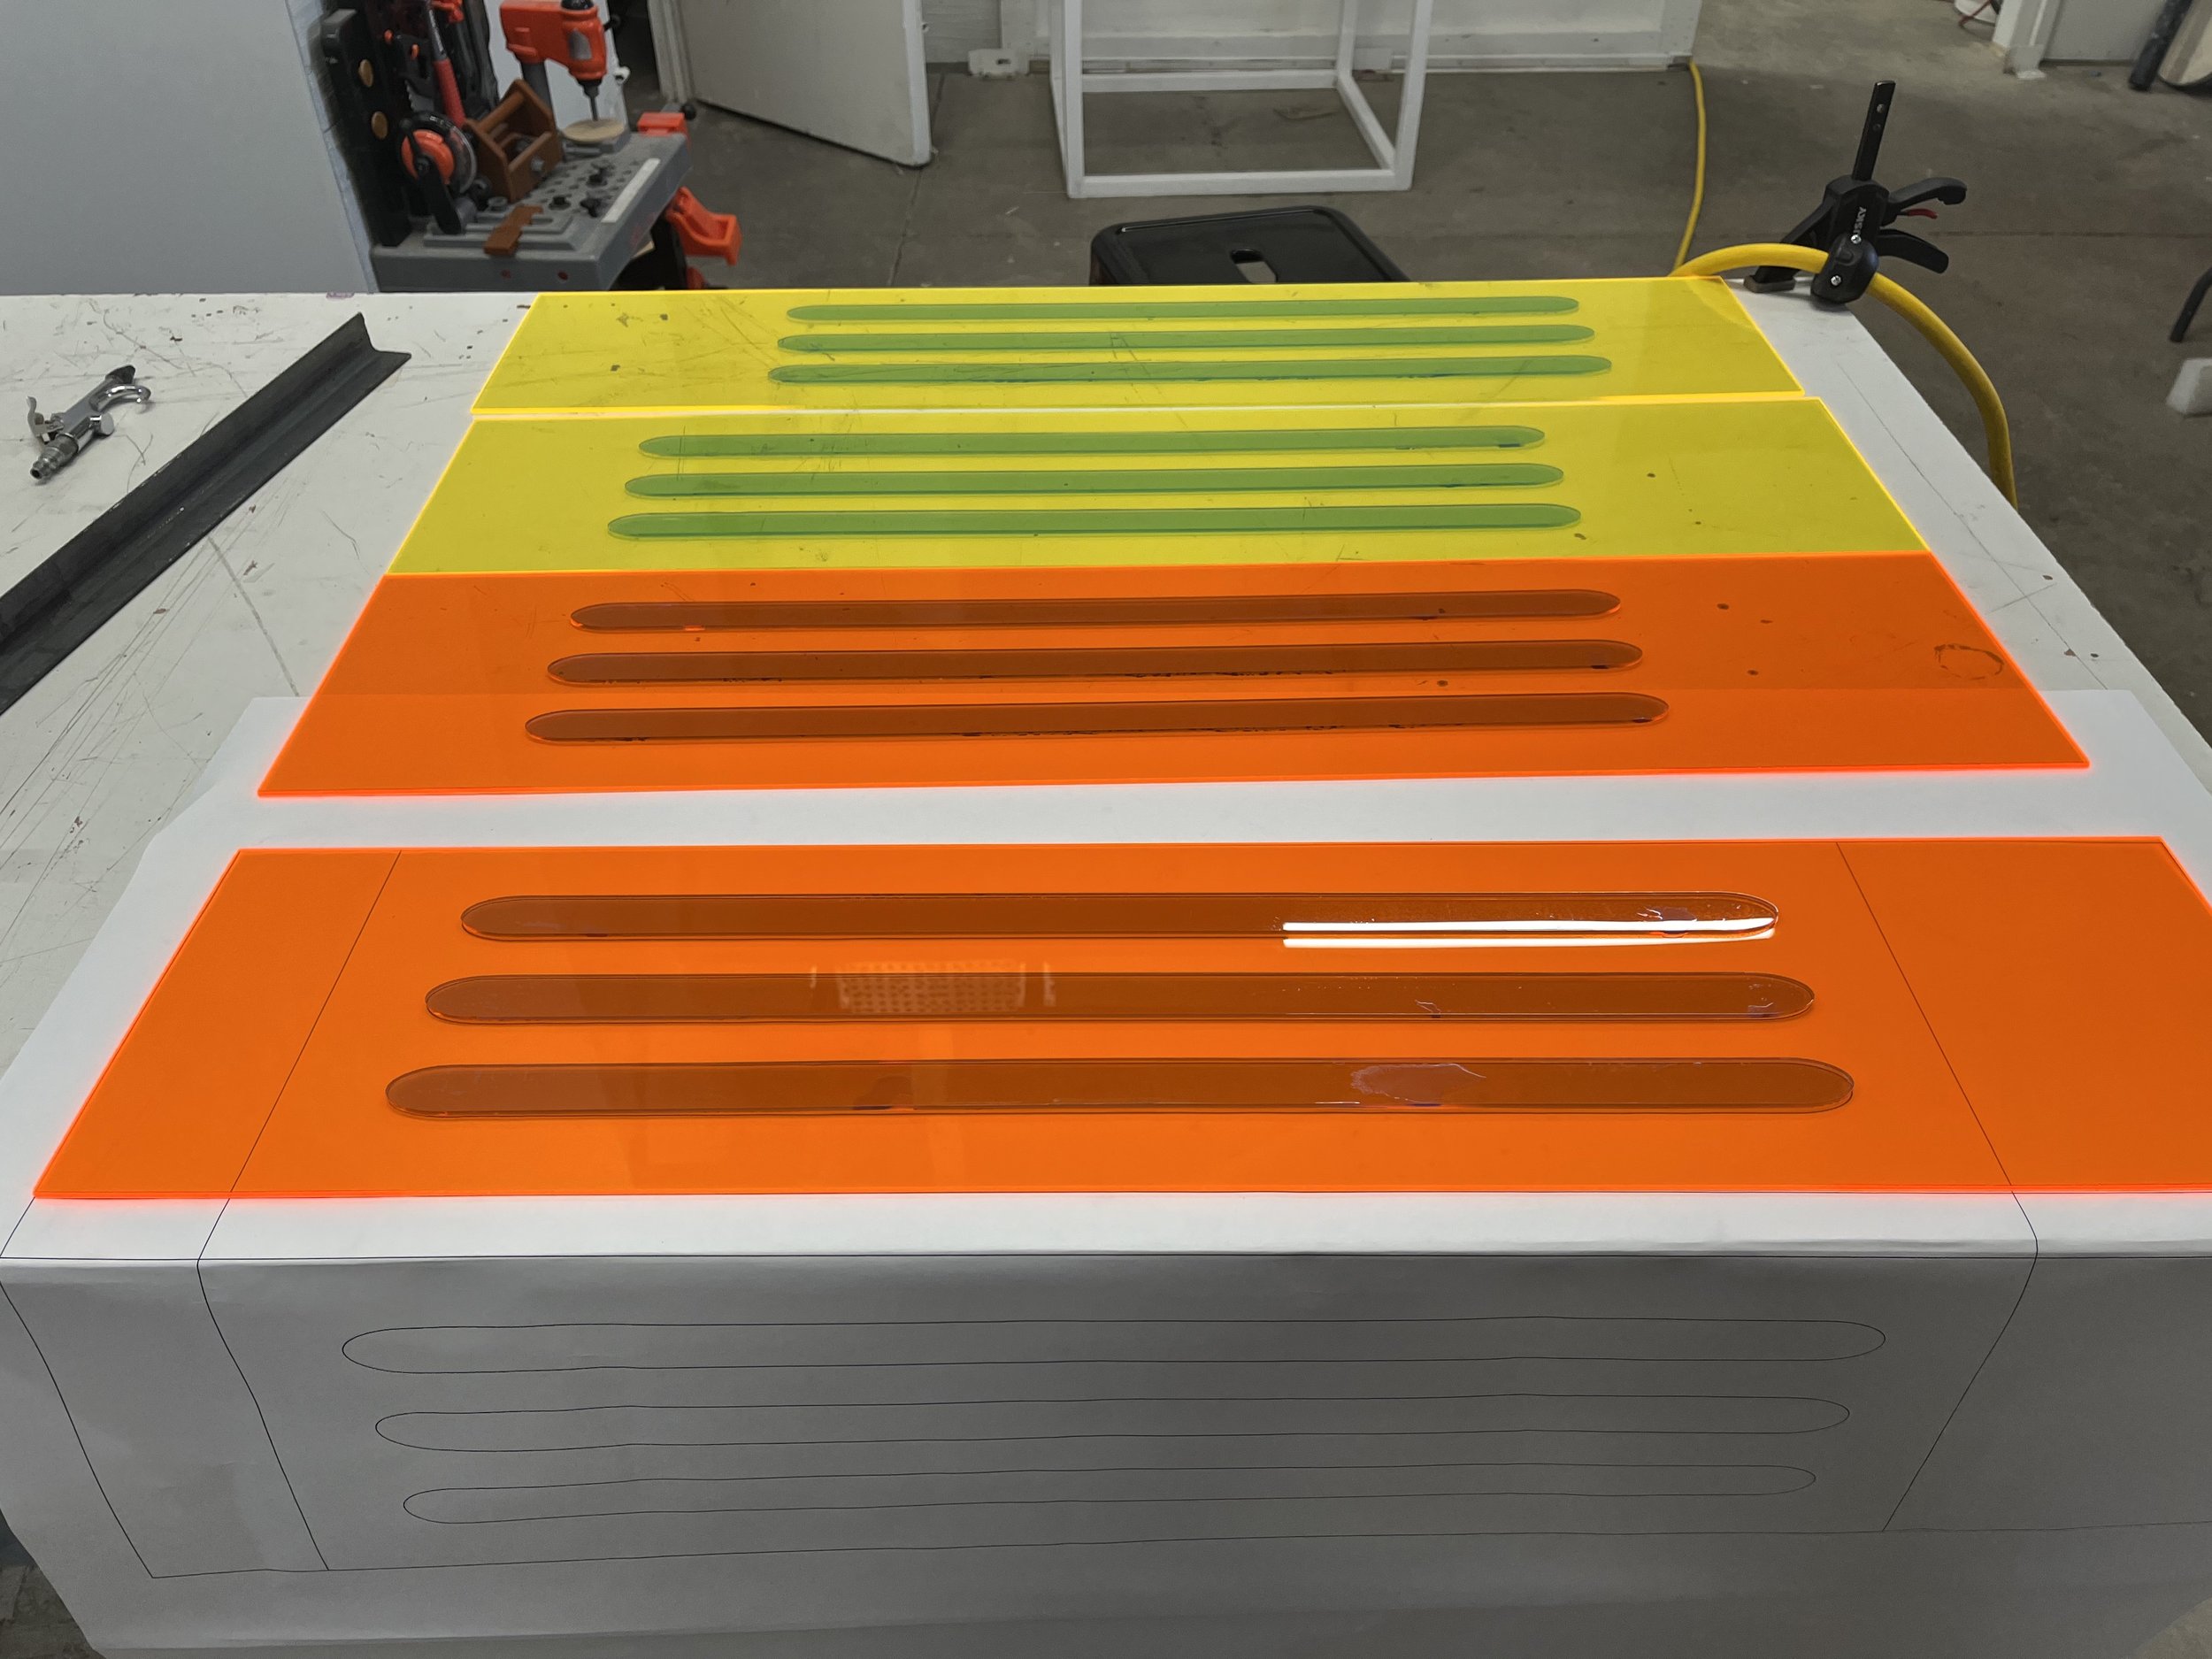
Since this is a laser cutter heavy project before I could get to building I had to get my laser cuts drawn up in Adobe Illustrator. Even though most of the column parts are just rectangles, I really had a hard time visualizing how all the pieces fit together in 3D, hence all the scribbled calculations and drawings done old-school by pen on paper. In hindsight, I should have drawn up a model on the computer right at the beginning, but I don’t really know how to do that. I basically lived by the “measure 10 times, cut once” philosophy to make sure my laser cuts came out right. Some of my favorite laser cut files are pictured below but all my files live on this github repo.

Dimensioning

Laser cutter file

Laser cutter file
Because I had no scale rendering of what my column would look like put together, I made a scale model prototype. This was constructed out of scrap cardboard and wood. It was at this point I realized that the proportion of the size of the top platform to the bottom “foot” was way off so I decided to double up on the “feet”.

Turning mechanism prototype

Scale prototype
With acrylic in hand, I was eager to build. But first, the cut pieces needed to be prepared by finishing the edges with some sandpaper and cleaning with isopropyl and a microfiber cloth. Pro-tip: wear gloves when handling unwrapped acrylic to avoid too many neon fingerprints.
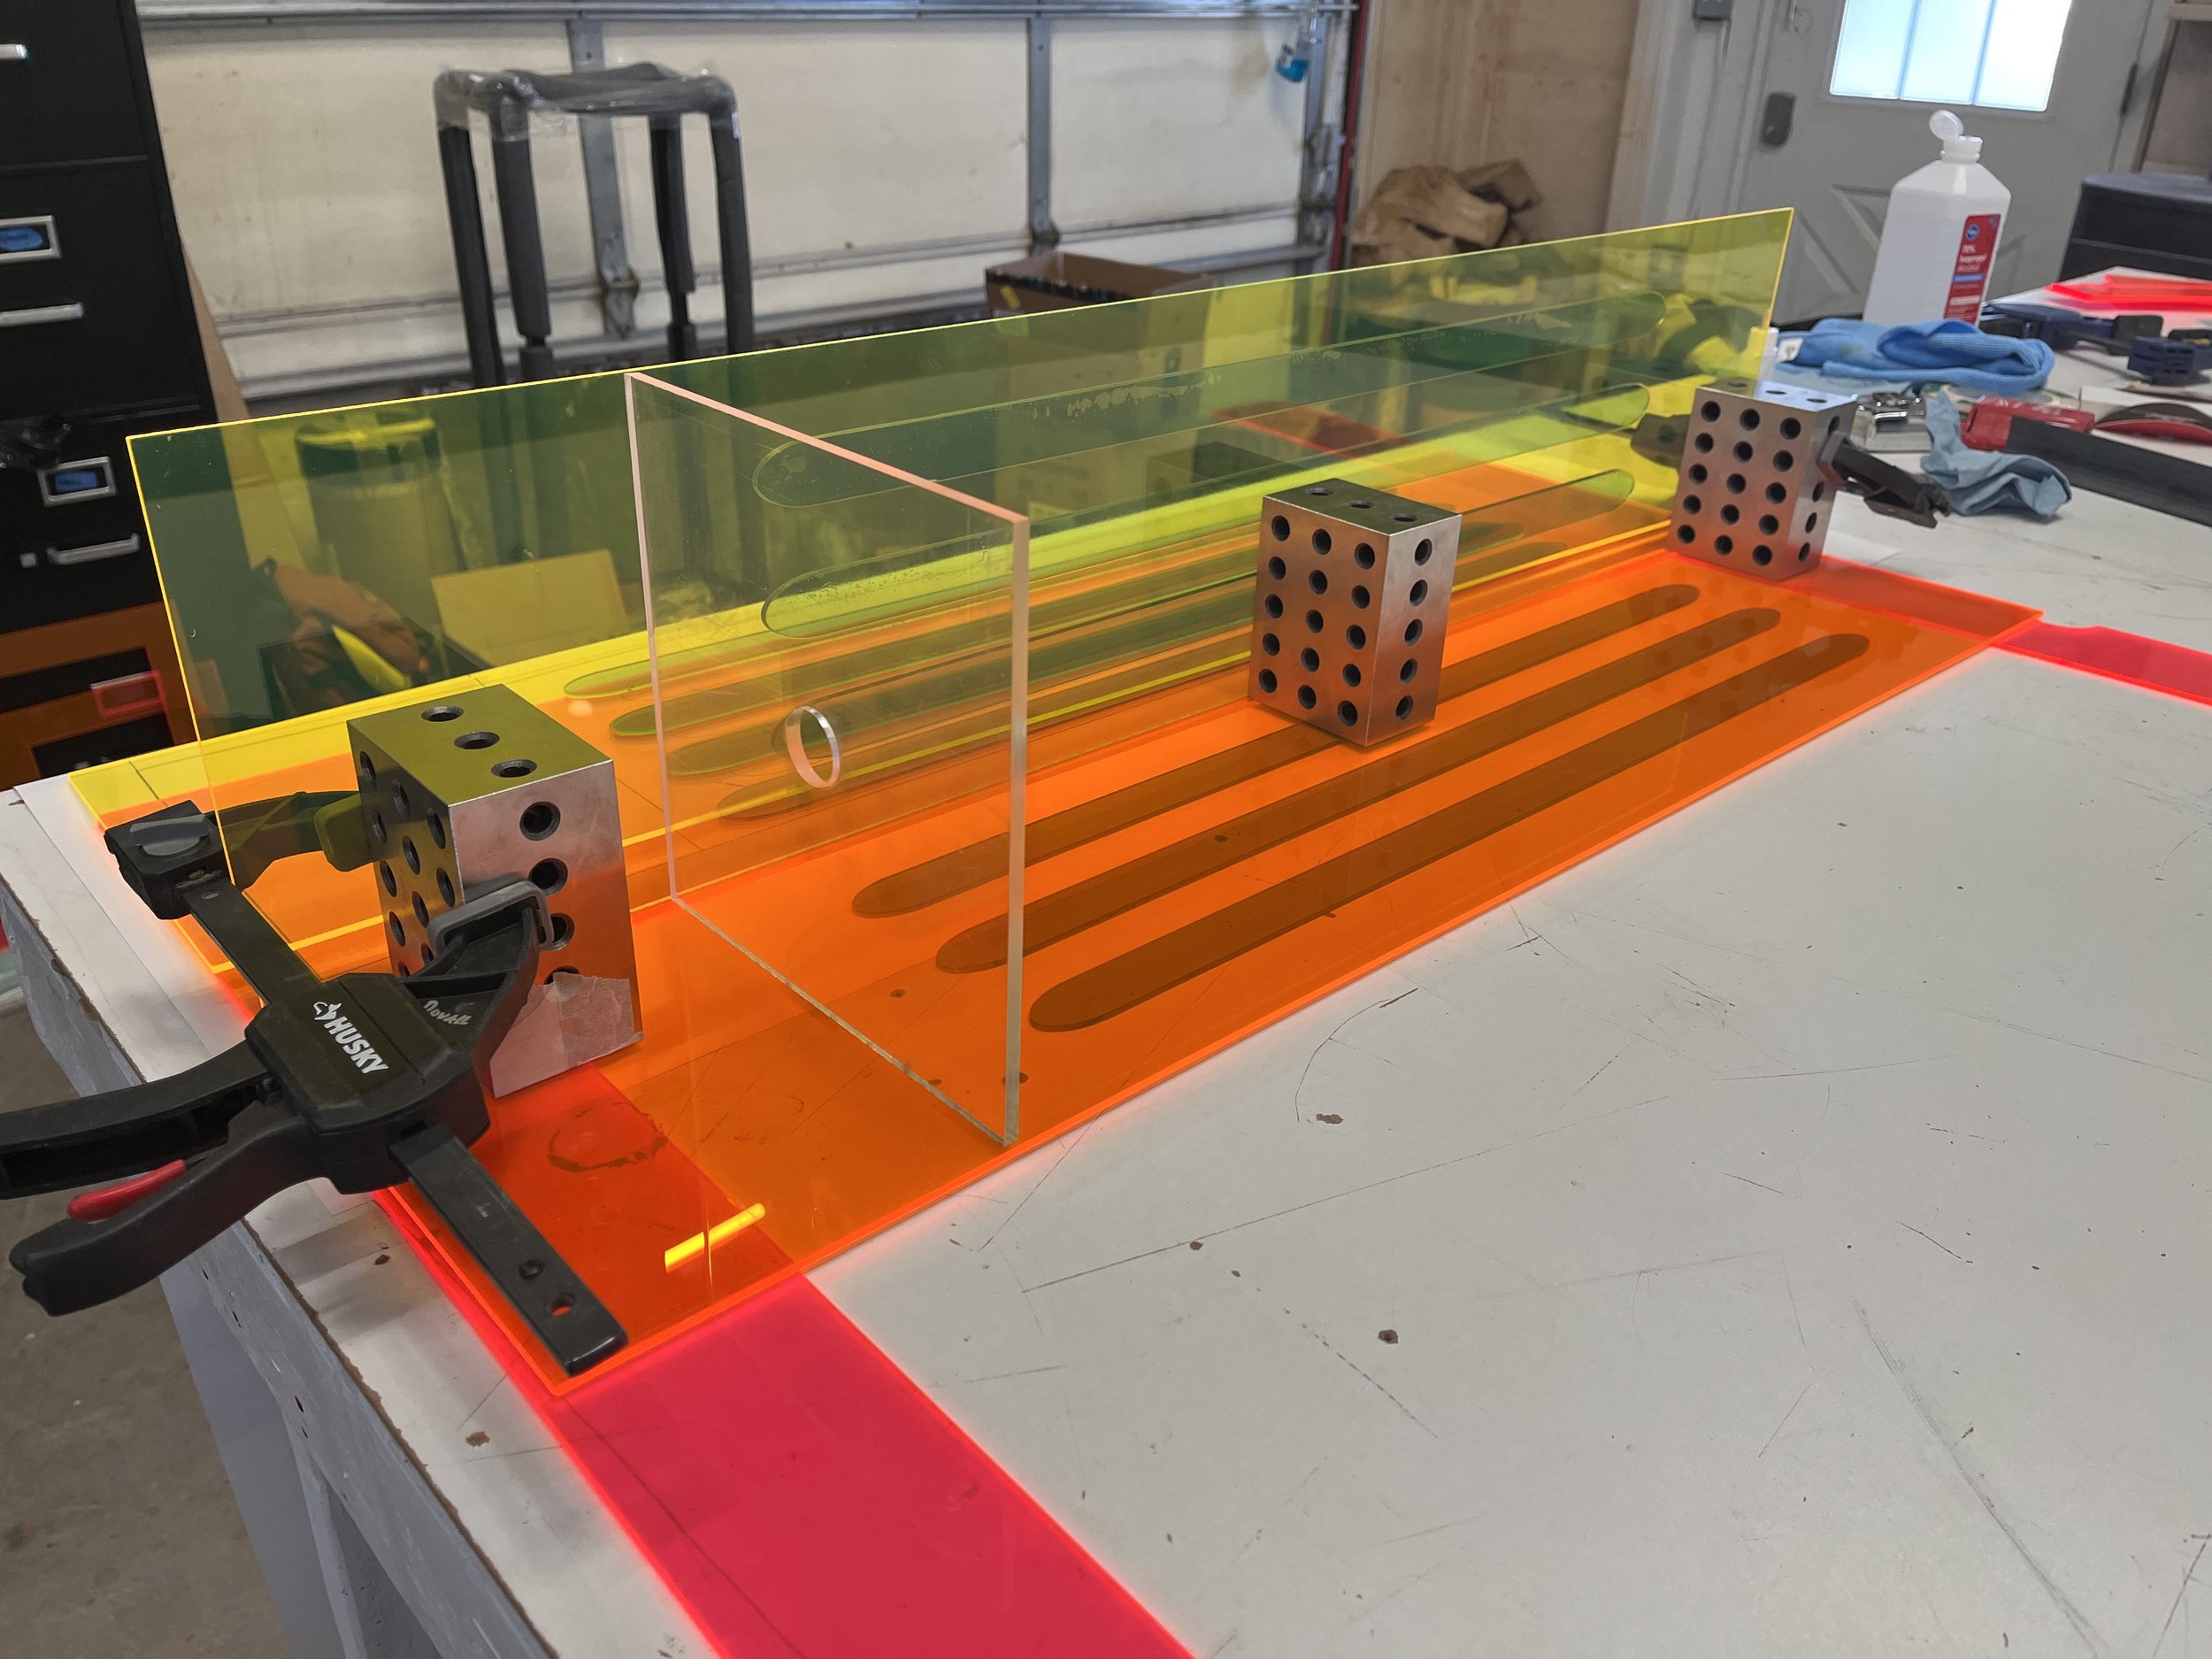
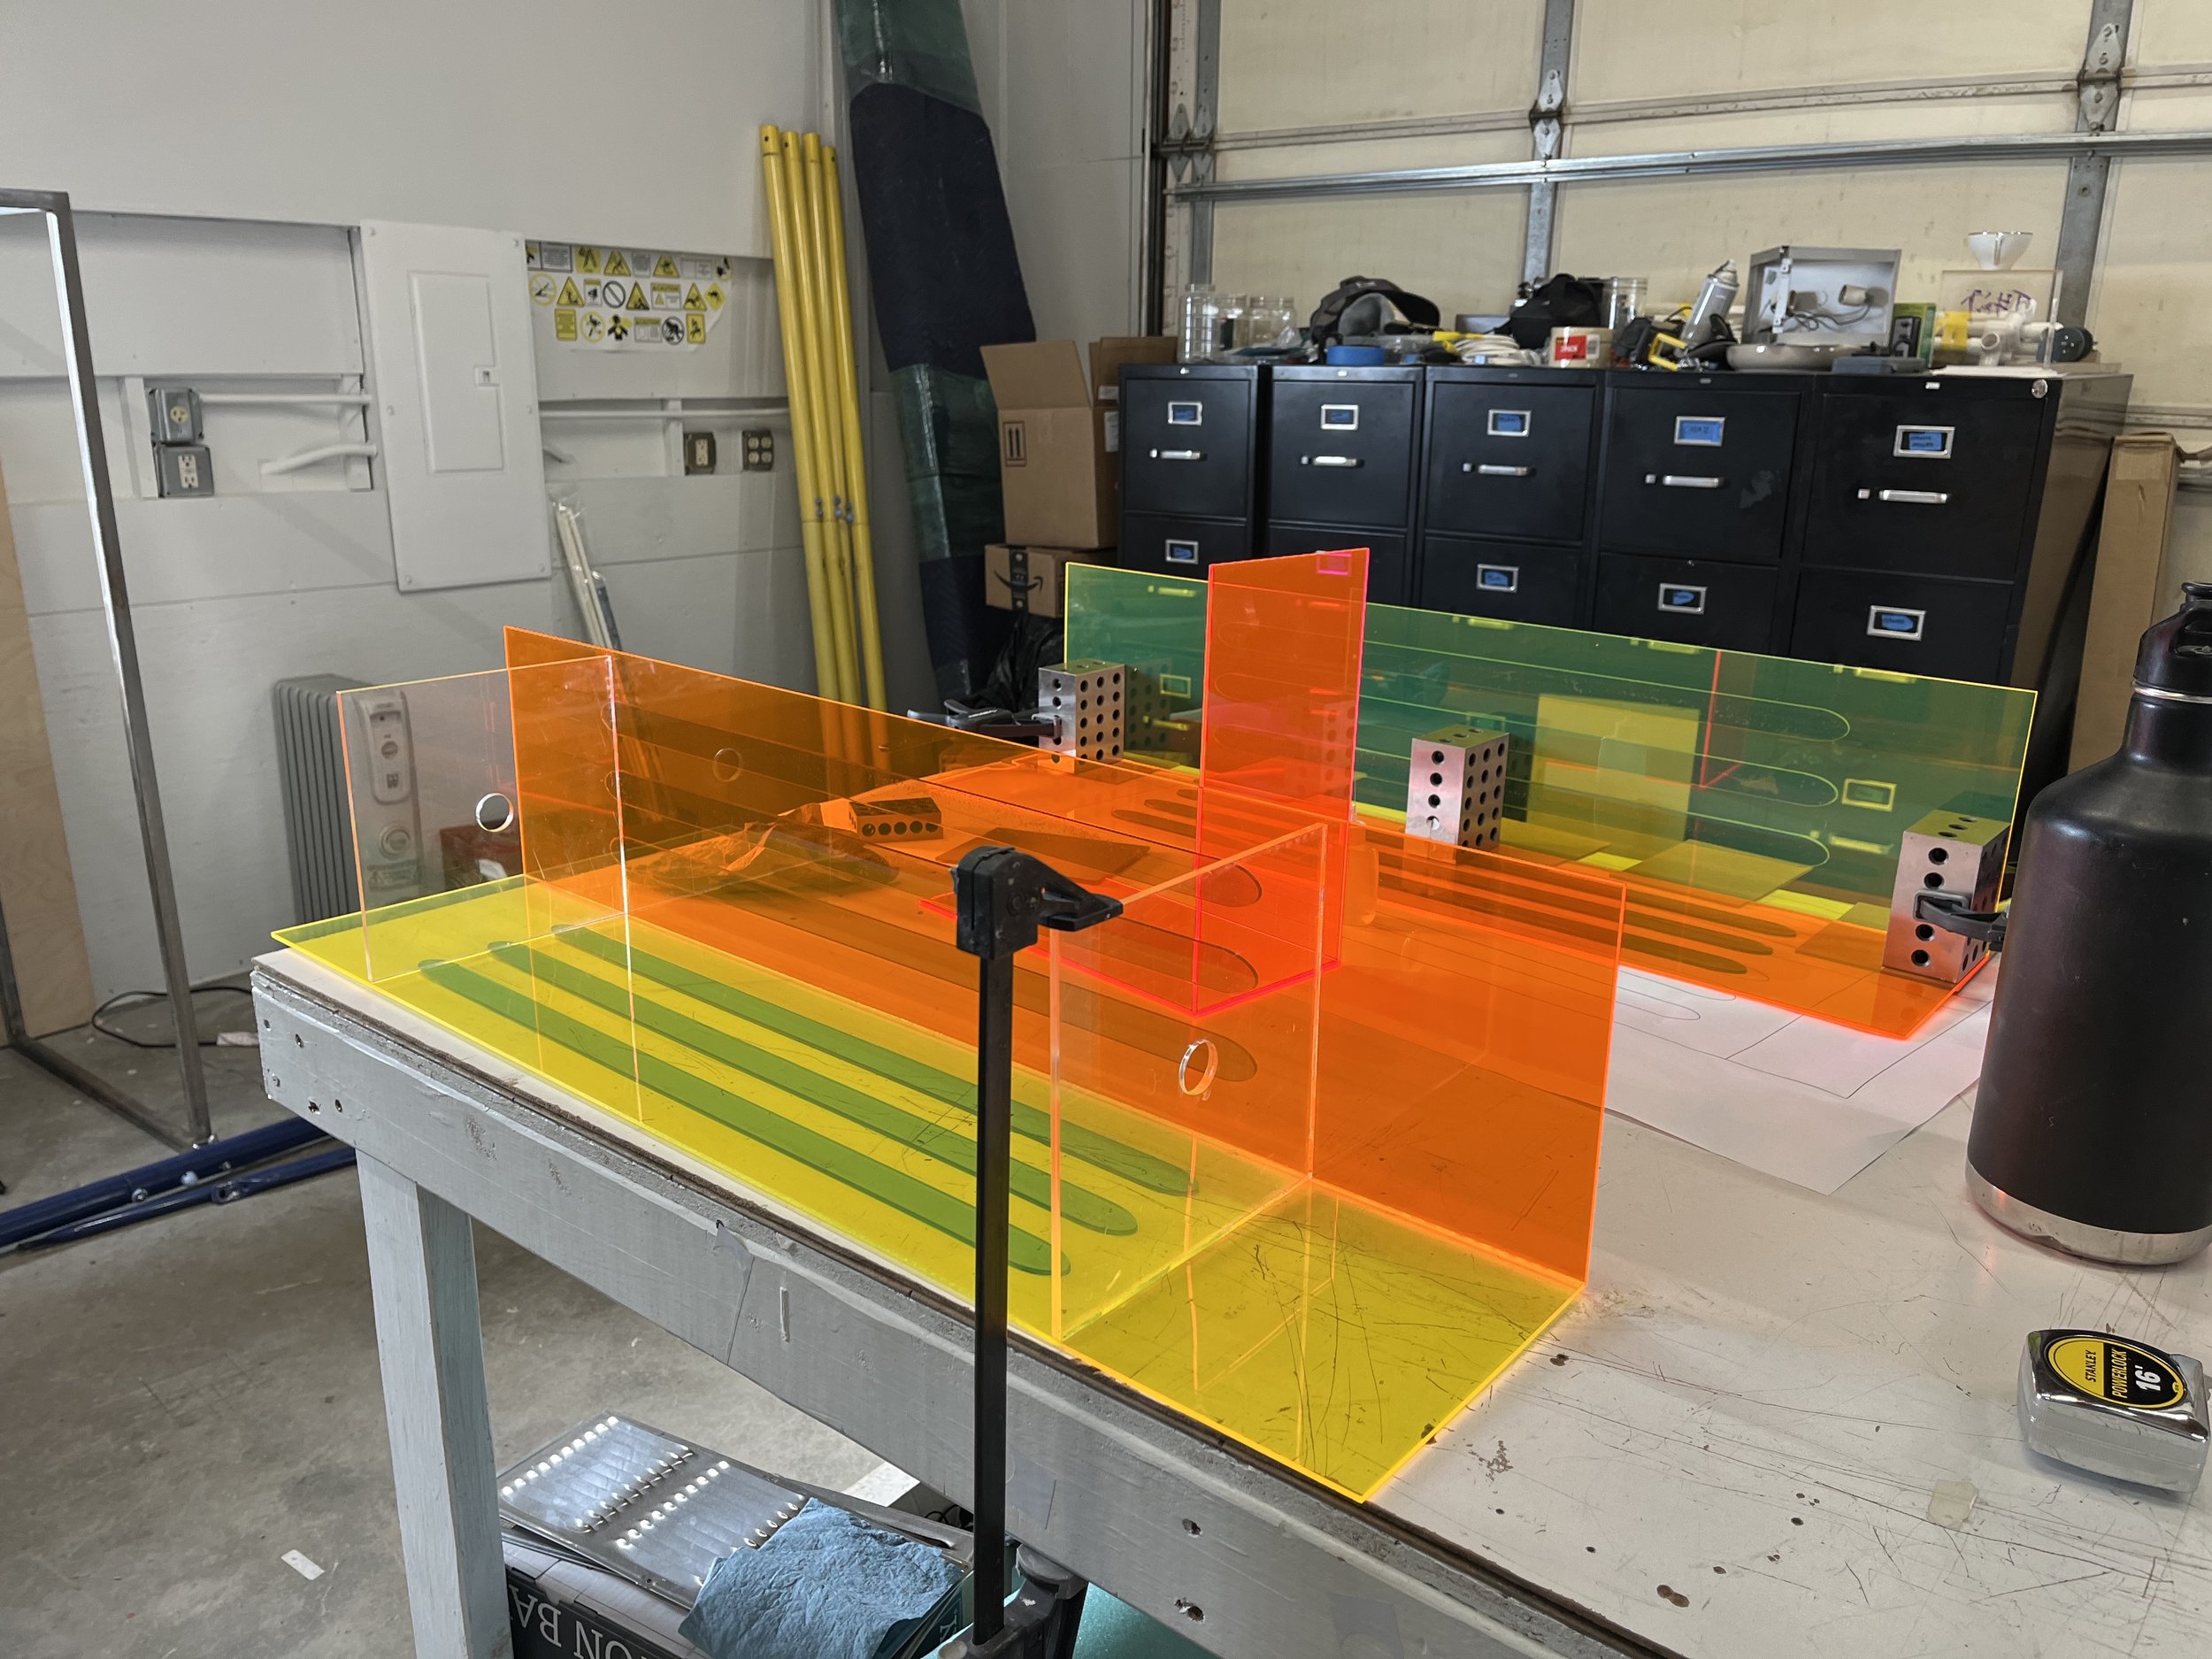
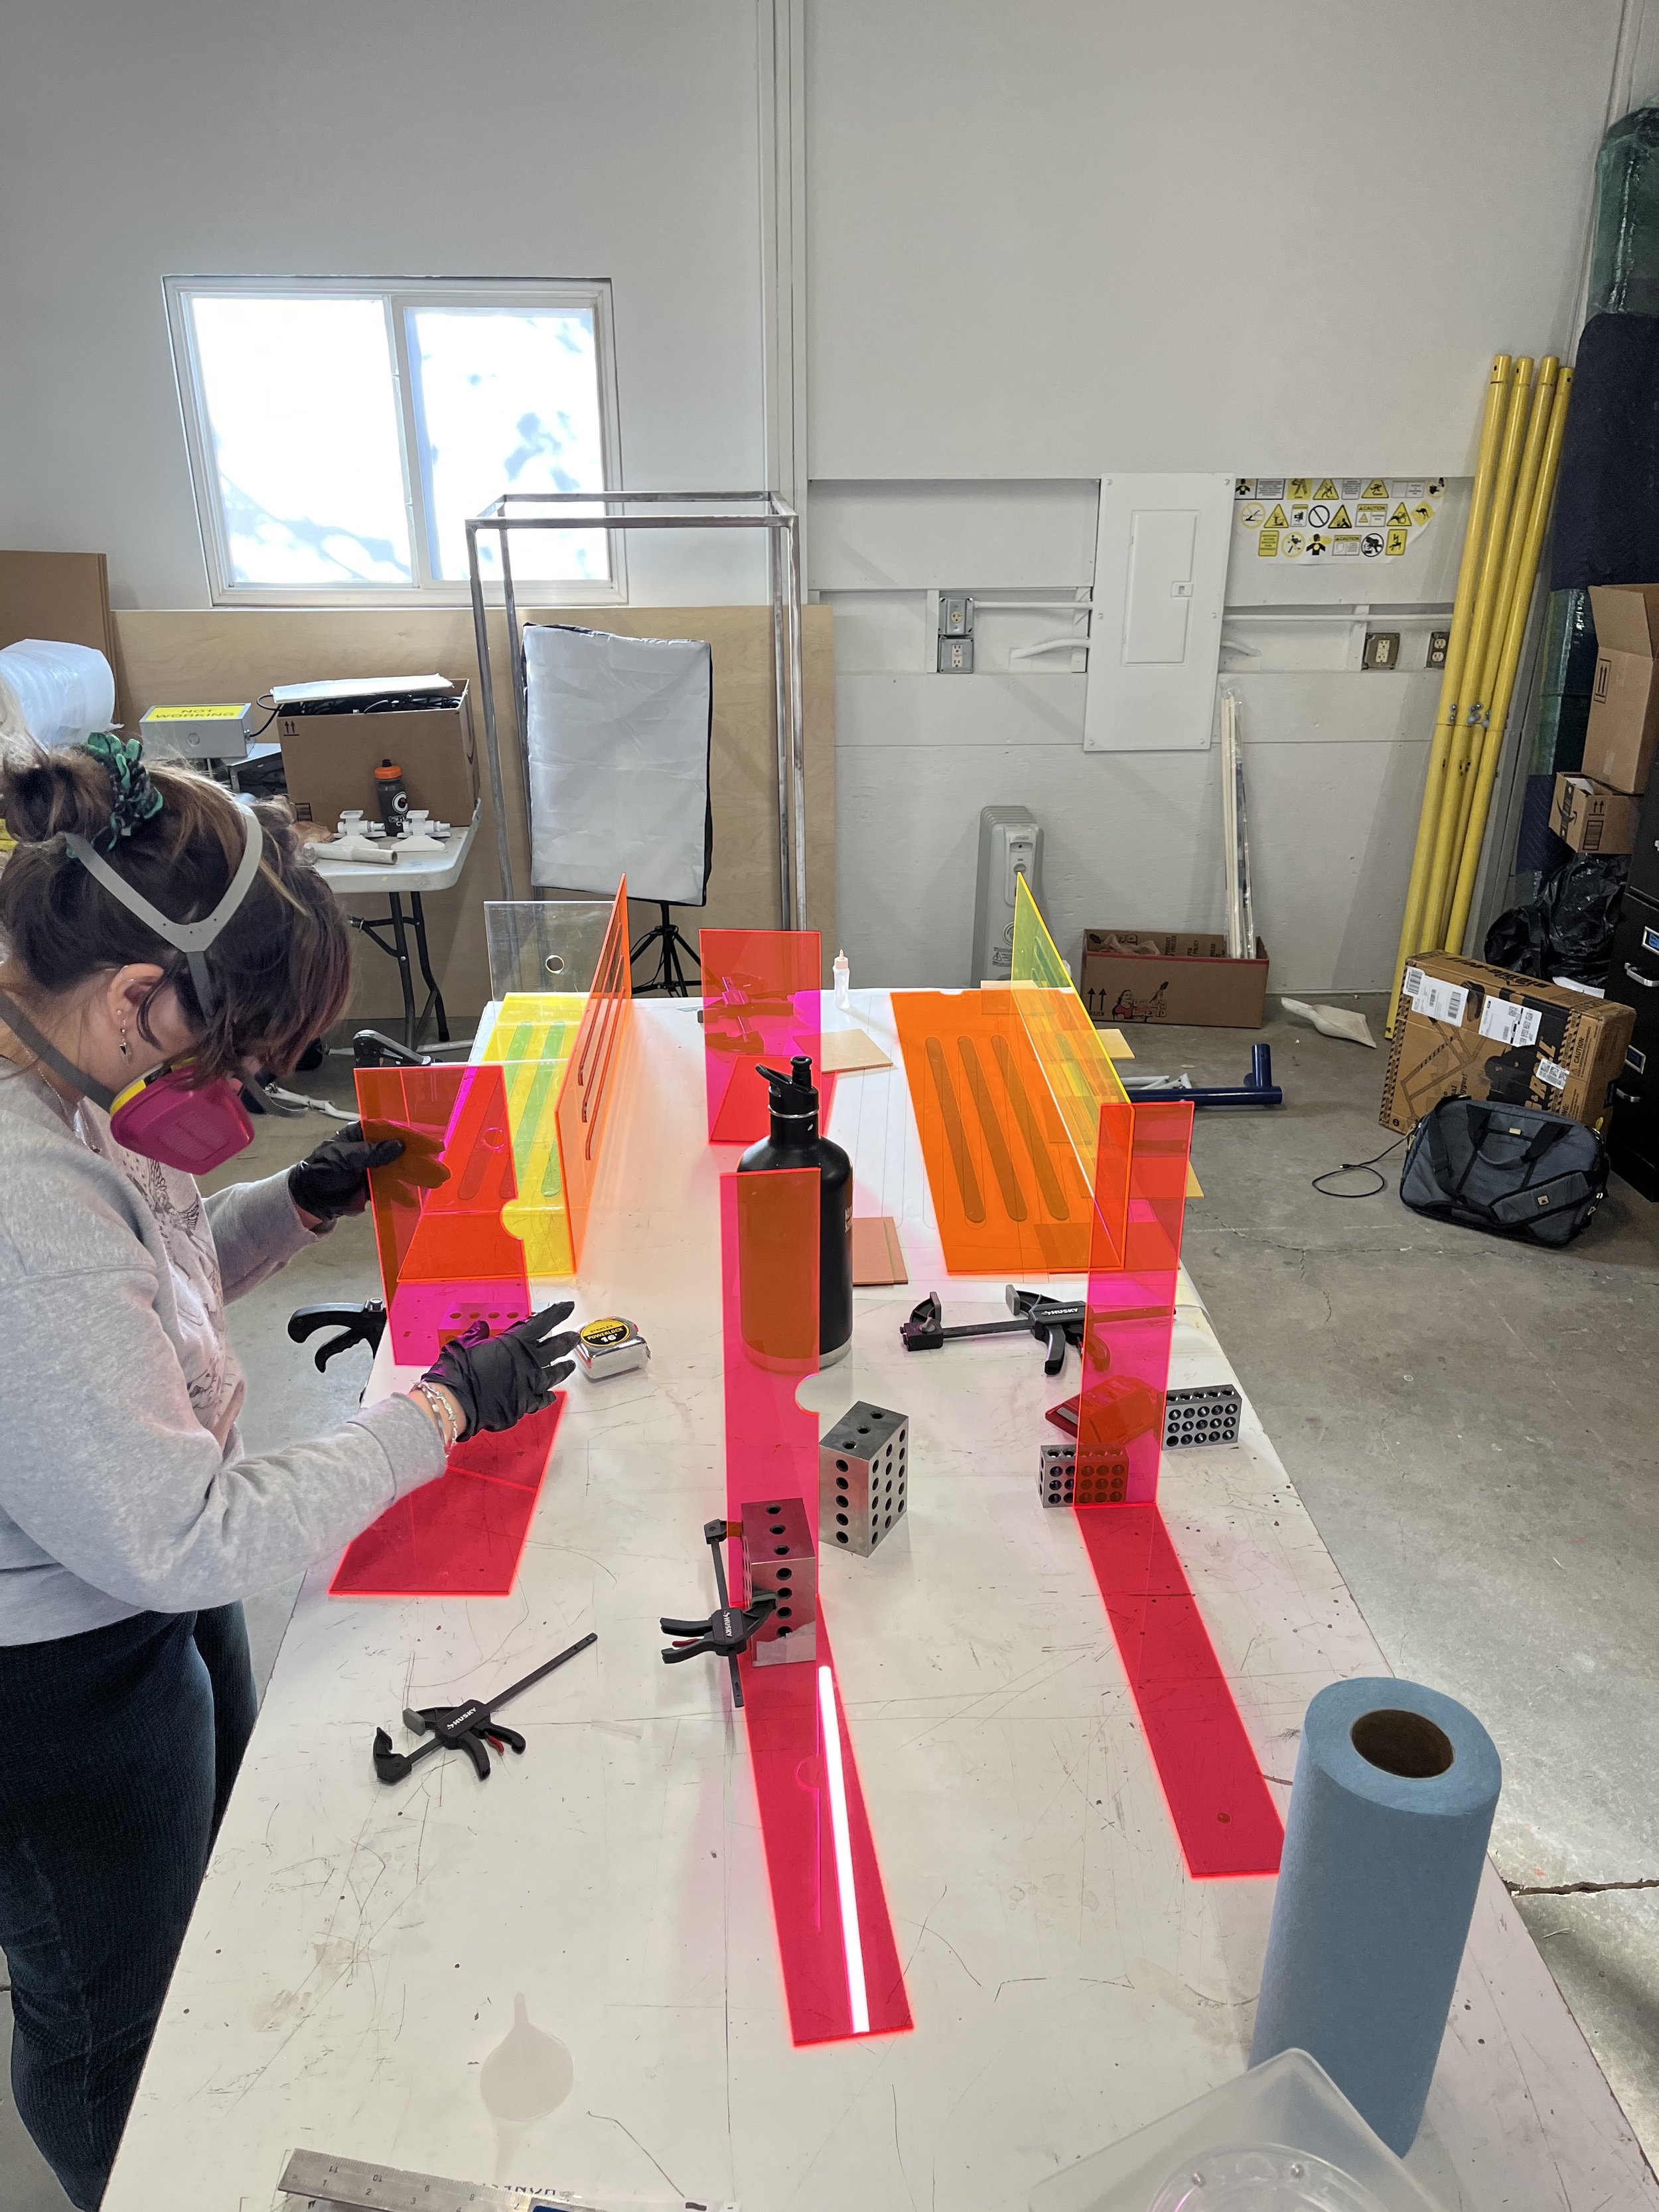
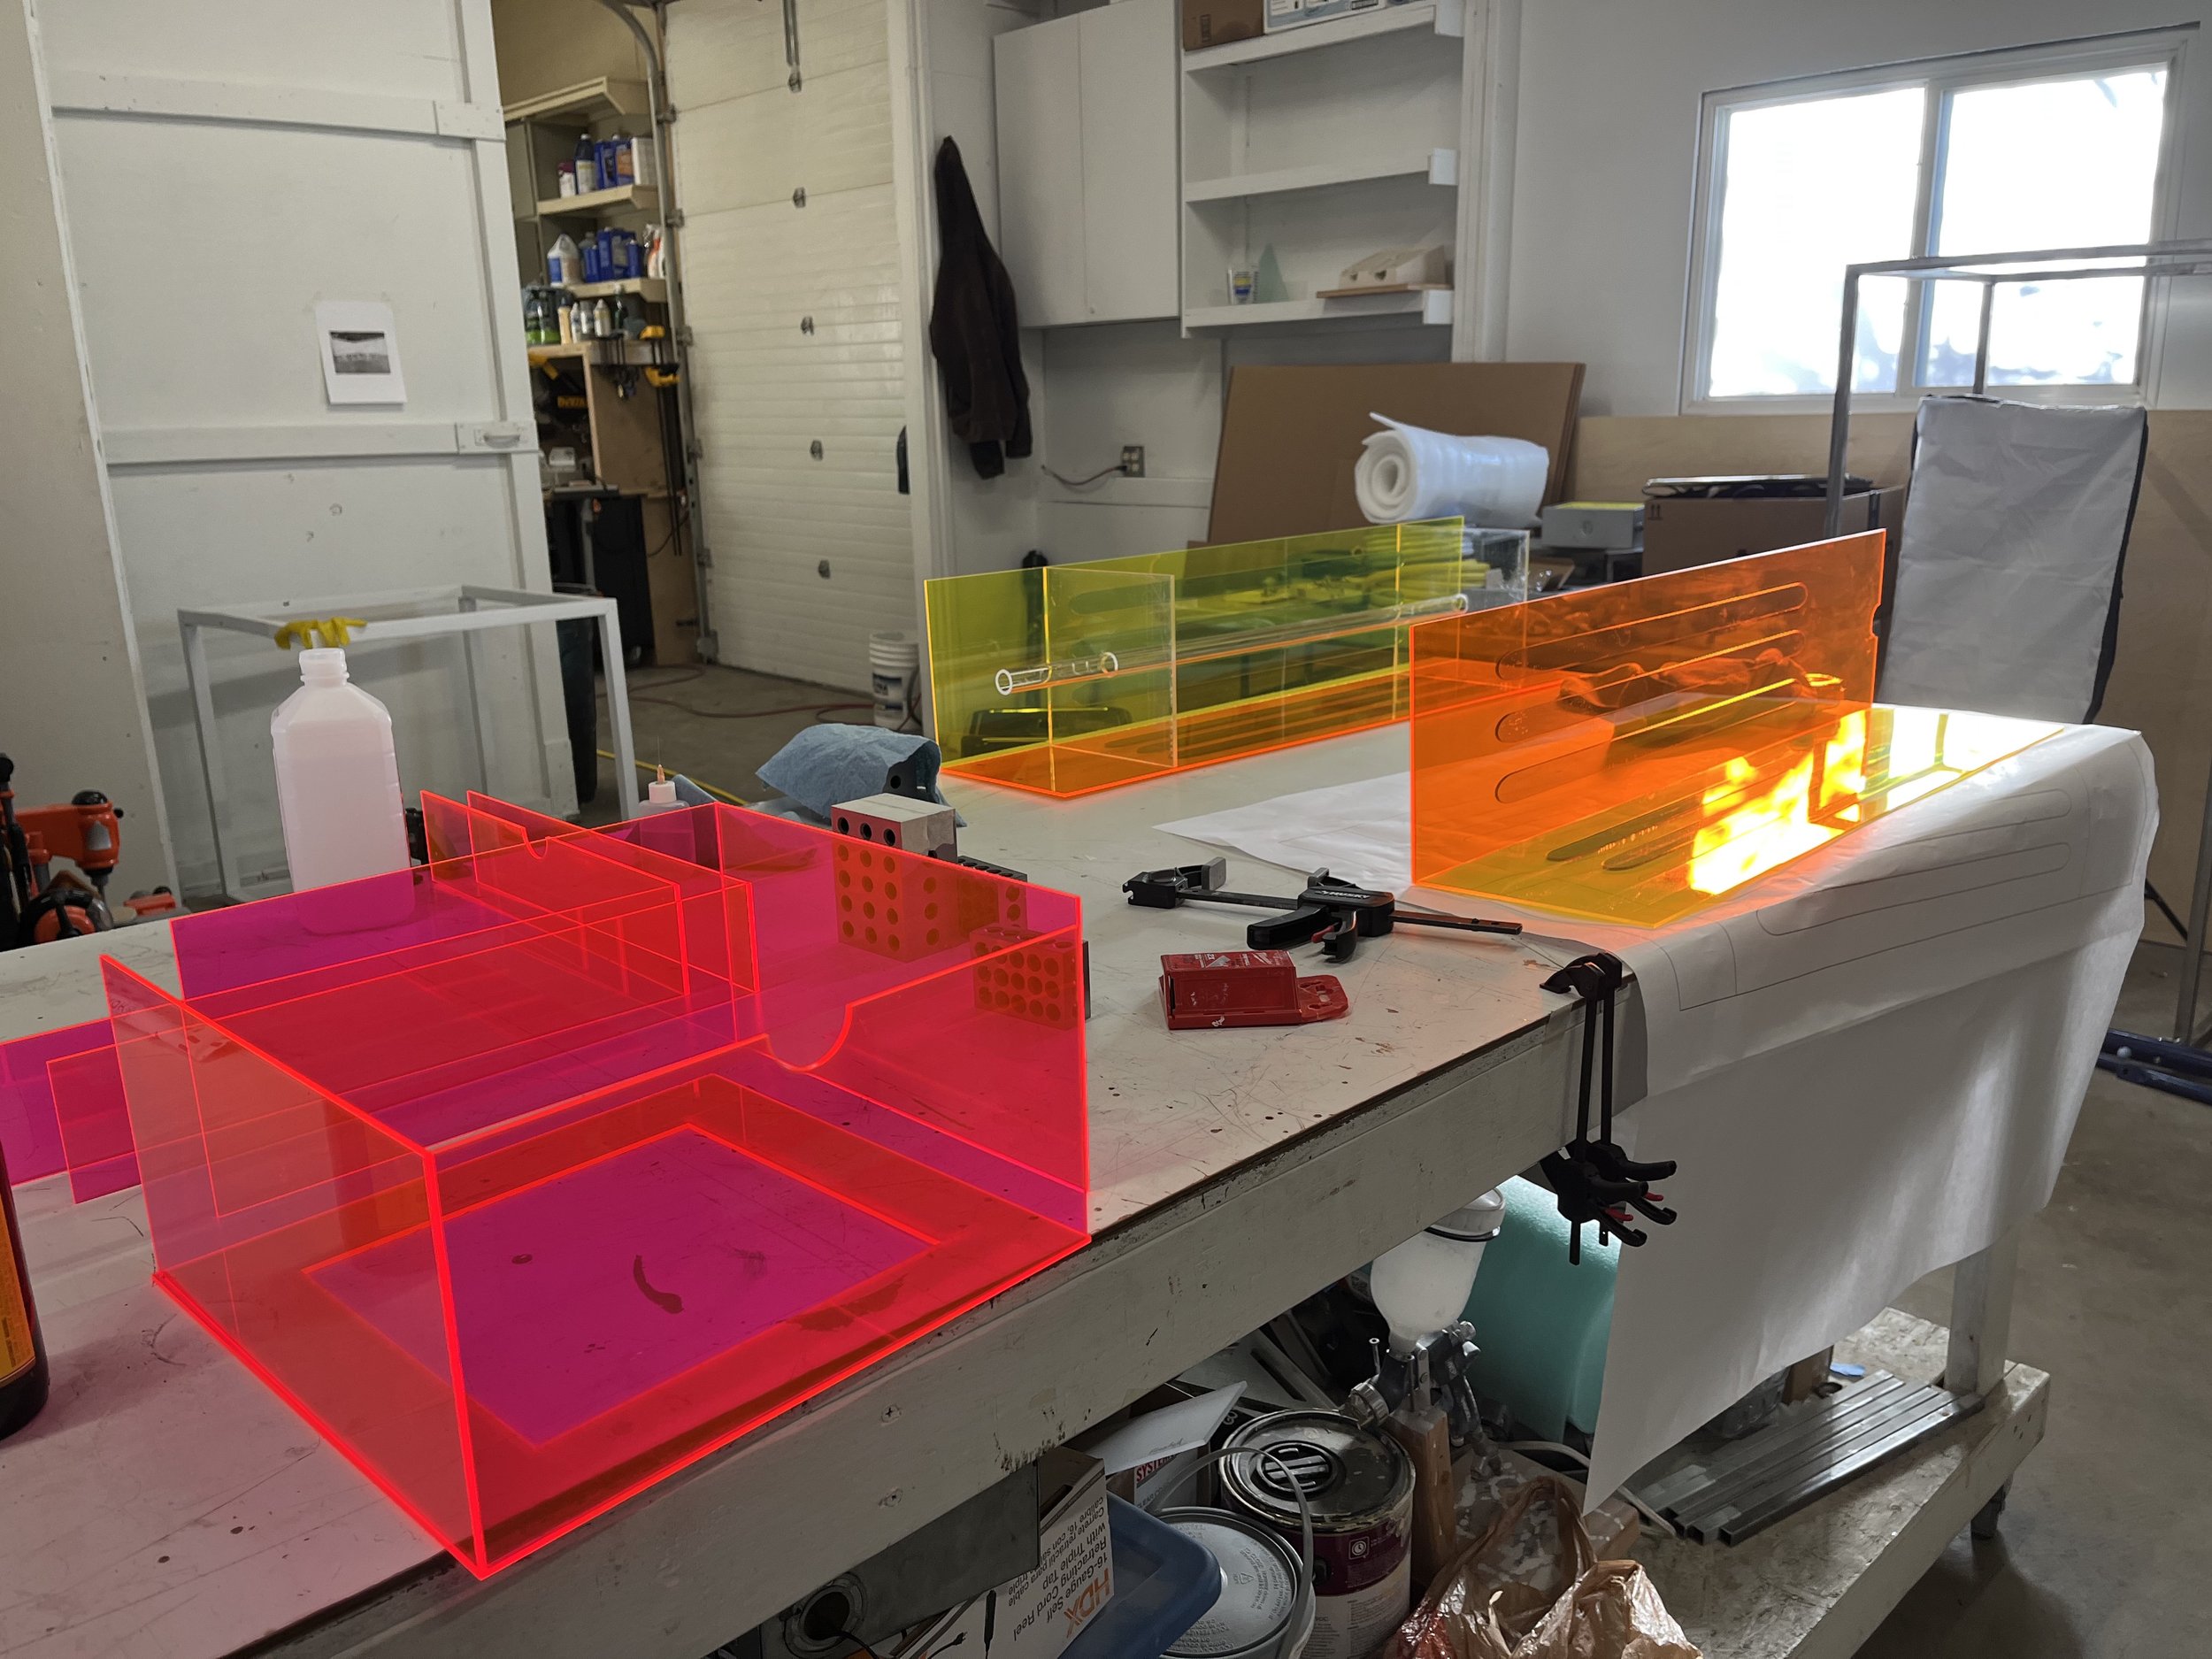
After all the acrylic was cut and prepped, it was time to get started with assembly. This was pretty much a four-hand job, so my friend and mentor Trey Duvall helped me with the construction. The order of assembly is depicted in the images below. Essentially we first welded on the ornamental pieces that go on the outside, the scroll swirls and blue flutes. Then built the trunk of the column including the interior supports and the tube. And then the two box feet were constructed as well as the scrolls welded onto the top plate. 1-2-3 blocks, clamps, and what we called “human clamps” (hands) were really instrumental in making the joints. This material is especially luminescent at the edges, it is important that the acrylic comes together at a nice seam. Also, due to the see-through properties of this type of acrylic, to-scale paper templates also came in handy to position or mark acrylic.
To join two pieces of acrylic together, the main method is using Weld-on which is a solvent that literally fuses together the plastic at a joint. It can be a pretty finicky material, especially if you’re working with stuff that is clear. Air bubbles and even wiped up drips are guaranteed to show up on your acrylic surface so it’s really important to practice your hand with the applicator bottle.


After all the 90° edges were welded together I had to tackle bending the acrylic top plate. The industrial standard for bending acrylic is using a professional line bender so we tried setting up a strip heater as pictured below. Other than the setup being pretty sketchy, the strip heater did not get hot enough to bend the acrylic quick enough, so we changed plans.
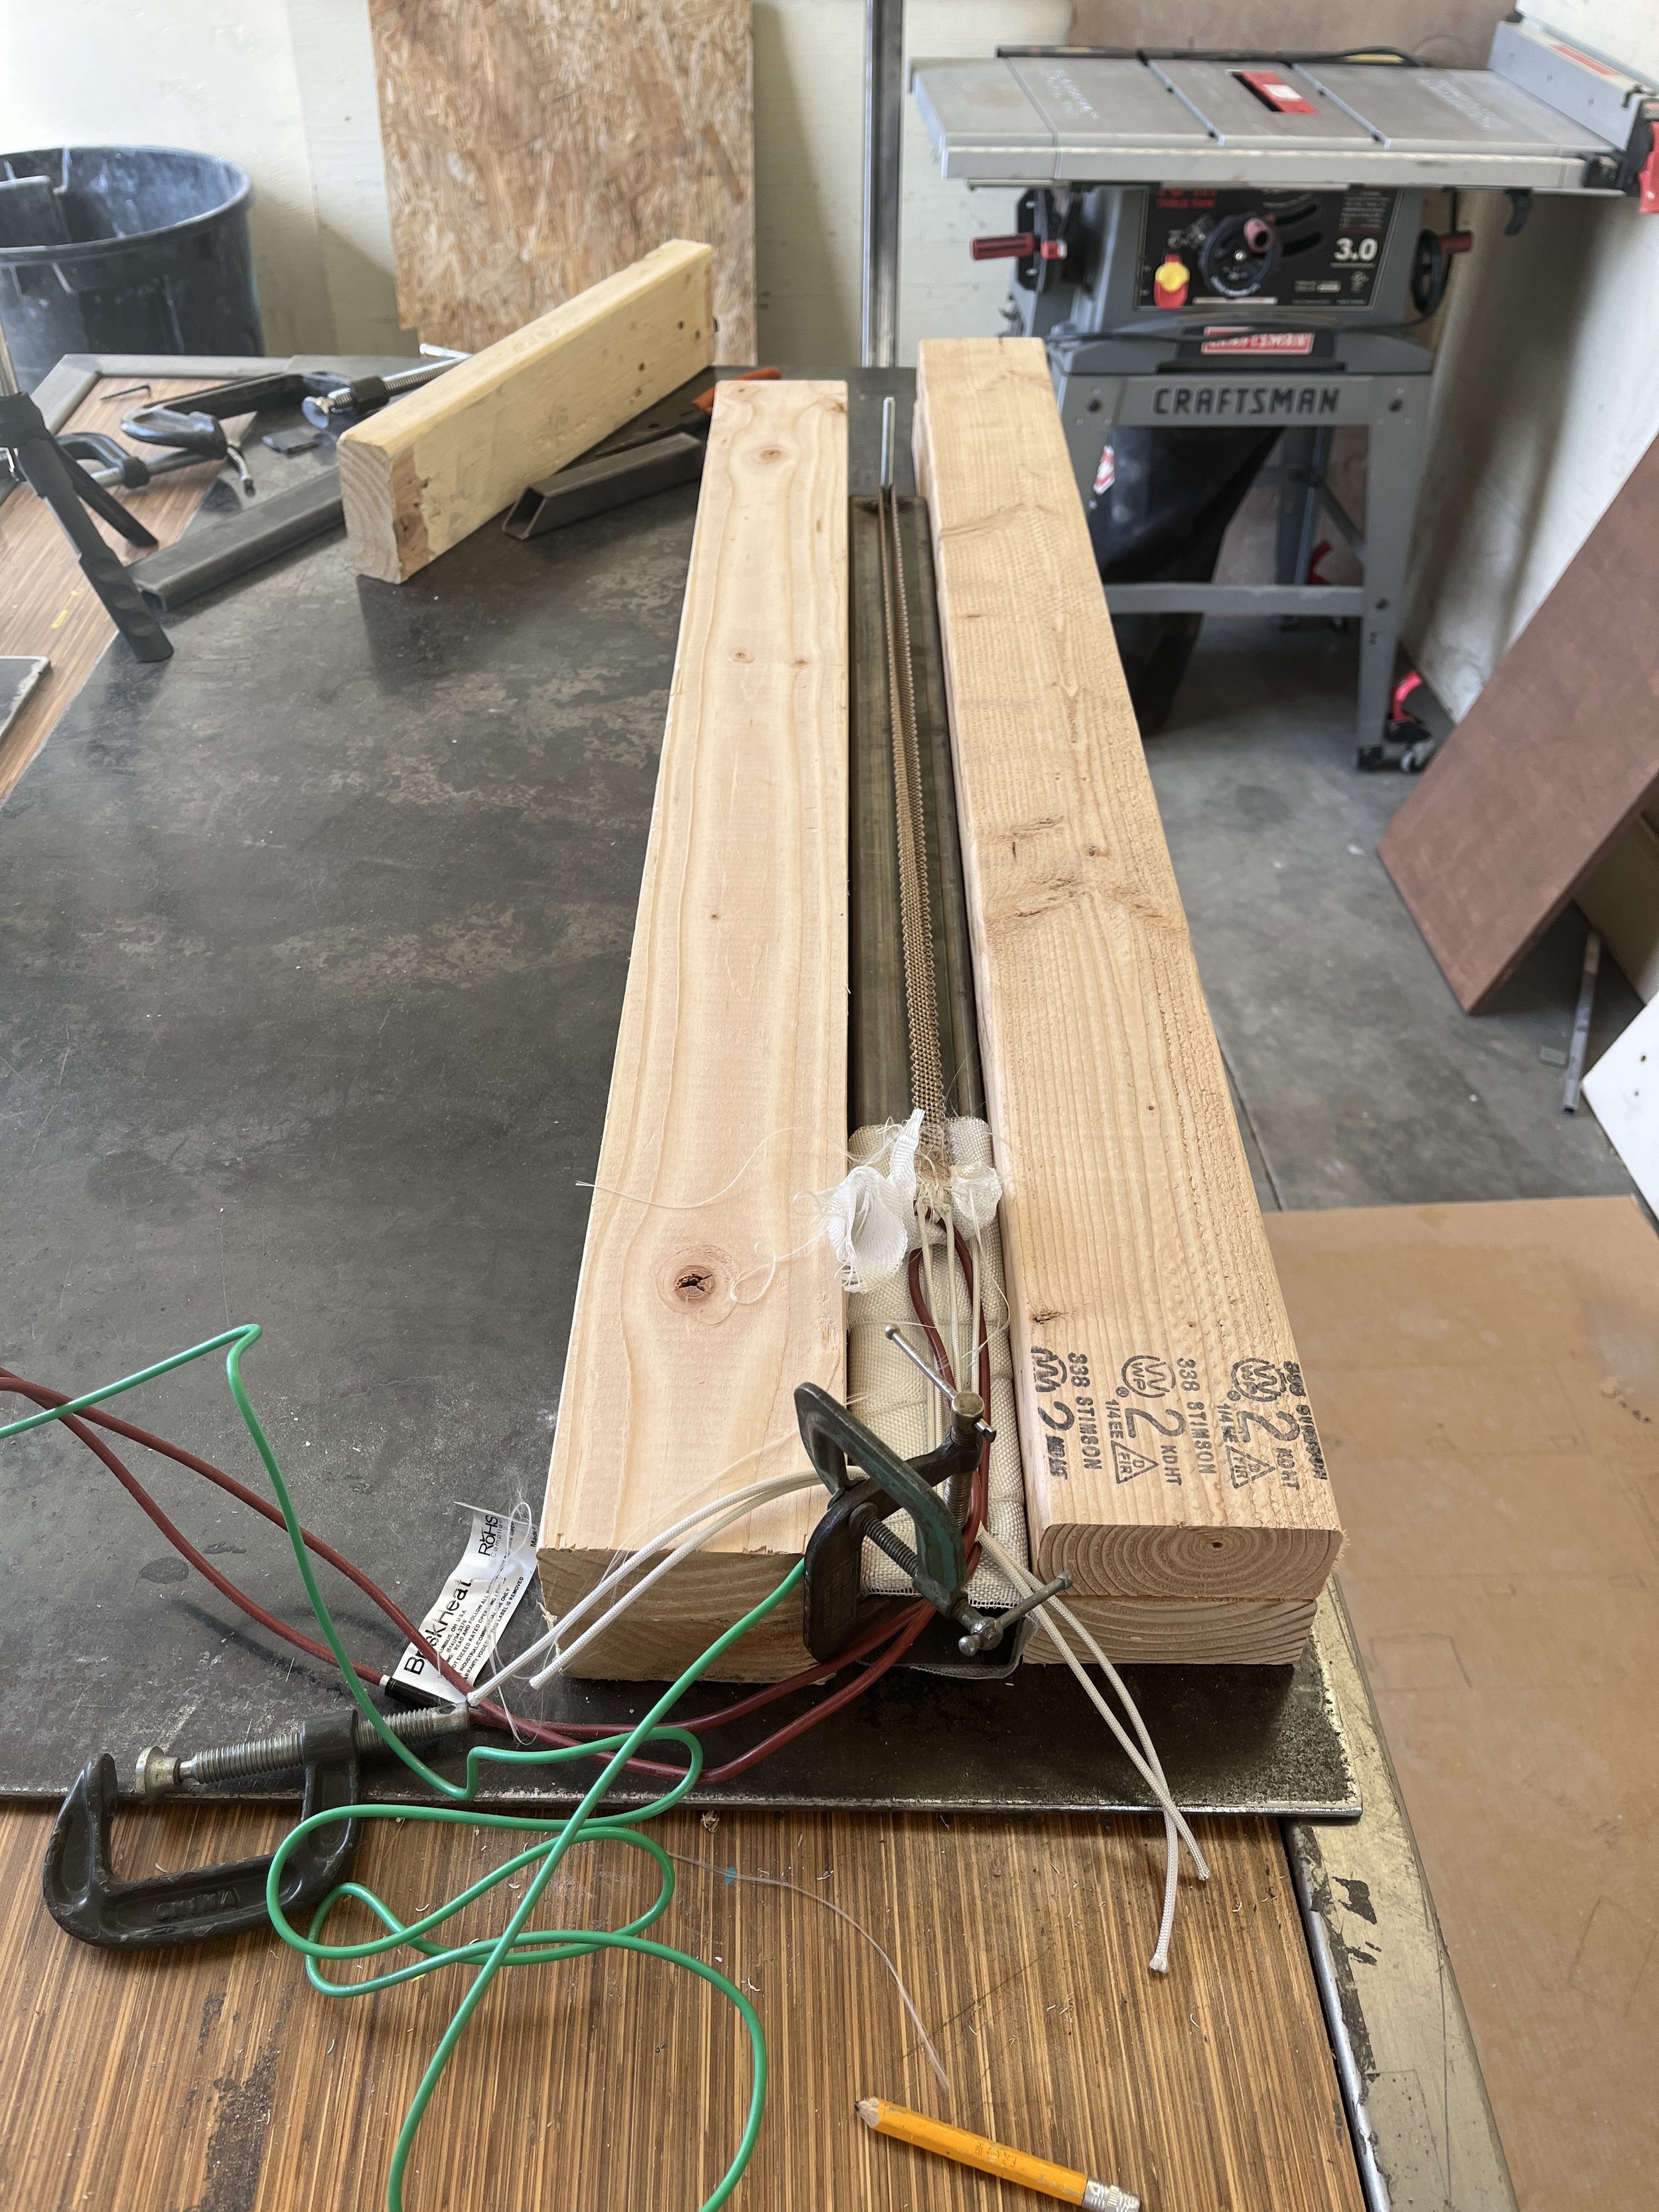
Acrylic line bender
Using a hot air gun and a counter weight really made the bending process really quick and clean. This is a very involved process that definitely requires at least four hands, so Trey helped me with this as well.

Complete motor housing stack-up with bent top-plate
Throughout this build, I kept on asking myself what this pedestal would display, if anything at all. I was definitely inspired by ancient greek relics and I eventually decided a classical vase would be the perfect topper and give me a chance to try out some etching.

Greek vase reference


Vase illustrator drawing
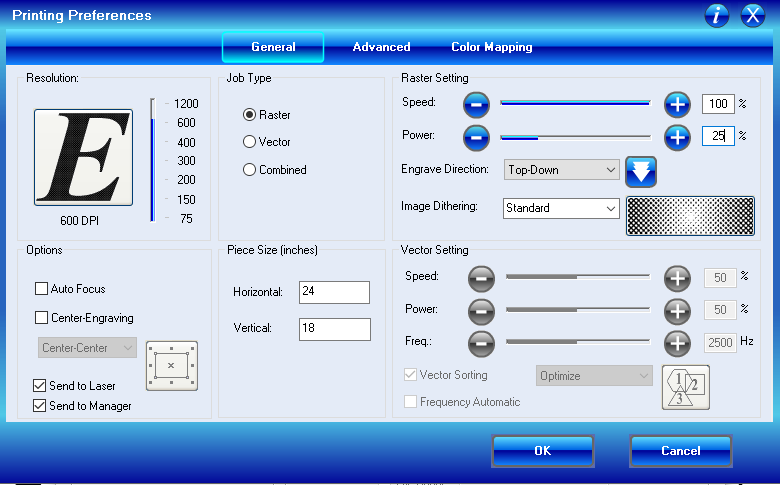
I learned so much about using the Epilog Engraver at the SparkFun office in drawing and creating this vase. For etching the Epilog engraver looks for a black fill with no line in your Illustrator file. I used my iPad and apple pencil to draw the vase scenes. I made the mistake of drawing the prototype etches using Illustrator’s Paintbrush Tool. That tool creates lines with anchor points, a given stroke, and thickness. To draw a custom engraving pattern I found the Blob Brush Tool worked for me which essentially creates vector shapes with both a stroke and fill.

Use the blob brush tool!
Etching laser printer settings
To create a cut, the Illustrator file you’re printing from needs a black line, no fill, and 0.001 stroke. I tried out different vector settings as well. The defaults outlined in the Epilog handbook usually require the cut to be done twice to get all the way through the thickness of the acrylic. This sometimes leads to non-perpendicular and wavy cuts. By slowing down the cutting speed, one cut can make it through the acrylic but the dimensions are less exact because the laser takes out a wider path out of the acrylic.
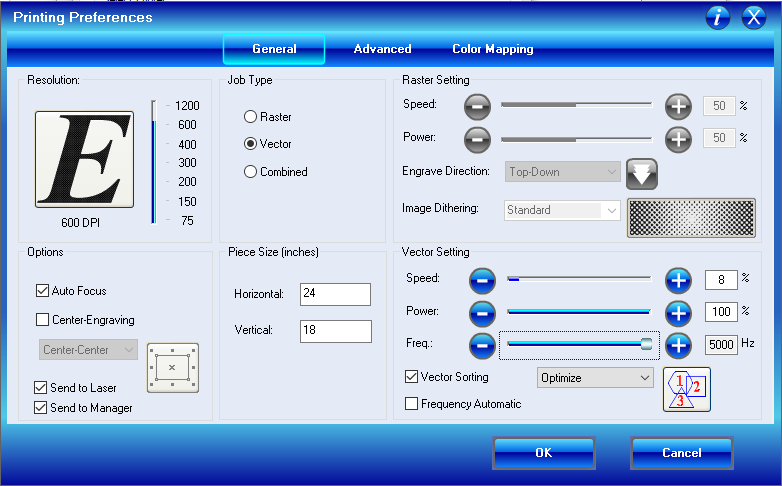
Cutting laser printer settings

Kinetic Column vase

The last part of the build process was putting all the pieces together and installing the circuitry. I was pretty confident in my electrical system design because I had used similar systems on projects in the past. Below is my circuit diagram and physical circuitry. Most of the connections are soldered and shrink-tubed and the boards glued into place. The code used to turn the motor can be found on my github repo and the parts list is linked in the “Materials” section.

Electrical schematic

Installed electronics
The last game we like to play in the integration phase is “where’s the squeak coming from?” Once the whole column was assembled and turning, there was a horrendous squeaking sound, acrylic scratching on acrylic. I determined it was coming from the acrylic rod scratching on a hole. Though it’s still not perfect, a little bit of filing and WD-40 helped bring down some of the noise. Easy, peasy, kinetic column!
Evaluation
Since the Kinetic Column is primarily an art piece and doesn’t serve any tangible purpose or function per se, I found it kind of challenging to evaluate this project. I tried to create a virtual critique by sending out a Google Form questionnaire to some of my friends and colleagues.
Here are the questions I asked and some of the best responses:
What is your name?
What's your professional background?
What's your relationship with art?
Name at least 3 things you first notice about the Kinetic Column
“Colorful, geometric and reflective”
“The way the light reflects off of the vase, the intricate designs in the vase, how the top part of the column is spinning”
Name at least 3 things the Kinetic Column makes you think of
“Roman architecture, vapor wave and the 1980’s”
“This art piece makes me think of my history lessons in high school, where we learned about the different column types in Greek antiquity. It also makes think about my head spinning, if it could, 360 degrees around my neck. But mostly it makes me think about catching the light from all sides, which no photographer ever achieved.”
Name at least 3 things this the Kinetic Column makes you feel and why
“Impressed, makes me pay attention to the amazing details, connected to history in a modern way!”
What can be improved about the Kinetic Column?
“Bent pieces aren't perfectly rolled (obviously difficult). Squeaks could be diminished (or enhanced). Some faces not as plumb/orthagonal”
If I were to give a personal assessment of my piece I think it’s a success. My most basic project needs of building a column out of acrylic and creating a turning top platform have been met. I had stretch goals of learning laser engraving and creating something to be displayed on the pedestal and I’ve met those as well. Overall the new skills I learned completing this project were acrylic welding, acrylic bending, and engraving. I’m really proud of my work!
Discussion
Building the Kinetic Column has taught me a lot of things. When I work with this neon acrylic material again I will be sure to remain patient, calm, and give myself enough time to build and install. This material is so beautiful and mesmerizing but it can be really fragile and hard to work with. In my experience, there’s a lot that can fail when designing a kinetic sculpture so it is wise to mitigate stress and panic by remaining calm when issues arise.
Since I don’t have a formal art education, another thing that I wasn’t expecting was the additive color effect of all this transparent plastic. The finished product came out more orange than I realized it would.
I also considered adding extra features. I ultimately decided against addressable LEDs because they would detract from the inherent luminescent nature of this material. The addition of the ivy leaves was also polarizing. I decided to keep them because they break up the transparent material a bit and I find them kind of ironic as something that’s inorganic posing as organic, as well as ivy vines being often associated with greek columns.
Lastly, this project is one of a few of my efforts to create open source art. I currently work at an open source technology company and am incredibly inspired by the sharing of information to recreate or expand upon projects. I think this makes the exclusive fields of creating art, designing tech, or writing code more accessible to a range of people that would not normally think to explore those realms.


Resources
Project resources
Historical research
Illustrator tips
Acrylic fabrication