
Ever want to buy a custom shirt and it doesn’t exist? Ever wonder what people do with Cricuts?! Well you can make custom graphics and text for clothing using heat transfer vinyl!
My school has a bunch of Cricut knock-offs called Cameo. I was actually first introduced to them in my first semester Lo-Fi Hi-Impact class at ITP. I’ve linked some docs from that class below for my own reference I guess.
First off, create your design in Illustrator. If your design includes text, make sure to “create outlines” for it. Save the Illustrator file as a DXF filetype. The Cameo works with this ancient software called Silhouette Studio, make sure you have that.
Bring your design into the Cameo software by either opening it or dragging the DXF file into the software. Make sure to mirror the design and resize it to fit your surface. The maximum cut size is 12 inches in width but I think the length can be whatever because the material passes through the machine.

Now you are ready to setup your Cameo machine. Plug it into power. Then connect the Cameo to your computer using the printer/USB cable.
Prep your vinyl by cutting it to the relative size of your design. Put the vinyl shiny side down on the sticky cutting board. The ITP cutting boards are … well loved, so they’re not so sticky anymore, but a little tape can keep the vinyl in place. Load the cutting mat with the material into the Cameo machine.
In Silhouette Studio, navigate to the “SEND” tab. Choose “Heat Transfer, Smooth” as the material. The settings that go with this material have worked for me, so no need to adjust the blade depth or speed. Make sure the software detects the machine connected to your computer and hit the “SEND” button to start cutting.
Once the machine has stopped cutting, eject the mat from the machine. The next step is called weeding, which is removing all the excess material from the plastic backing. I grabbed my handy, super-sharp tweezers and went really slow to make sure I wasn’t pulling up any of my design.
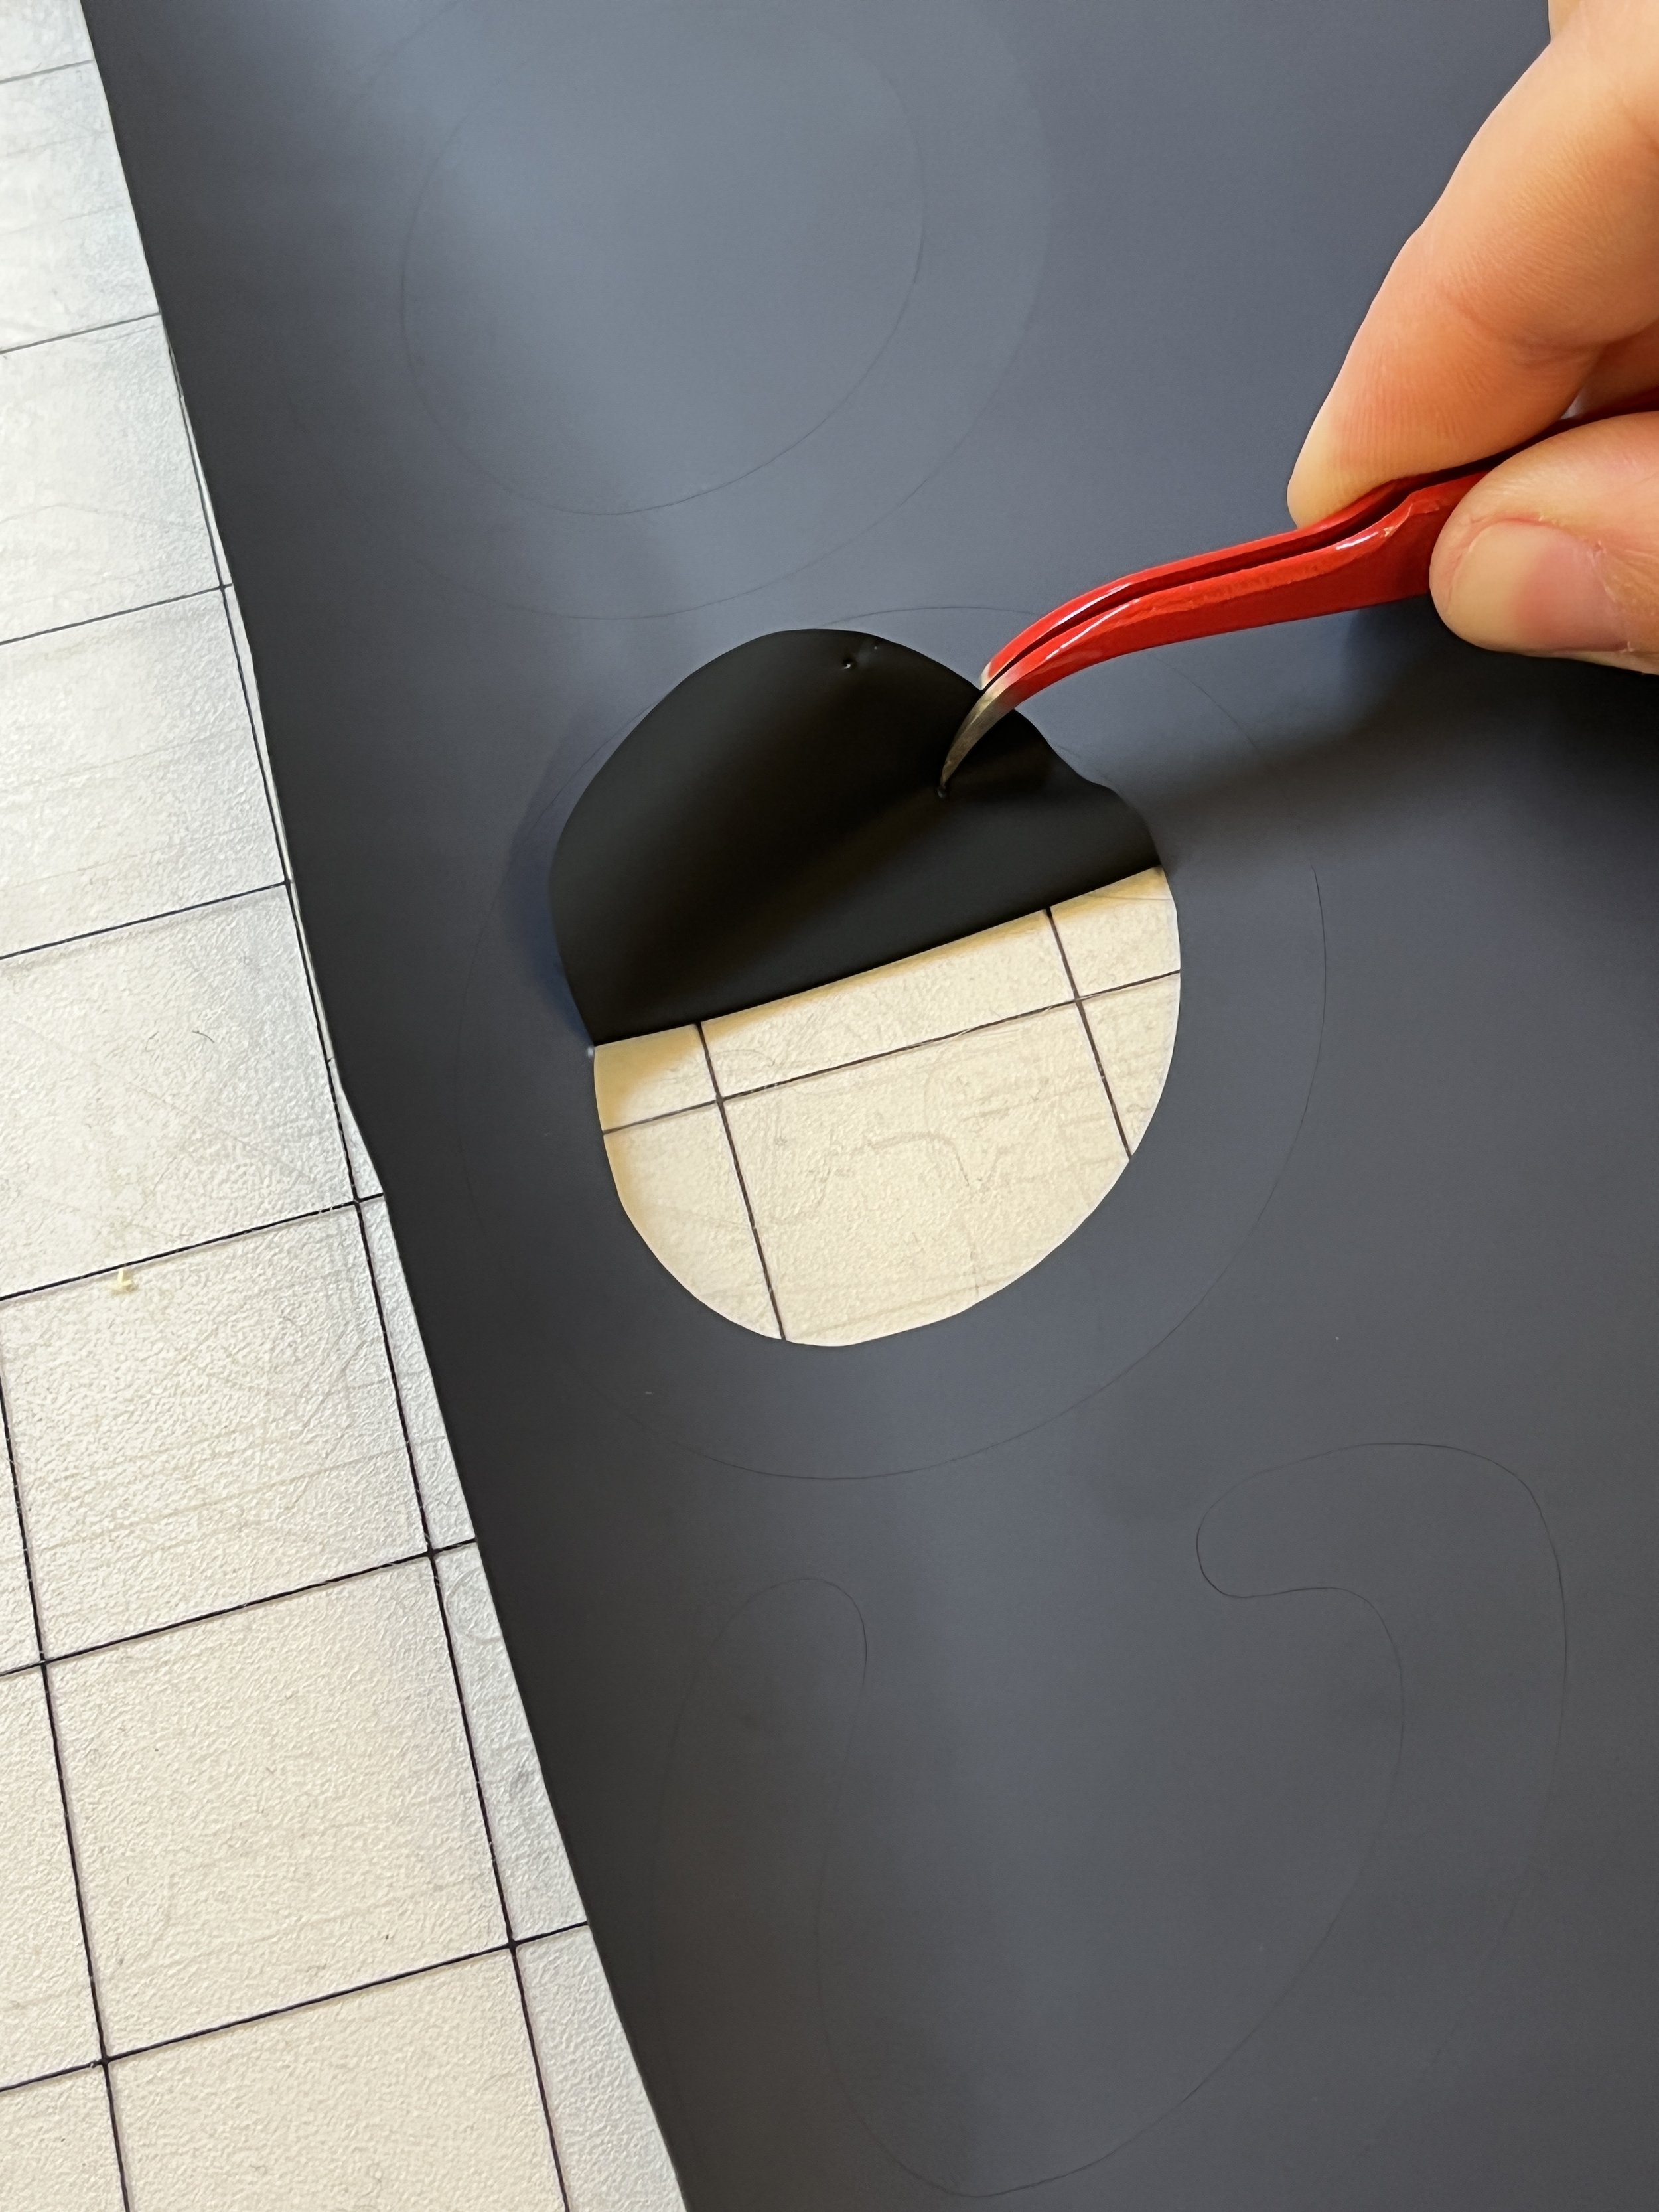


Before weeding

After weeding
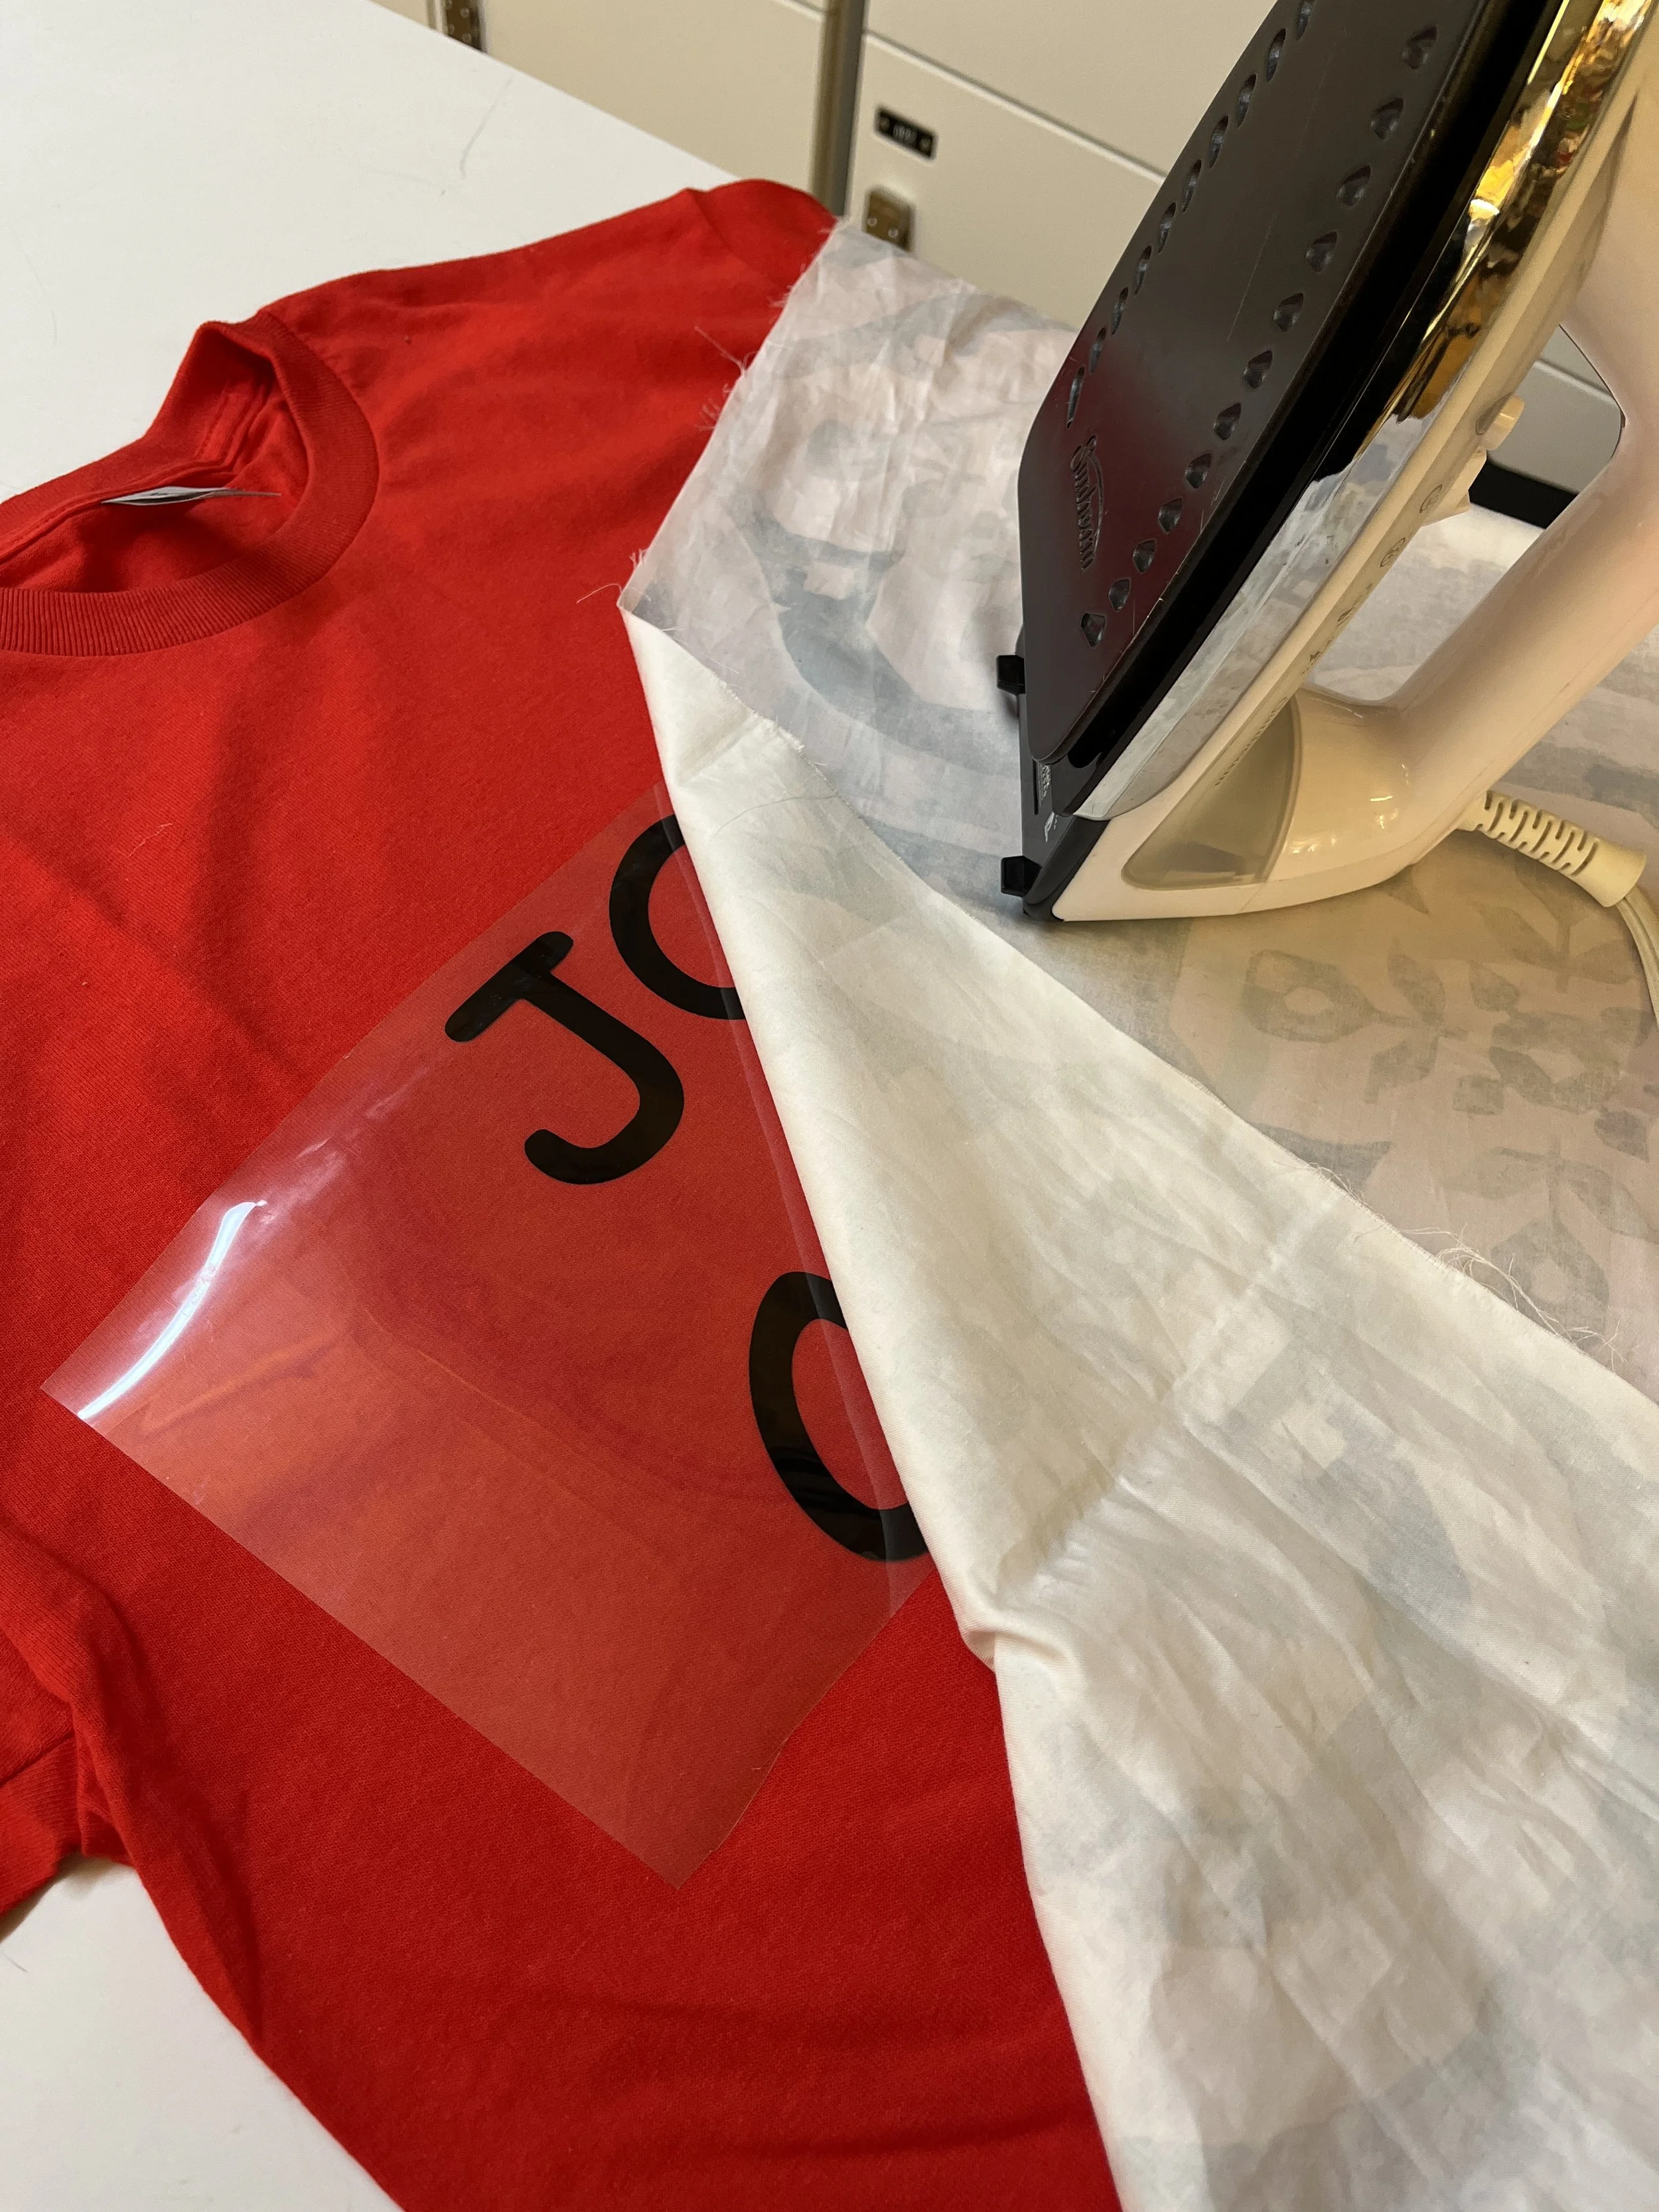
Once the vinyl was weeded, I flipped it over and placed it on my surface, in this case a cotton T-shirt, plastic side up. Then, all you need to do is iron it in place and peel the plastic away. To make sure the vinyl was really well attached and not curling up on the edges, I turned the shirt inside out and ironed some more from the inside.


Final Product


References
Cameo Workshop from LoFi High Impact