
What is Nginx?
Nginx is a popular web server that hosts many high-traffic sites on the internet.
Process
Setting up the Nginx Server

I am following this tutorial from Digital Ocean to set up my Nginx server. First, I updated the “apt” packaging system and then “sudo apt install nginx”. For some reason I am still running into this error and am not sure why because I’ve definitely rebooted my Droplet.
Next, I needed to adjust the firewall and luckily Nginx registers itself with ufw (uncomplicated firewall) upon installation. The instructions for this assignment said to configure our server for both HTTP and HTTPS requests so that would mean opening up both port 80 and 443.


Looks like Nginx is running!


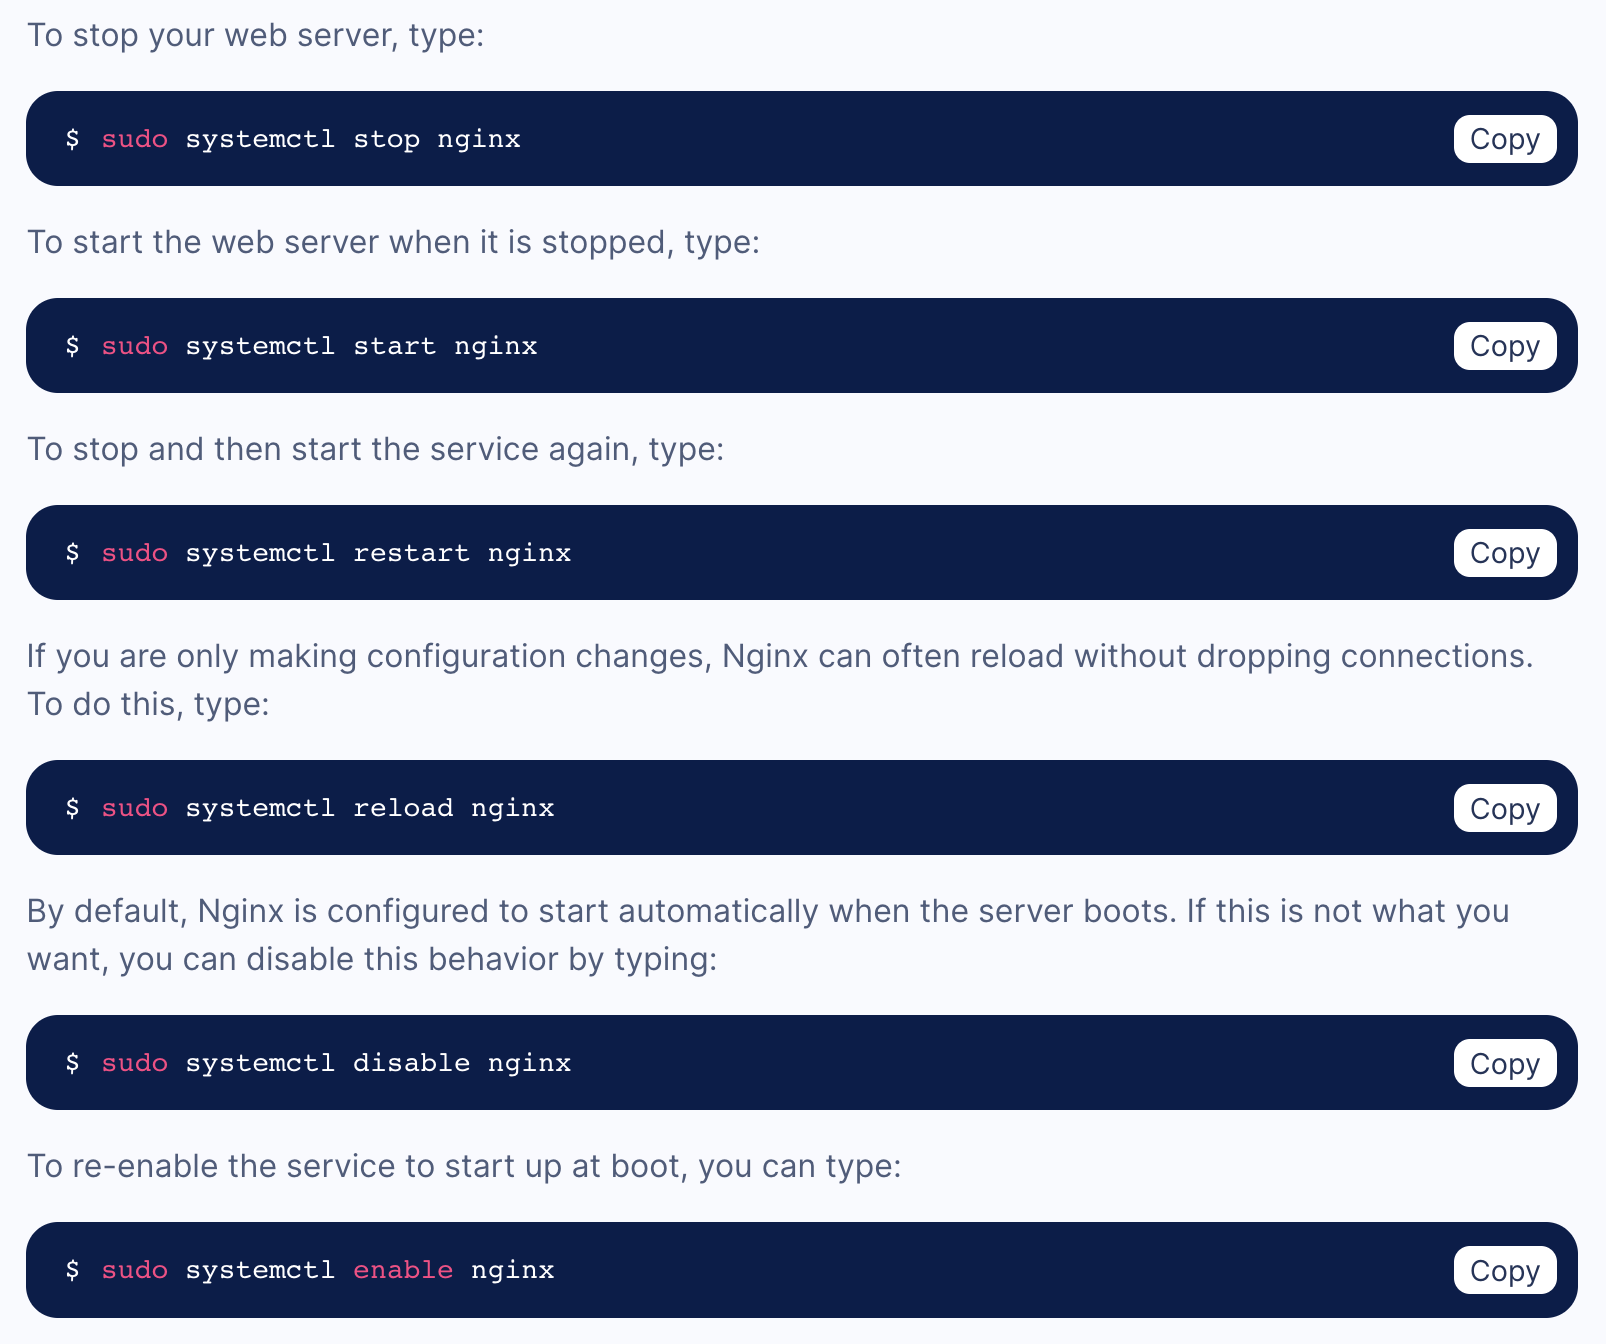
Here are some basic Nginx commands I tried out.
Setting up server blocks
Server blocks can be used to encapsulate configuration details and host more than one domain from a single server. The directory “/var/www/html” is enabled by default to serve documents.
I followed the tutorial to create the “your_domain” directory, configure permissions, and create a starter html page. I created a new default configuration file in the “/etc/nginx/sites-available/your_domain”.

Basic html page

Configuration file
If you look closely at my configuration file above, you can see I had a typo! This caused the Nginx test to fail. The right image below shows the output of running the test after I’ve fixed my configuration file typo.

Failed Nginx test

Successful Nginx test
Here’s where I’m lost. Obviously “http://your_domain” is not a domain that I own or exists, so this whole “Setting up server blocks” section didn’t really get me anywhere. Do I need to get a new domain for this class/assignment? I own the domain “priyankamakin.com”, could I make a new page on that and point it to my virtual host? How would I do that? How would the two things know of each other?

So, what I ended up doing was editing the “index.html” file in “/var/www/html” and this is what the browser looks like when I put my host’s IP address into the web address bar.

Cave and get a domain
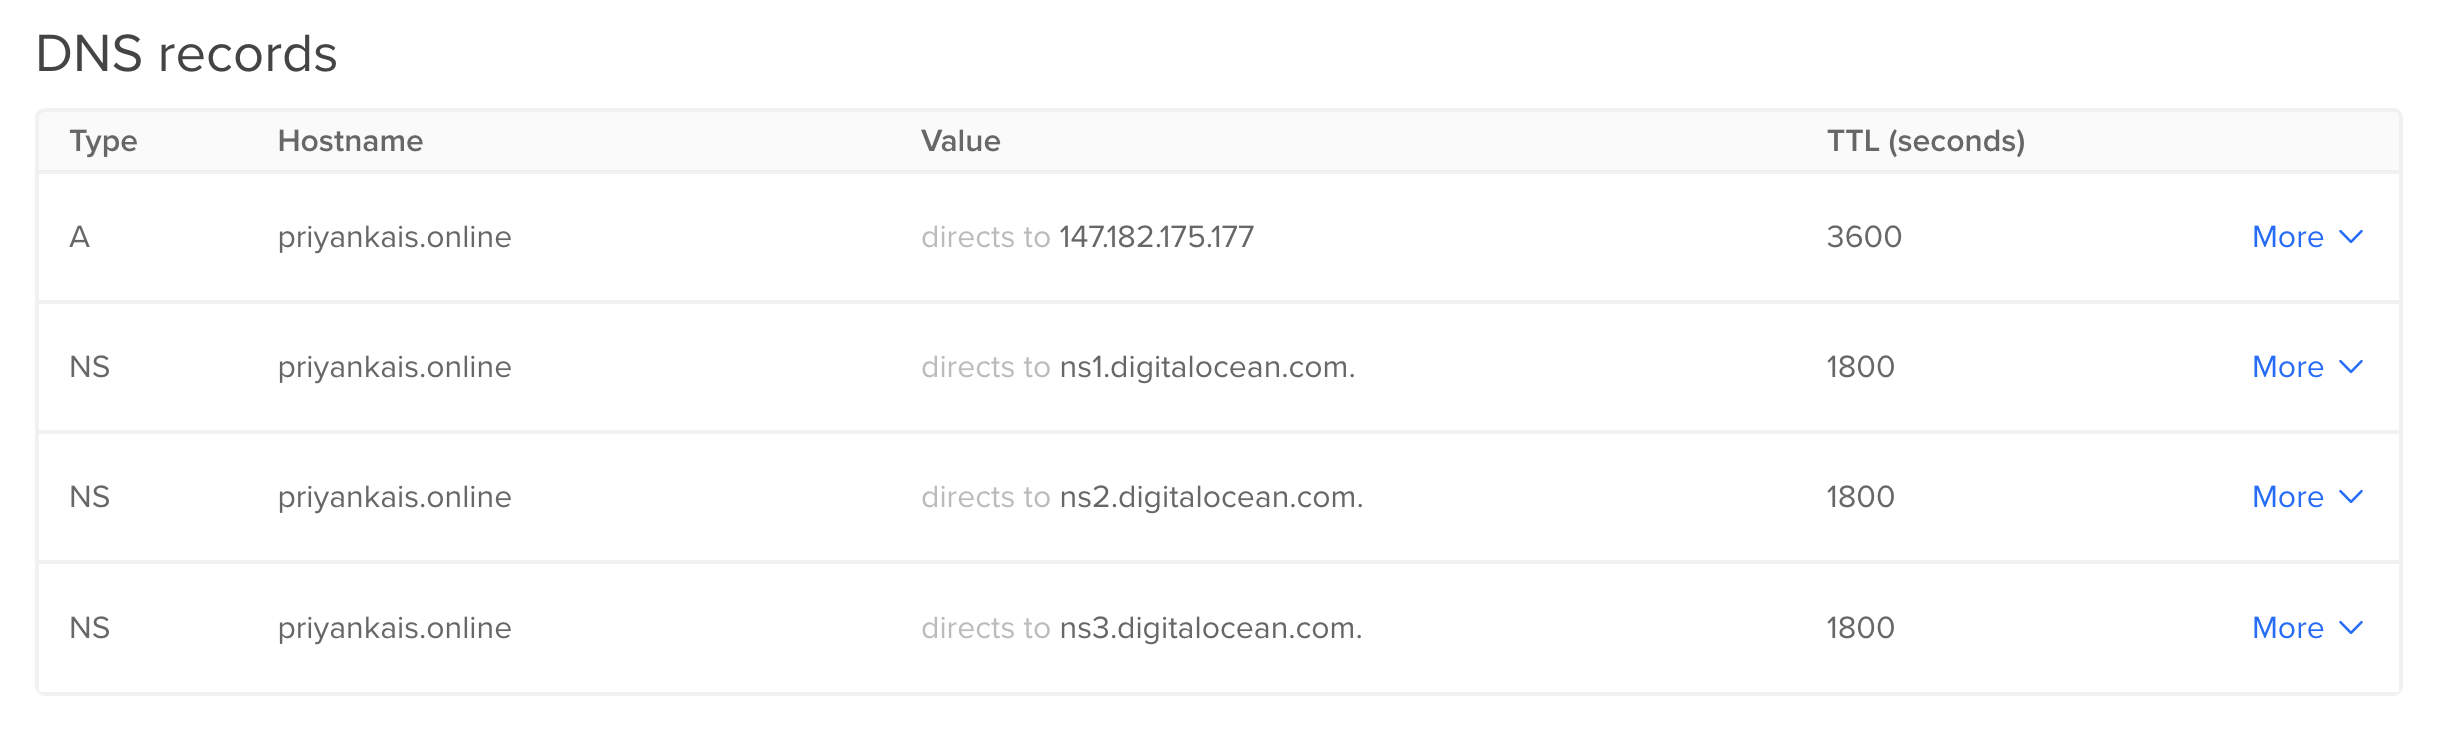
I ended up getting the custom domain “priyankais.online” from NameCheap for a whopping $1.66/year. The first image shows how I pointed the domain registrar to DigitalOcean name servers and the second image shows the DNS record on DigitalOcean


I removed the “your_domain” directory and redid the “set up server blocks” section with my brand new domain… and drum roll… priyankais.online. Woo hoo!
Let’s Encrypt
I followed this tutorial to set up TLS/SSL certificates.
TLS/SSL certificates are used to protect both the end user’s information while it’s in transfer, and to authenticate the website’s organization identity to ensure users are interacting with legitimate website owners. Let’s Encrypt is a certificate authority (CA) which makes it easy to install free TLS/SSL certificates. A software client called Certbot automates almost all of the required steps.
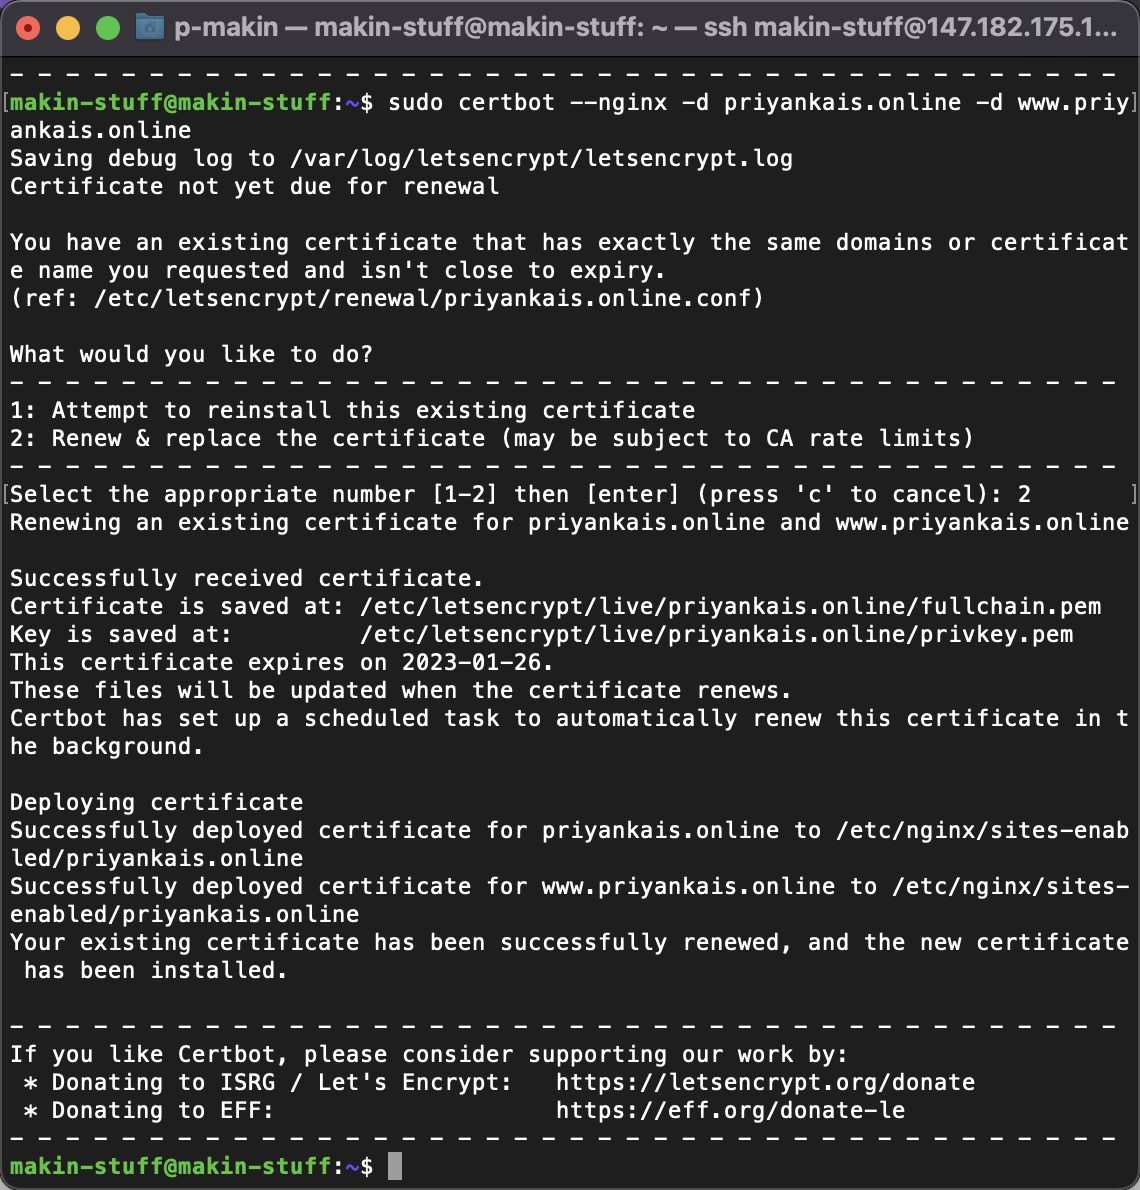
First, I installed CertBot and confirmed the Nginx configuration file server block was pointing to my new domain name. Then I verified that HTTPS was allowed through the firewall. I obtained an SSL certificate by typing the command “sudo certbot —nginx -d priyankais.online -d www.priyankais.online”.

Voila!
Terminal and Nginx Notes
There are two primary directories on the host: /var and /etc
The server block I just tried to set up lives in “/var/www/your_domain/html” and that’s where the web content is saved.
“ls” = lists the files in a given directory, “less” = shows a file’s contents on screen at a time, “nano” = command line text editor
