
This is a continuation of my previous blog post. In this article I will show you how I made an enclosure for my game controller circuit.
Solder Fest
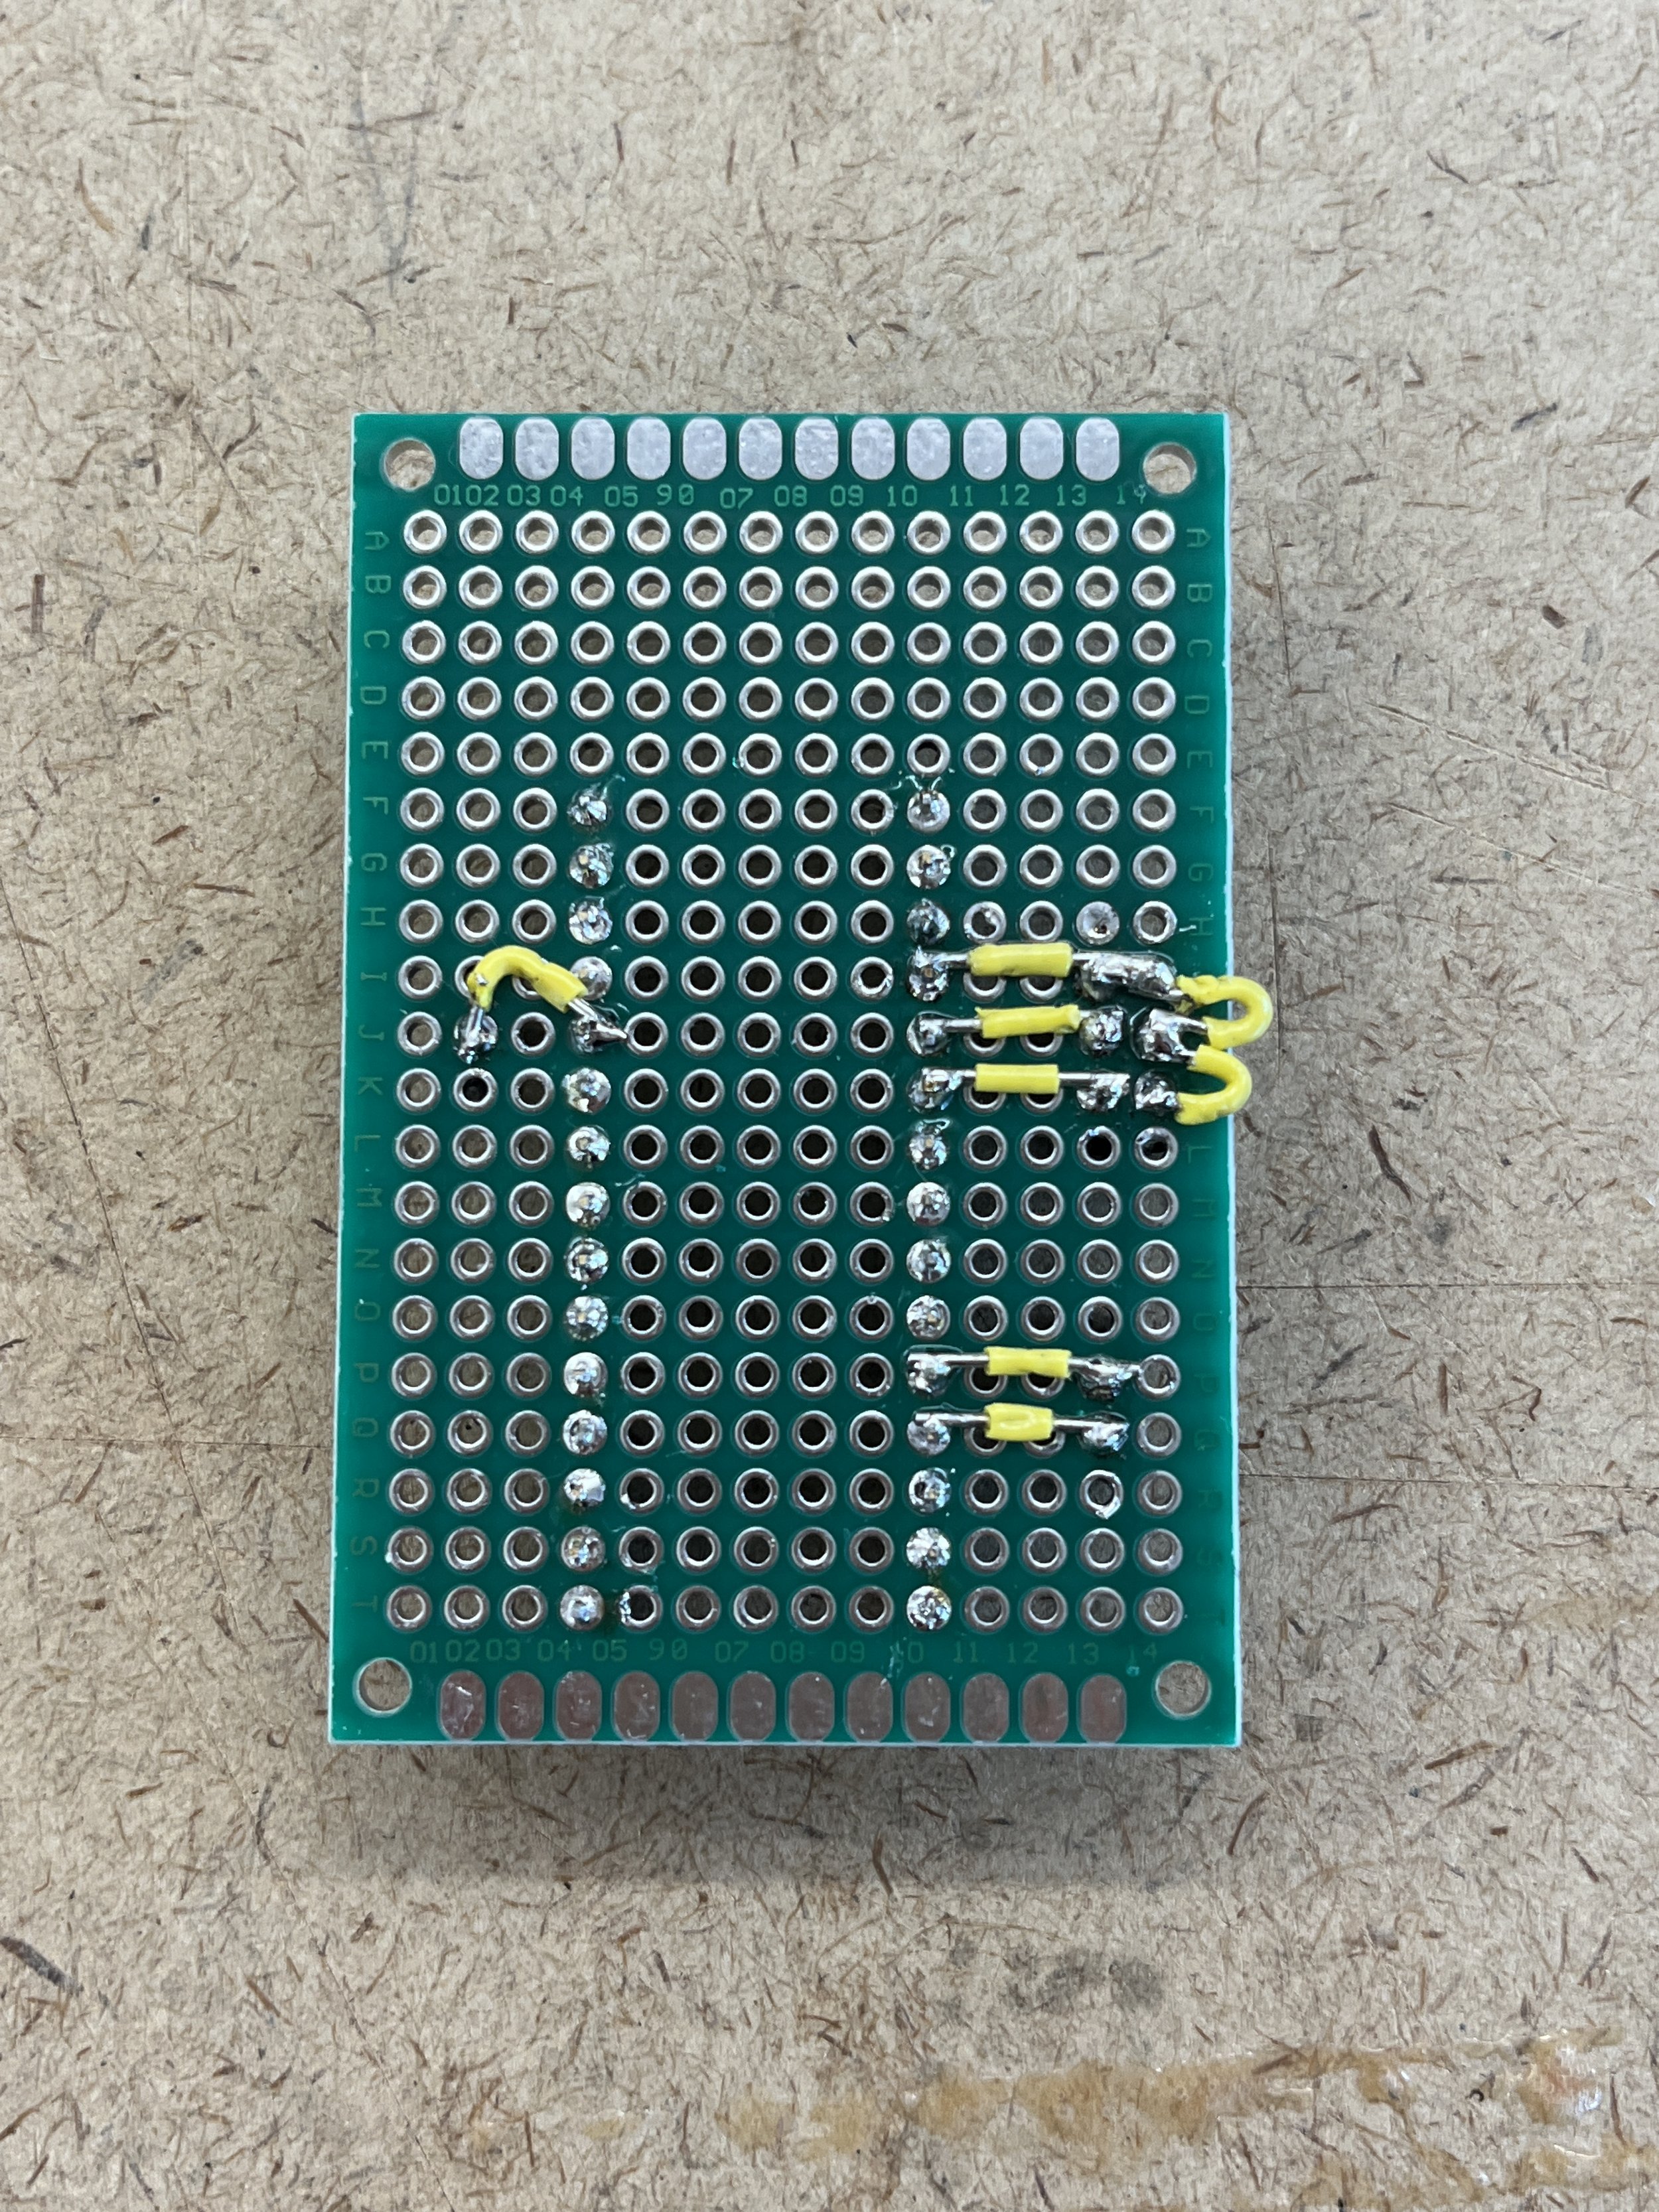
First, I soldered a small protoboard female headers so I could easily unplug the electrical components if needed. The brain of this controller is an Arduino Nano 33 IoT which I only have one of and costs $24, so I want to be able to remove it and use it in other projects. I also soldered stranded silicone wire to my two encoders and push button and heat shrinked the joints. The stranded wire does not work super well with the female sockets, the tips need to be tinned, but the wire itself is more flexible than solid core so it can be stuffed into a small enclosure!


Circuit Testing
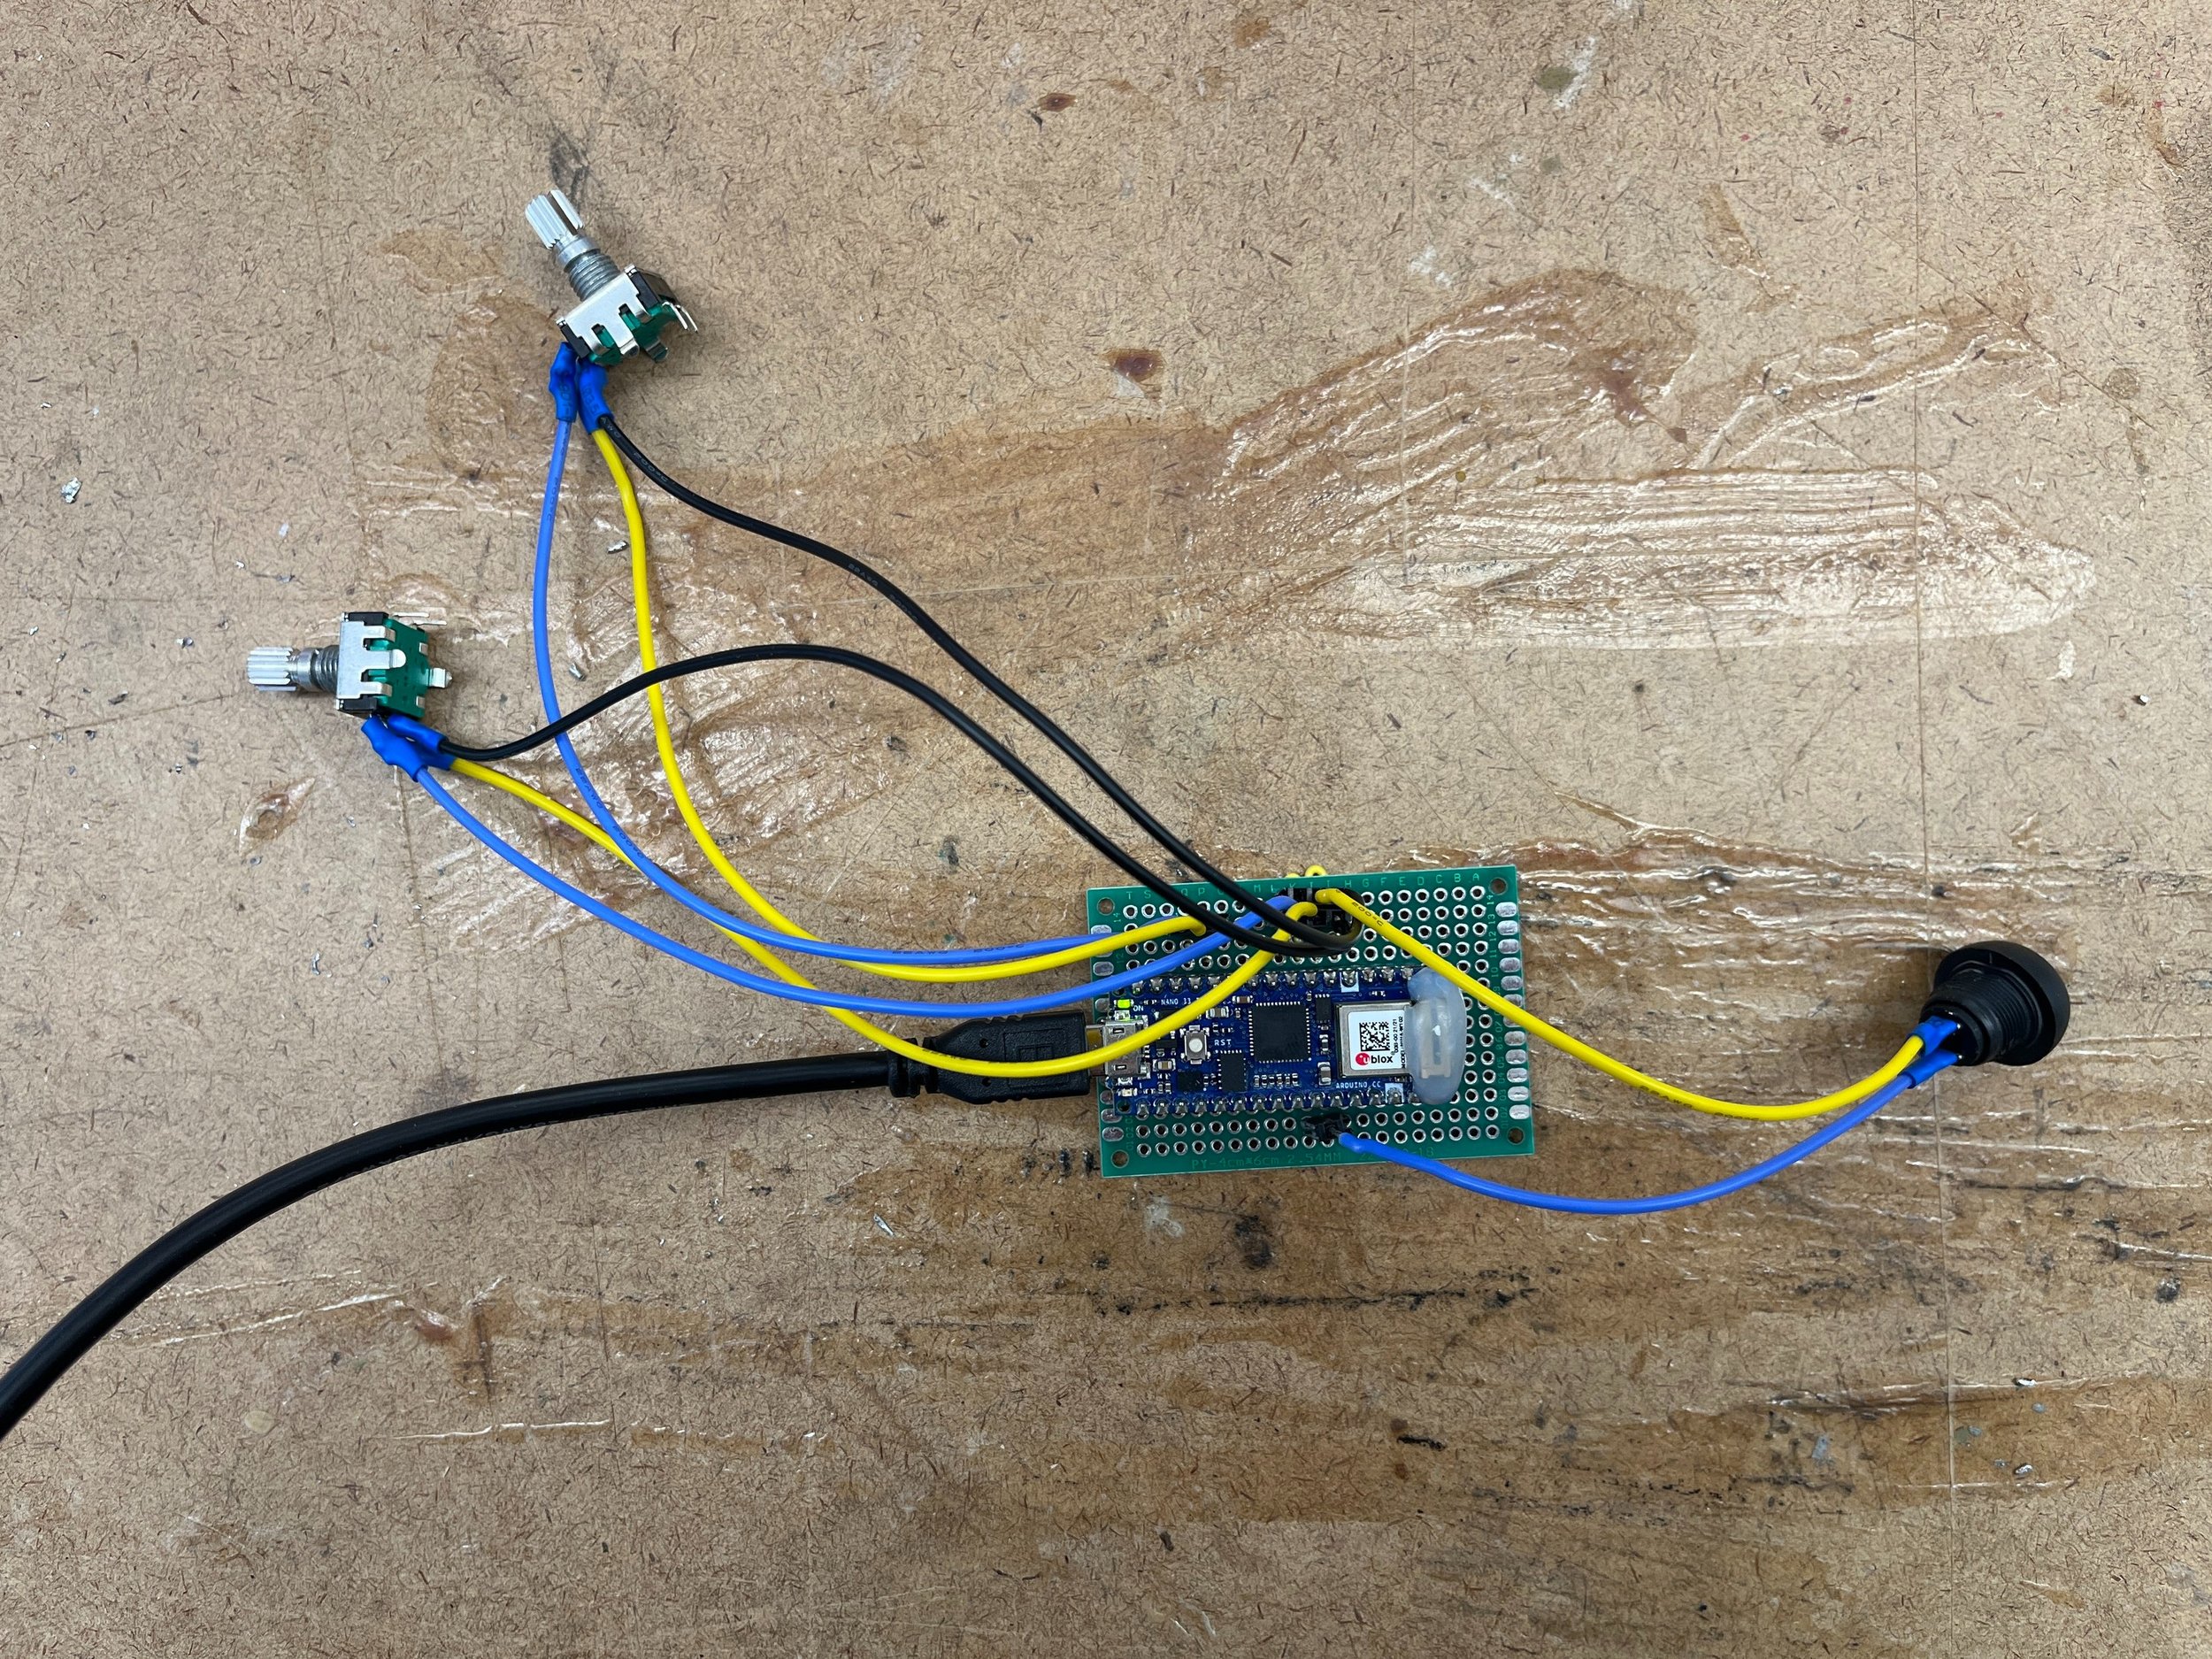
I wired up my complete circuit and made sure it was still working like before.
Enclosure Building
Next was the fun part, flexing my fabrication muscles. I found this little candy tin on the ITP junk shelf and thought it would make the cutest little game controller. After I made sure all the electrical parts would actually fit in this tin, I got to work.

First, I drilled holes for the two encoders and the button to be mounted to the lid. I used tin snips to make an opening for the micro USB cable to connect to the Arduino.

The edges were kind of sharp. I cleaned them up using the small snips to cut away sharp pieces and taped up the edges of the USB hole so it wouldn’t cut anyone.
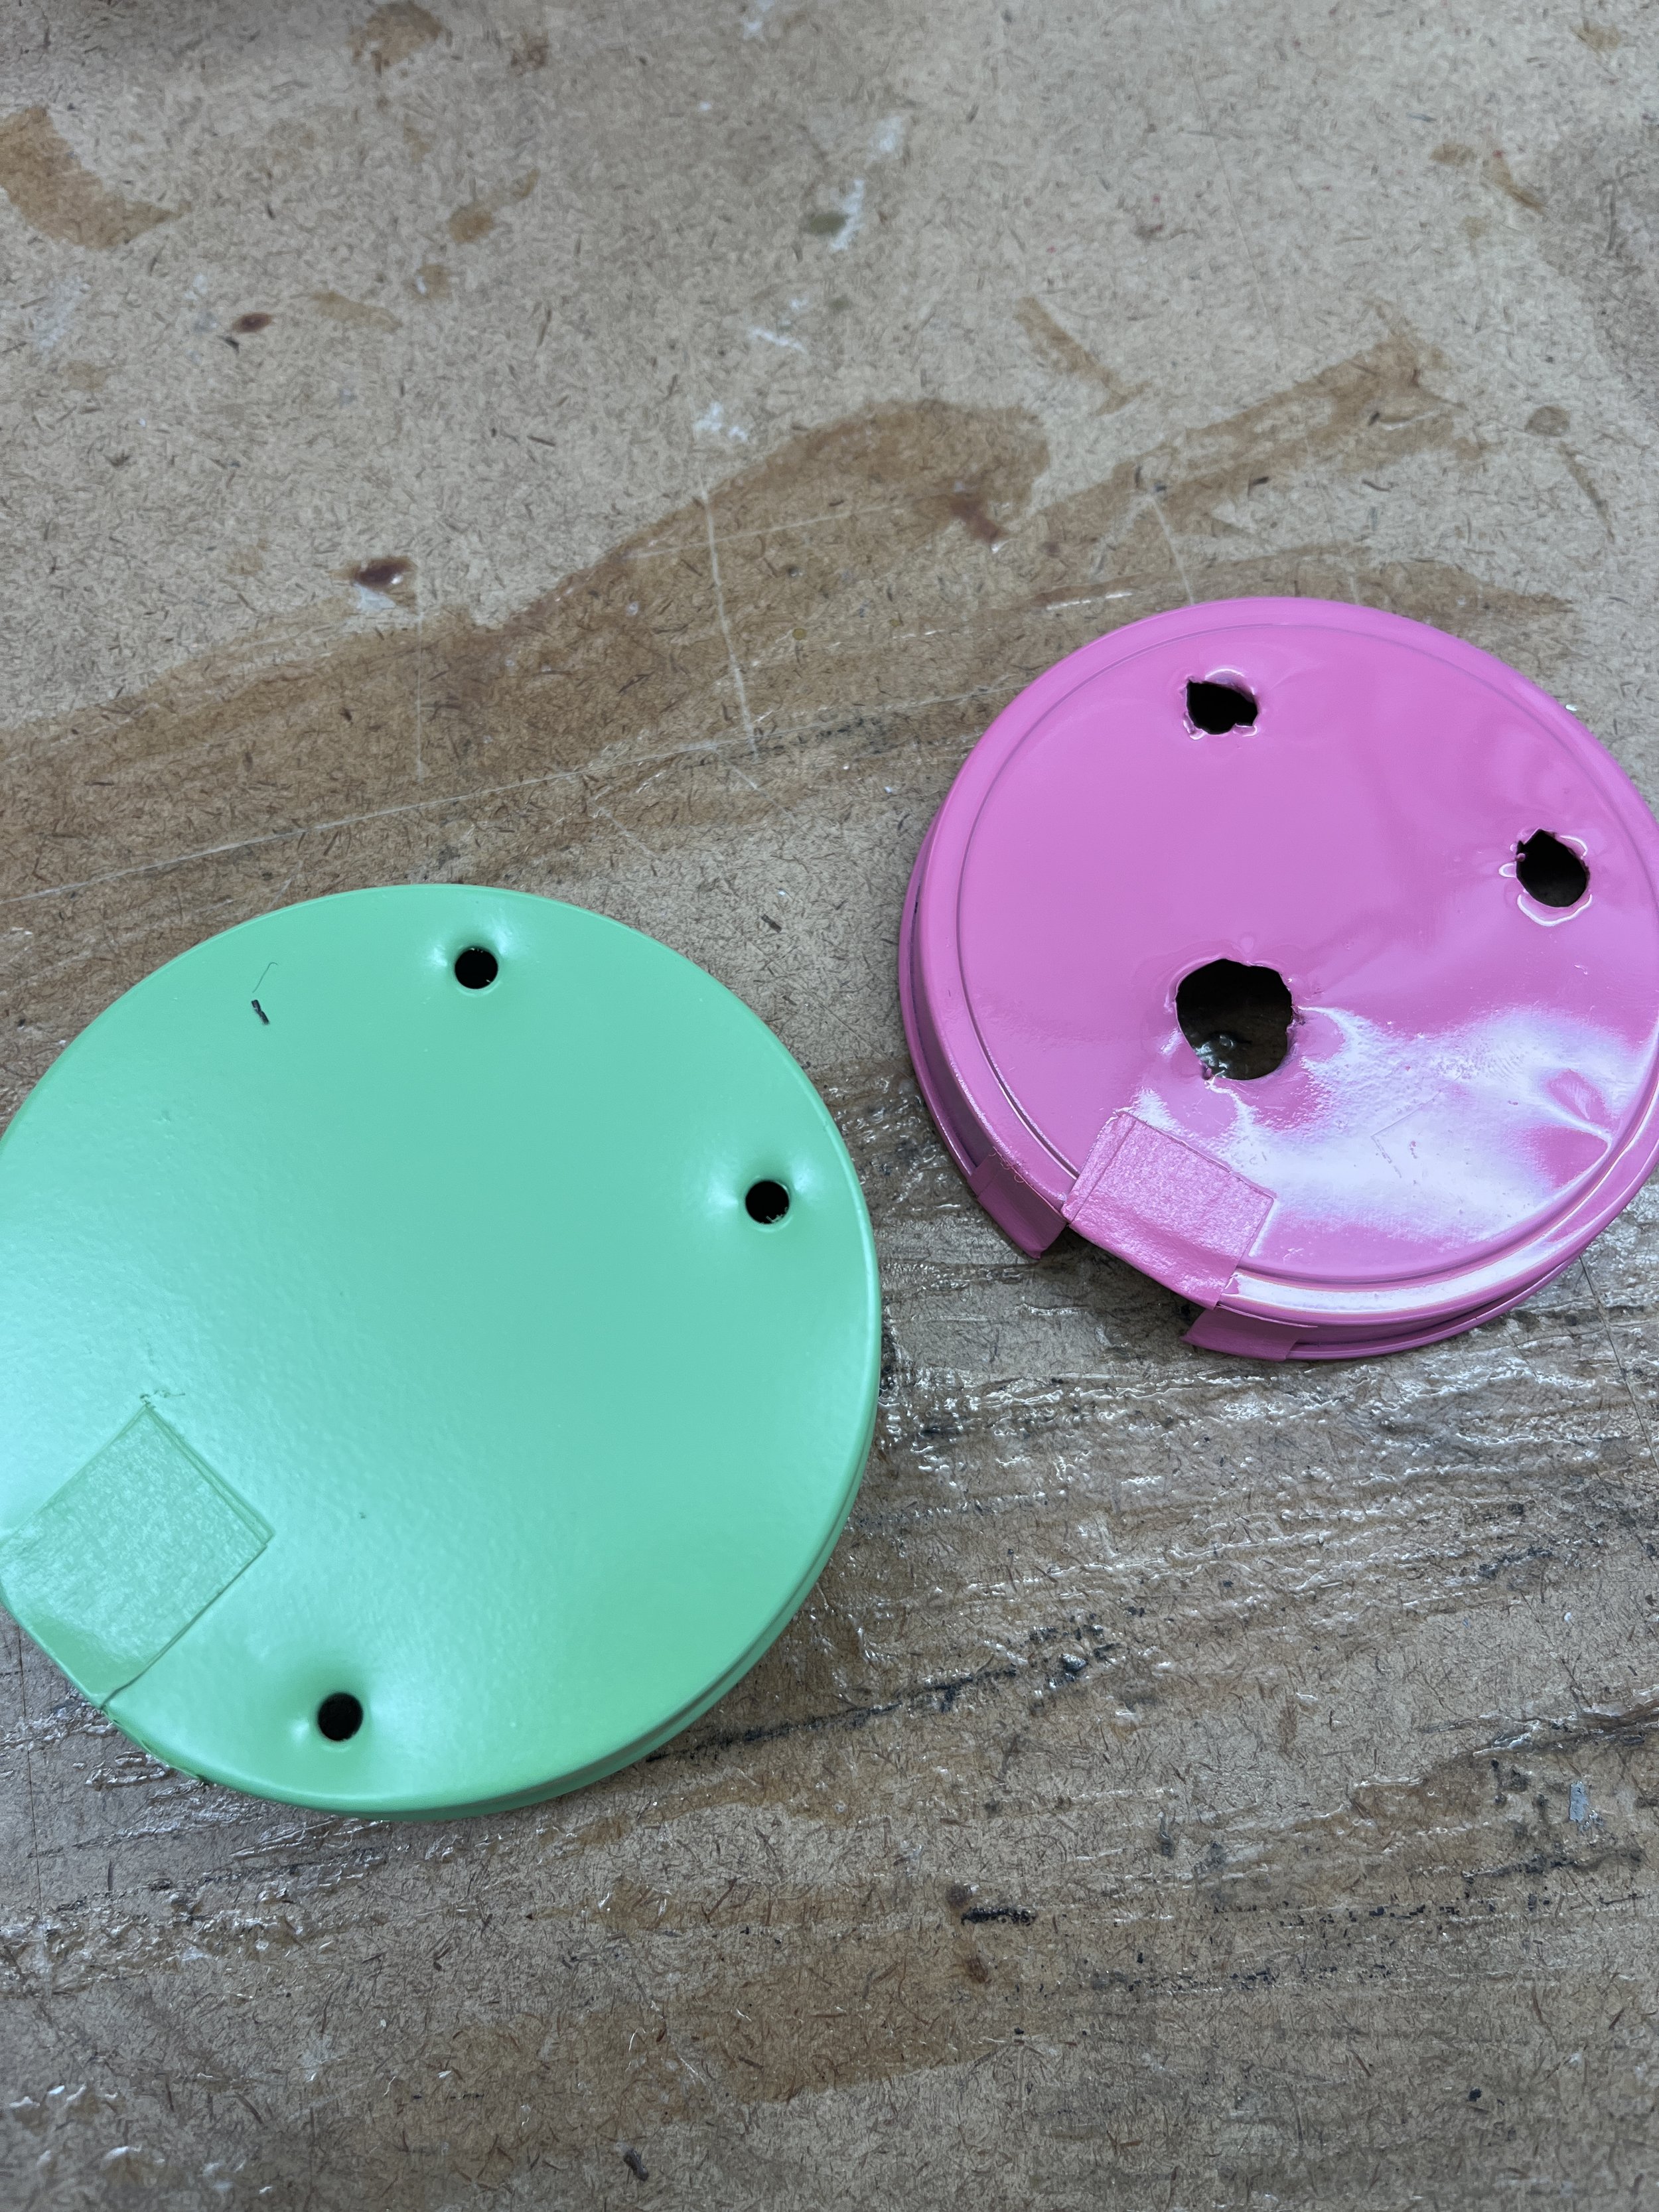
Next, I spray painted the top and bottom pieces in the basement spray booth.

I also cut this circle to line the inside of the tin. I’m not certain if the tin is conductive, but it’s a good safety measure to add some paper to mitigate shorting.
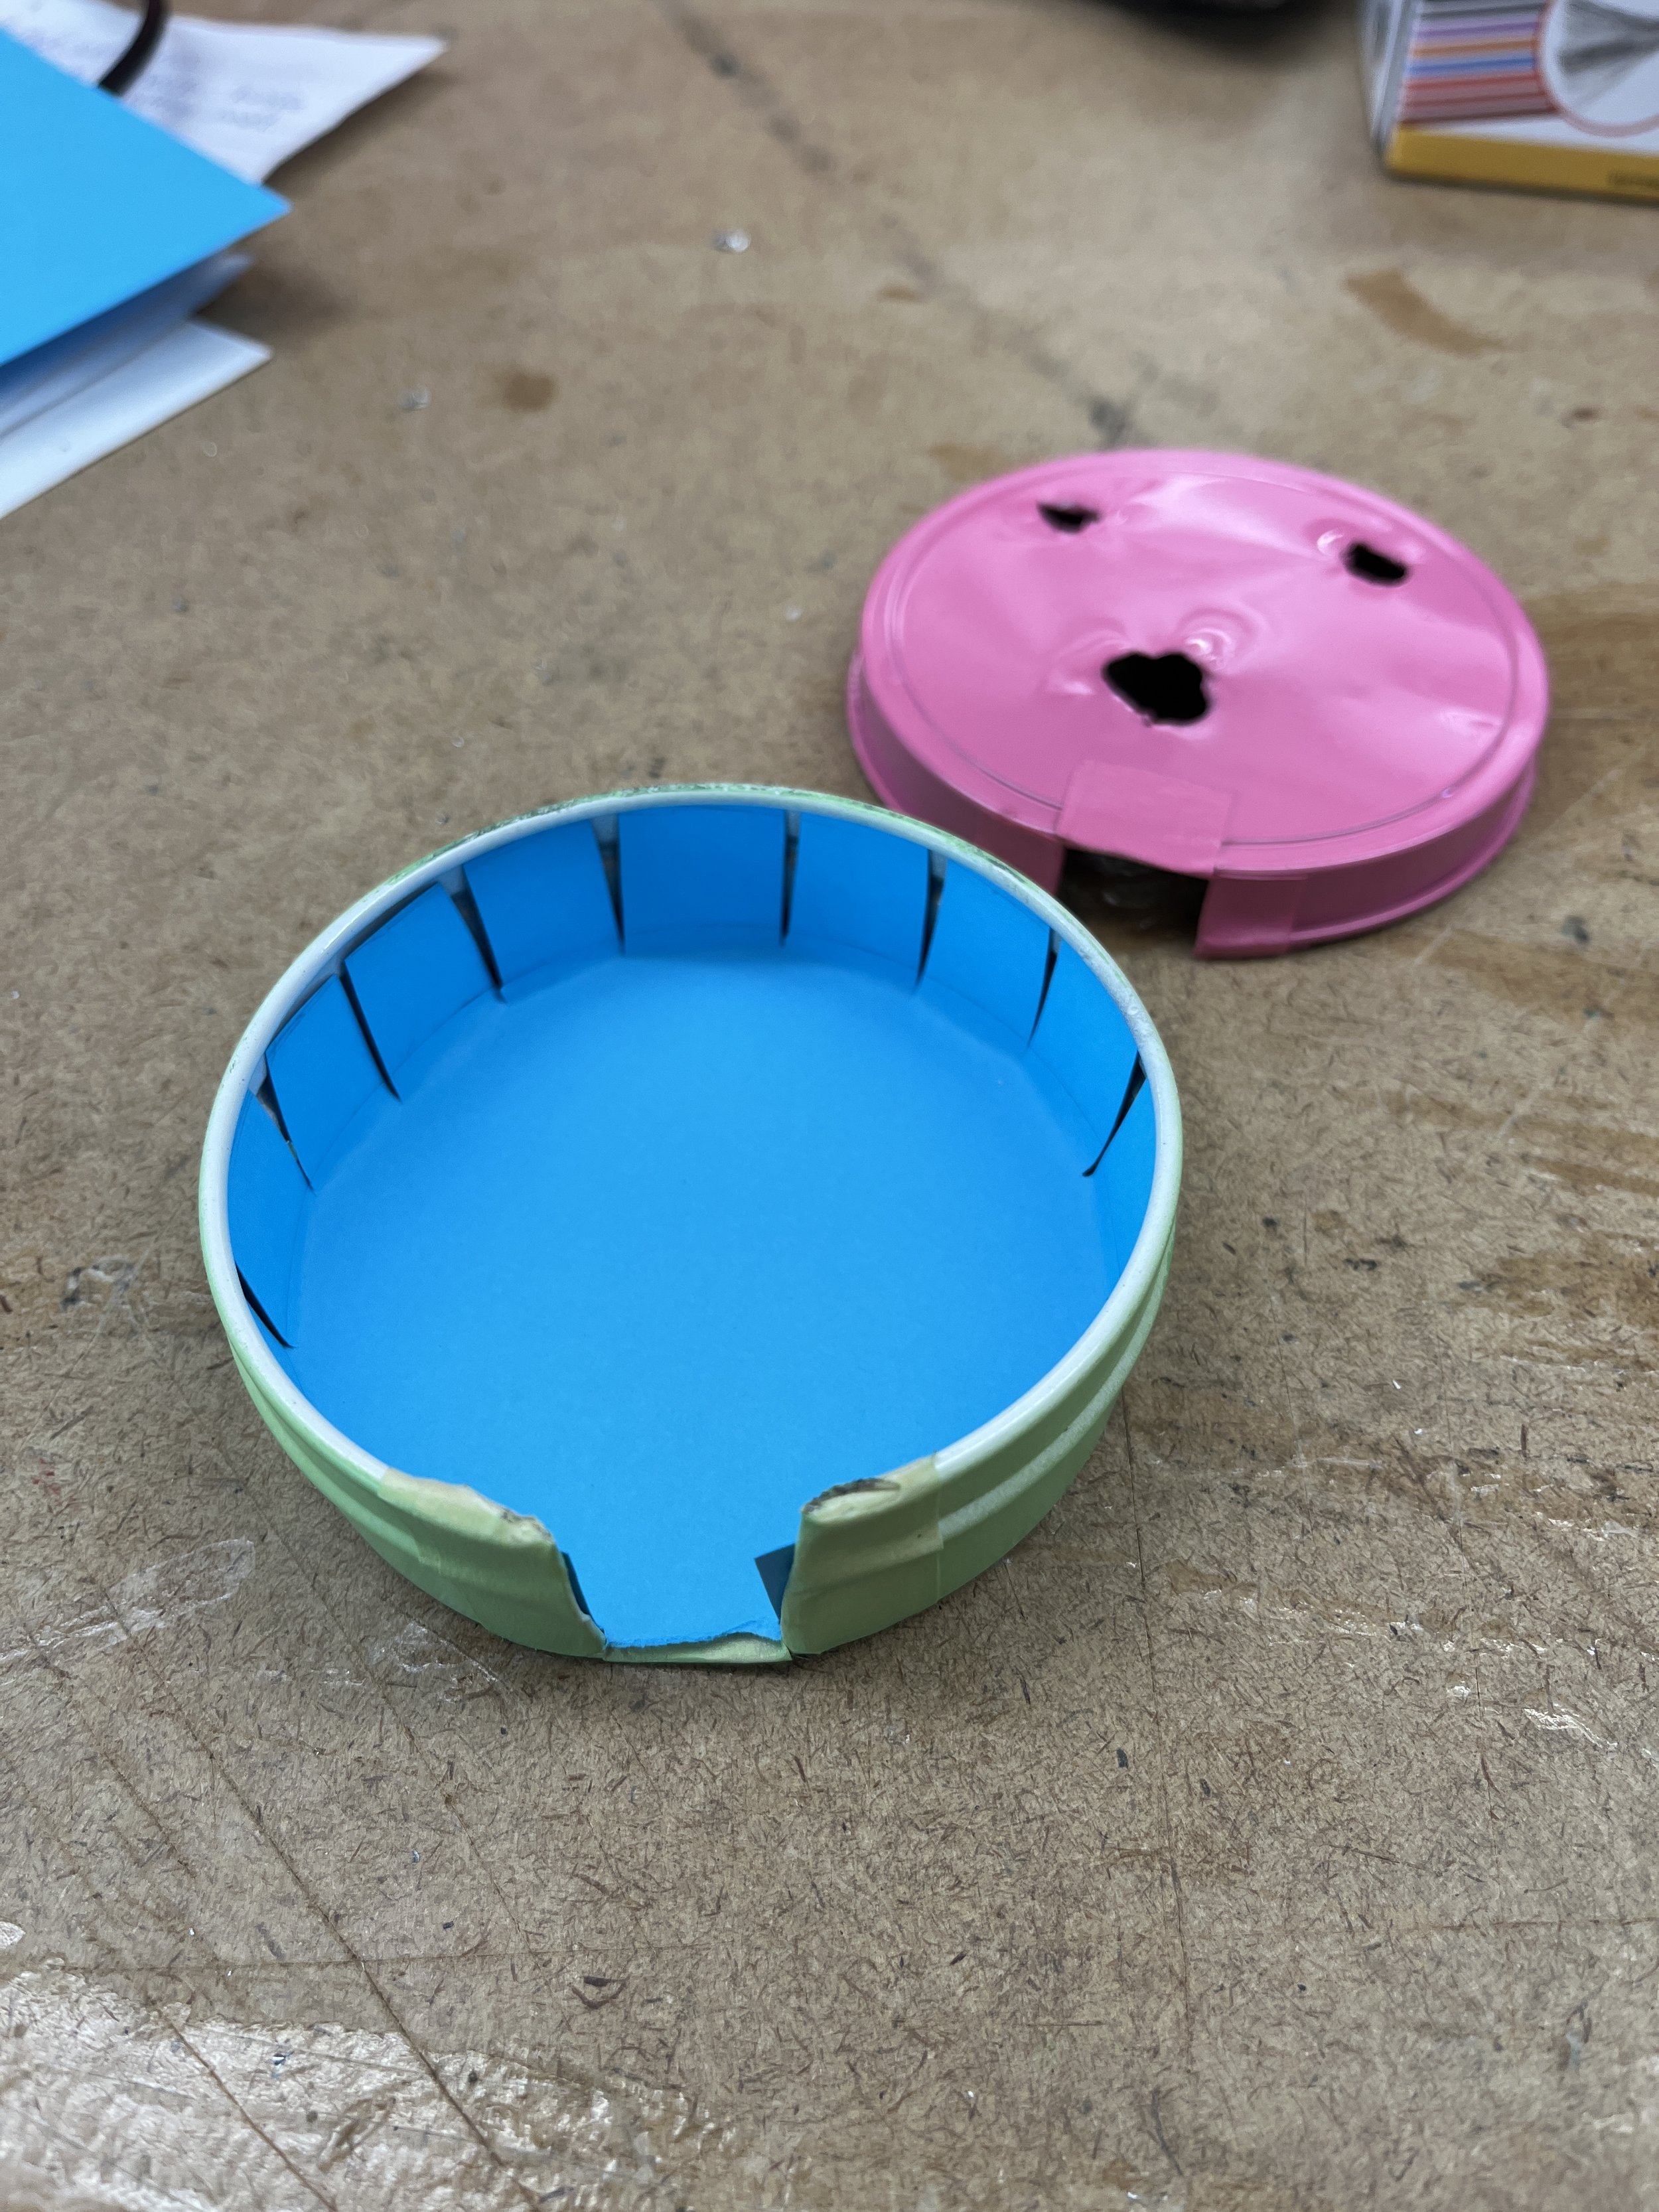
Installed paper liner.
Finishing Touches
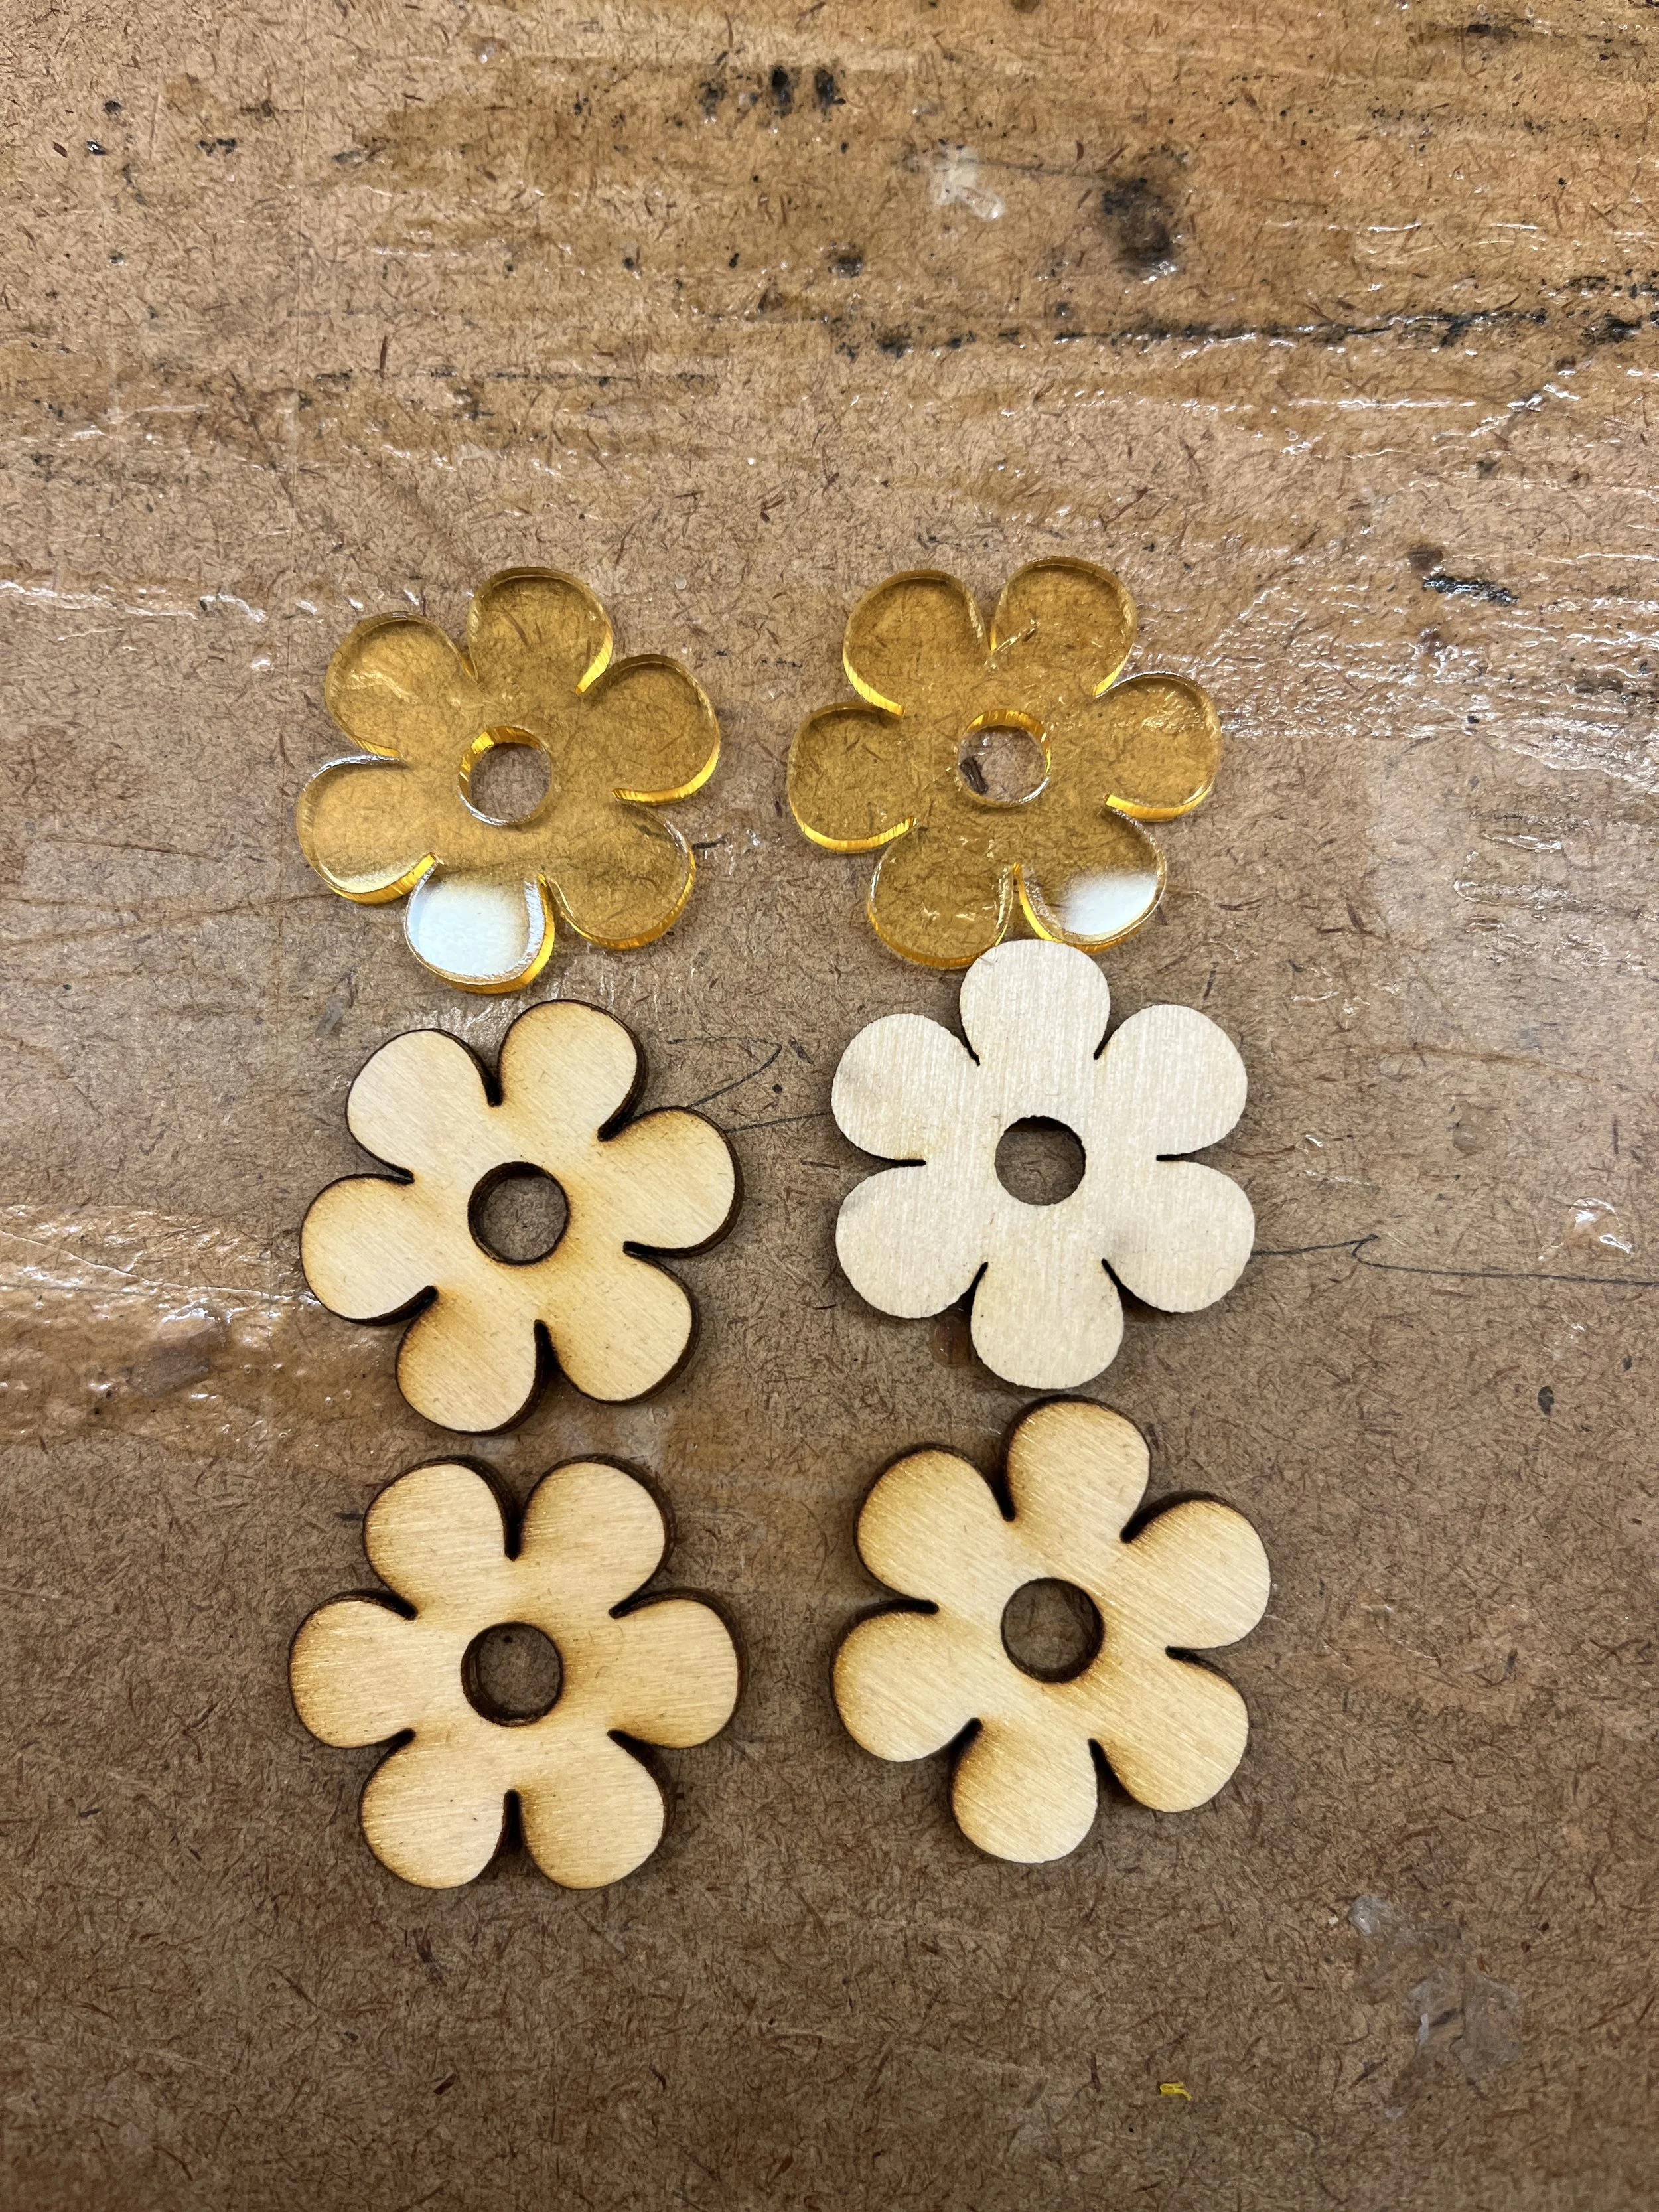
I cut flower knobs using the laser cutter.
I glued together the wood layers with wood glue and painted some designs.
Final Product

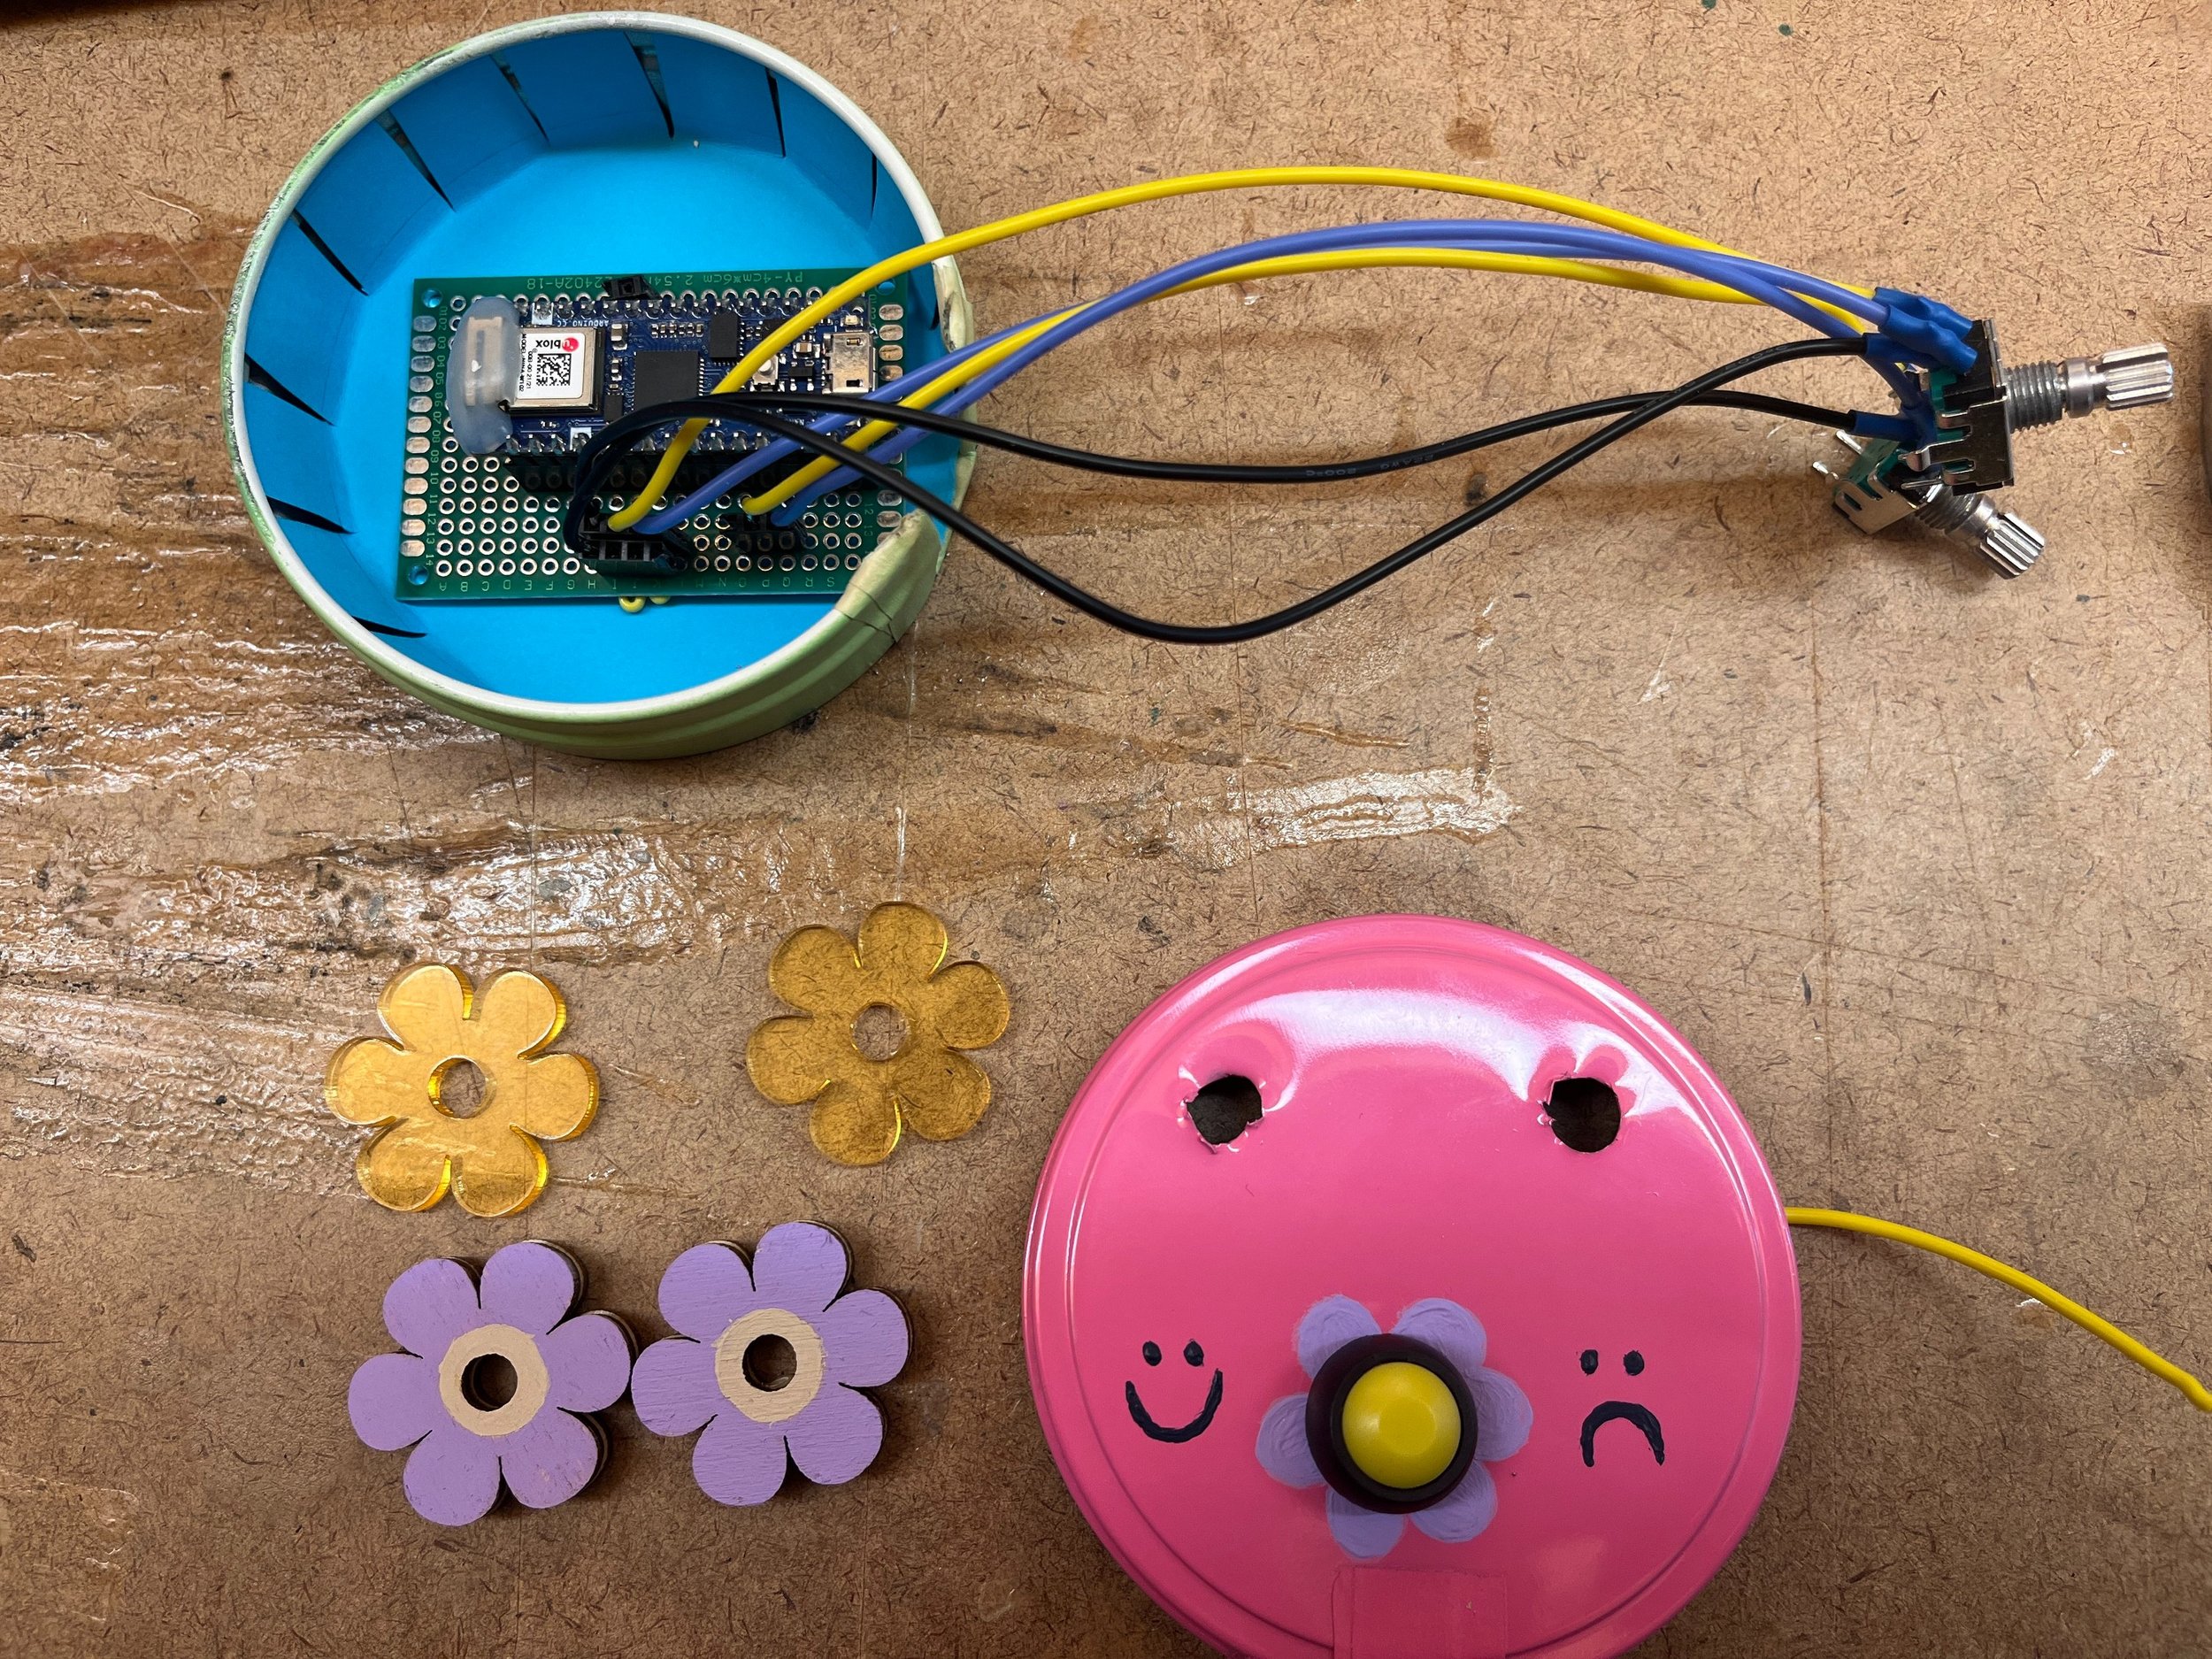
Assembled controller - I screwed on the nuts of the encoders and button to attach them to the lid.
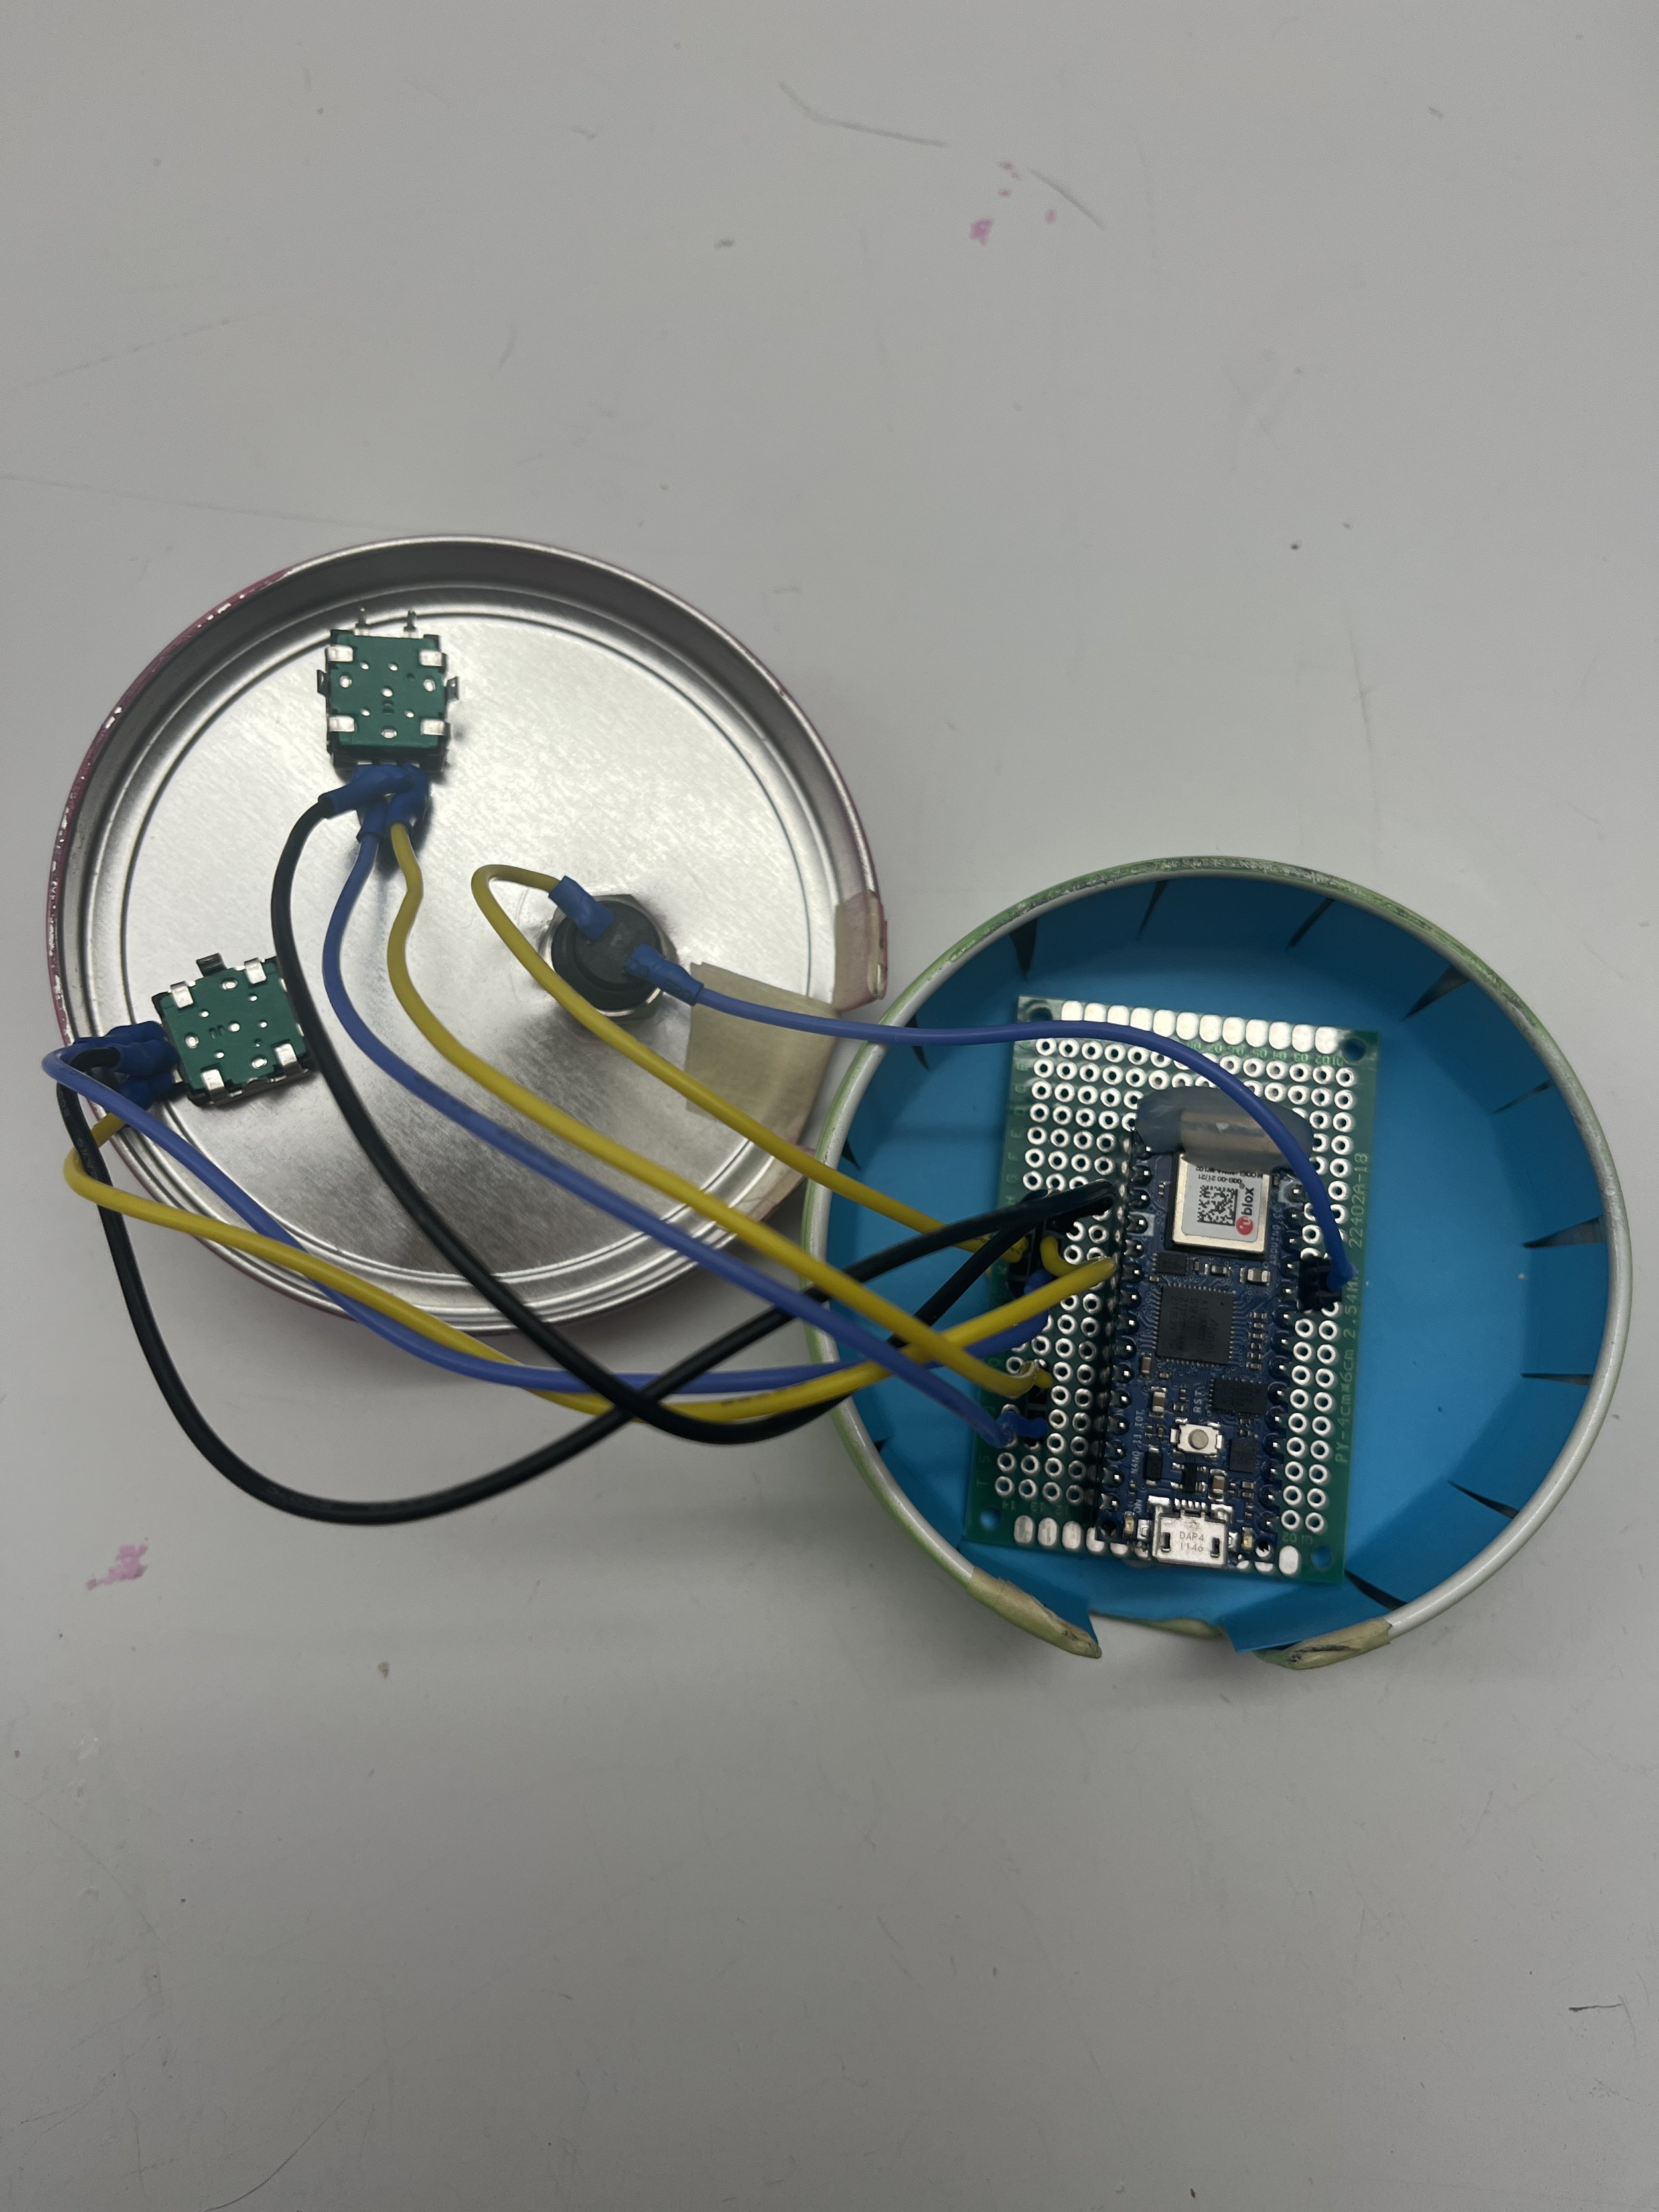
Installed electronics - I used some putty to keep my protoboard/circuit in place.

I ended up gluing the acrylic layer to the wood by using this glue called “GOOP” that I picked up from Bruno’s. I think it’s worked pretty well.
Conclusion
I’m really happy with how my controller turned out. One of my biggest downfalls as an engineer is that I didn’t grow up playing video games so I’m on the outside for a lot of nerdy conversations. This is my ideal, Priyanka-esque, hyper-feminine game controller.
Here are my next steps:
Try out the new encoder library. Try getting to the bottom of the inconsistent encoder readings.
Make sure I can play the game on my computer and get some footage of the controller in action.
Here’s a link to my final blog post on this project.