
Ok, now we’re cookin’ with fire! This is a continuation of my previous blog post.
Fabrication
Stand
All my work this far has been flat and this ultimately needs to become an upright sculpture so I built a stand to hold the lungs and electronics in place. With some advice from the amazing Phil, I built a stand out of a 12x12x0.5 inch piece of ply wood, an 18 inch dowel, and 18 inches of PVC. I used a dremel to cut a notch out of the bottom of the PVC so that I could feed all the tubing and wires through it. The images below show the stand and the chaos of the end-of-the-year ITP floor.


Lungs
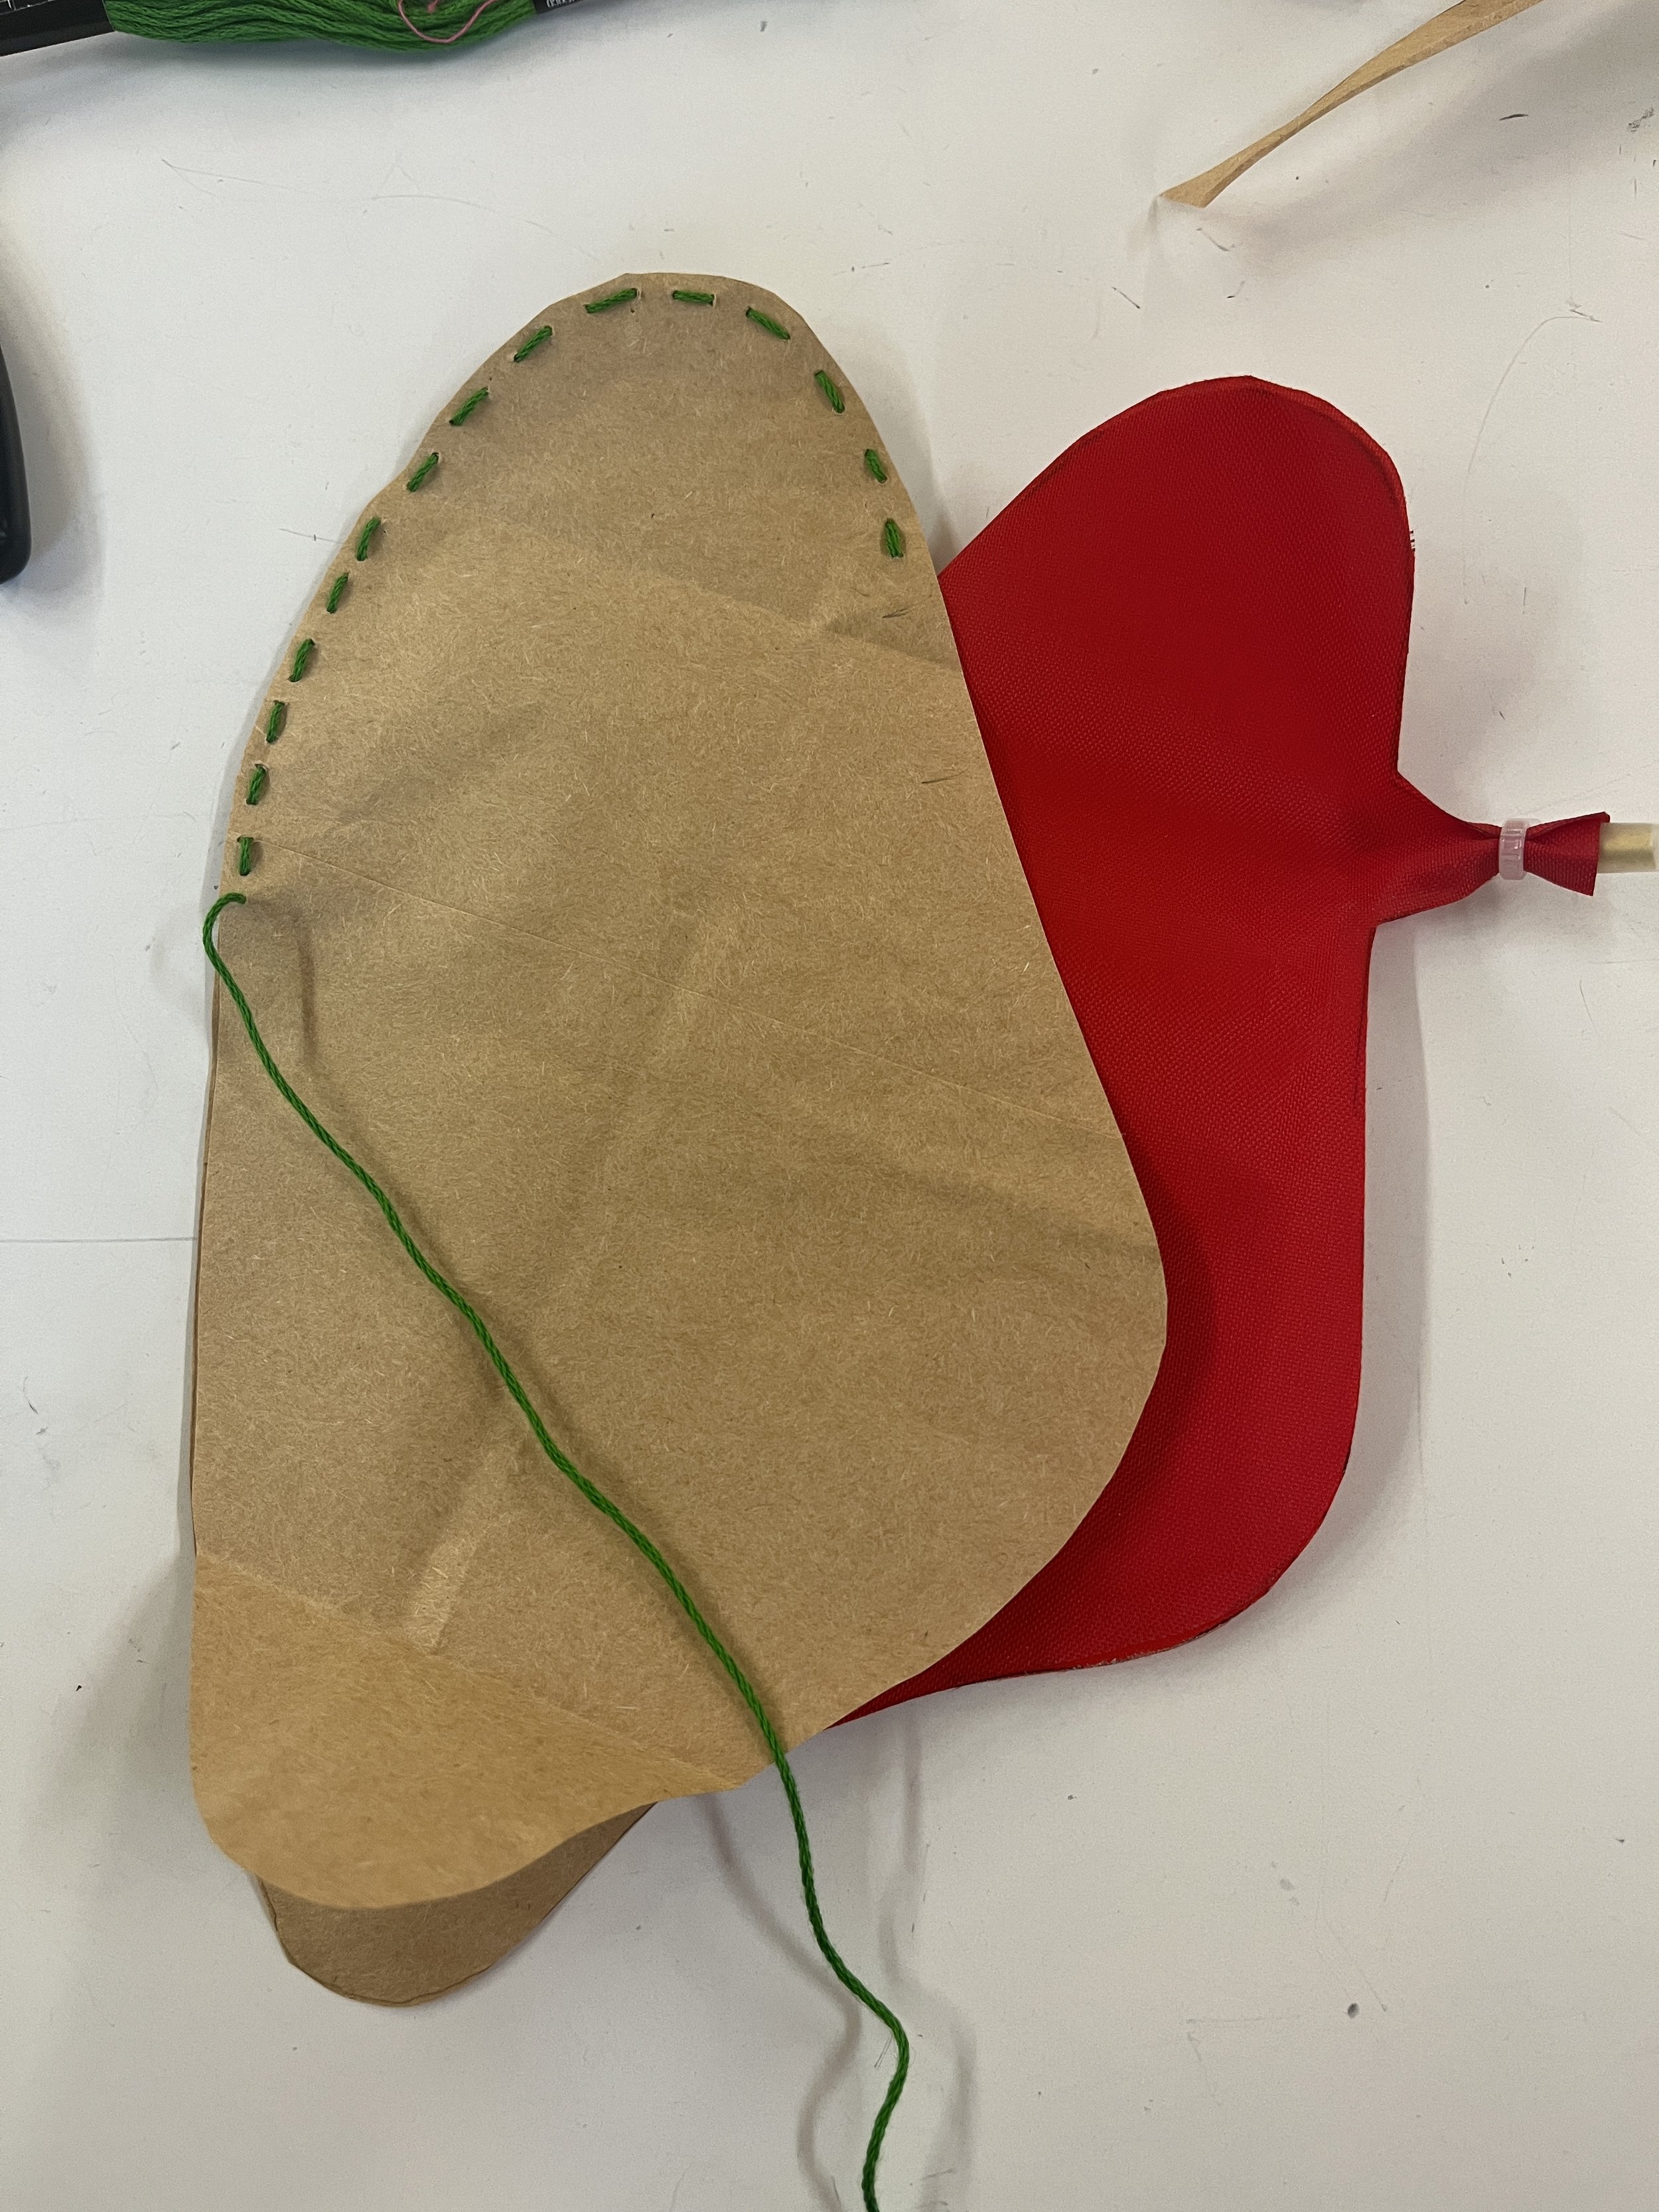
It was at this point I realized the air bags I made detailed in my last blog post (vinyl air bag with a paper covering glued on) would NOT WORK! Who knew that gluing the paper down would strop the fabric from inflating! After a quick panic attack, I re-cut and ironed some new lungs. My friend Granny suggested I could sew together a paper covering for my lungs which was a totally genius idea and something I’m already pretty good at! Voila!
Just a note, but for this pneumatic system I used 3mm silicone tubing and these little T lure locks to create the system. Also if it’s not super clear from the pictures, I attached my thoroughly-researched air bags using zip ties and a one inch piece of 3.5mm brass tubing inside.
Mounting Electronics
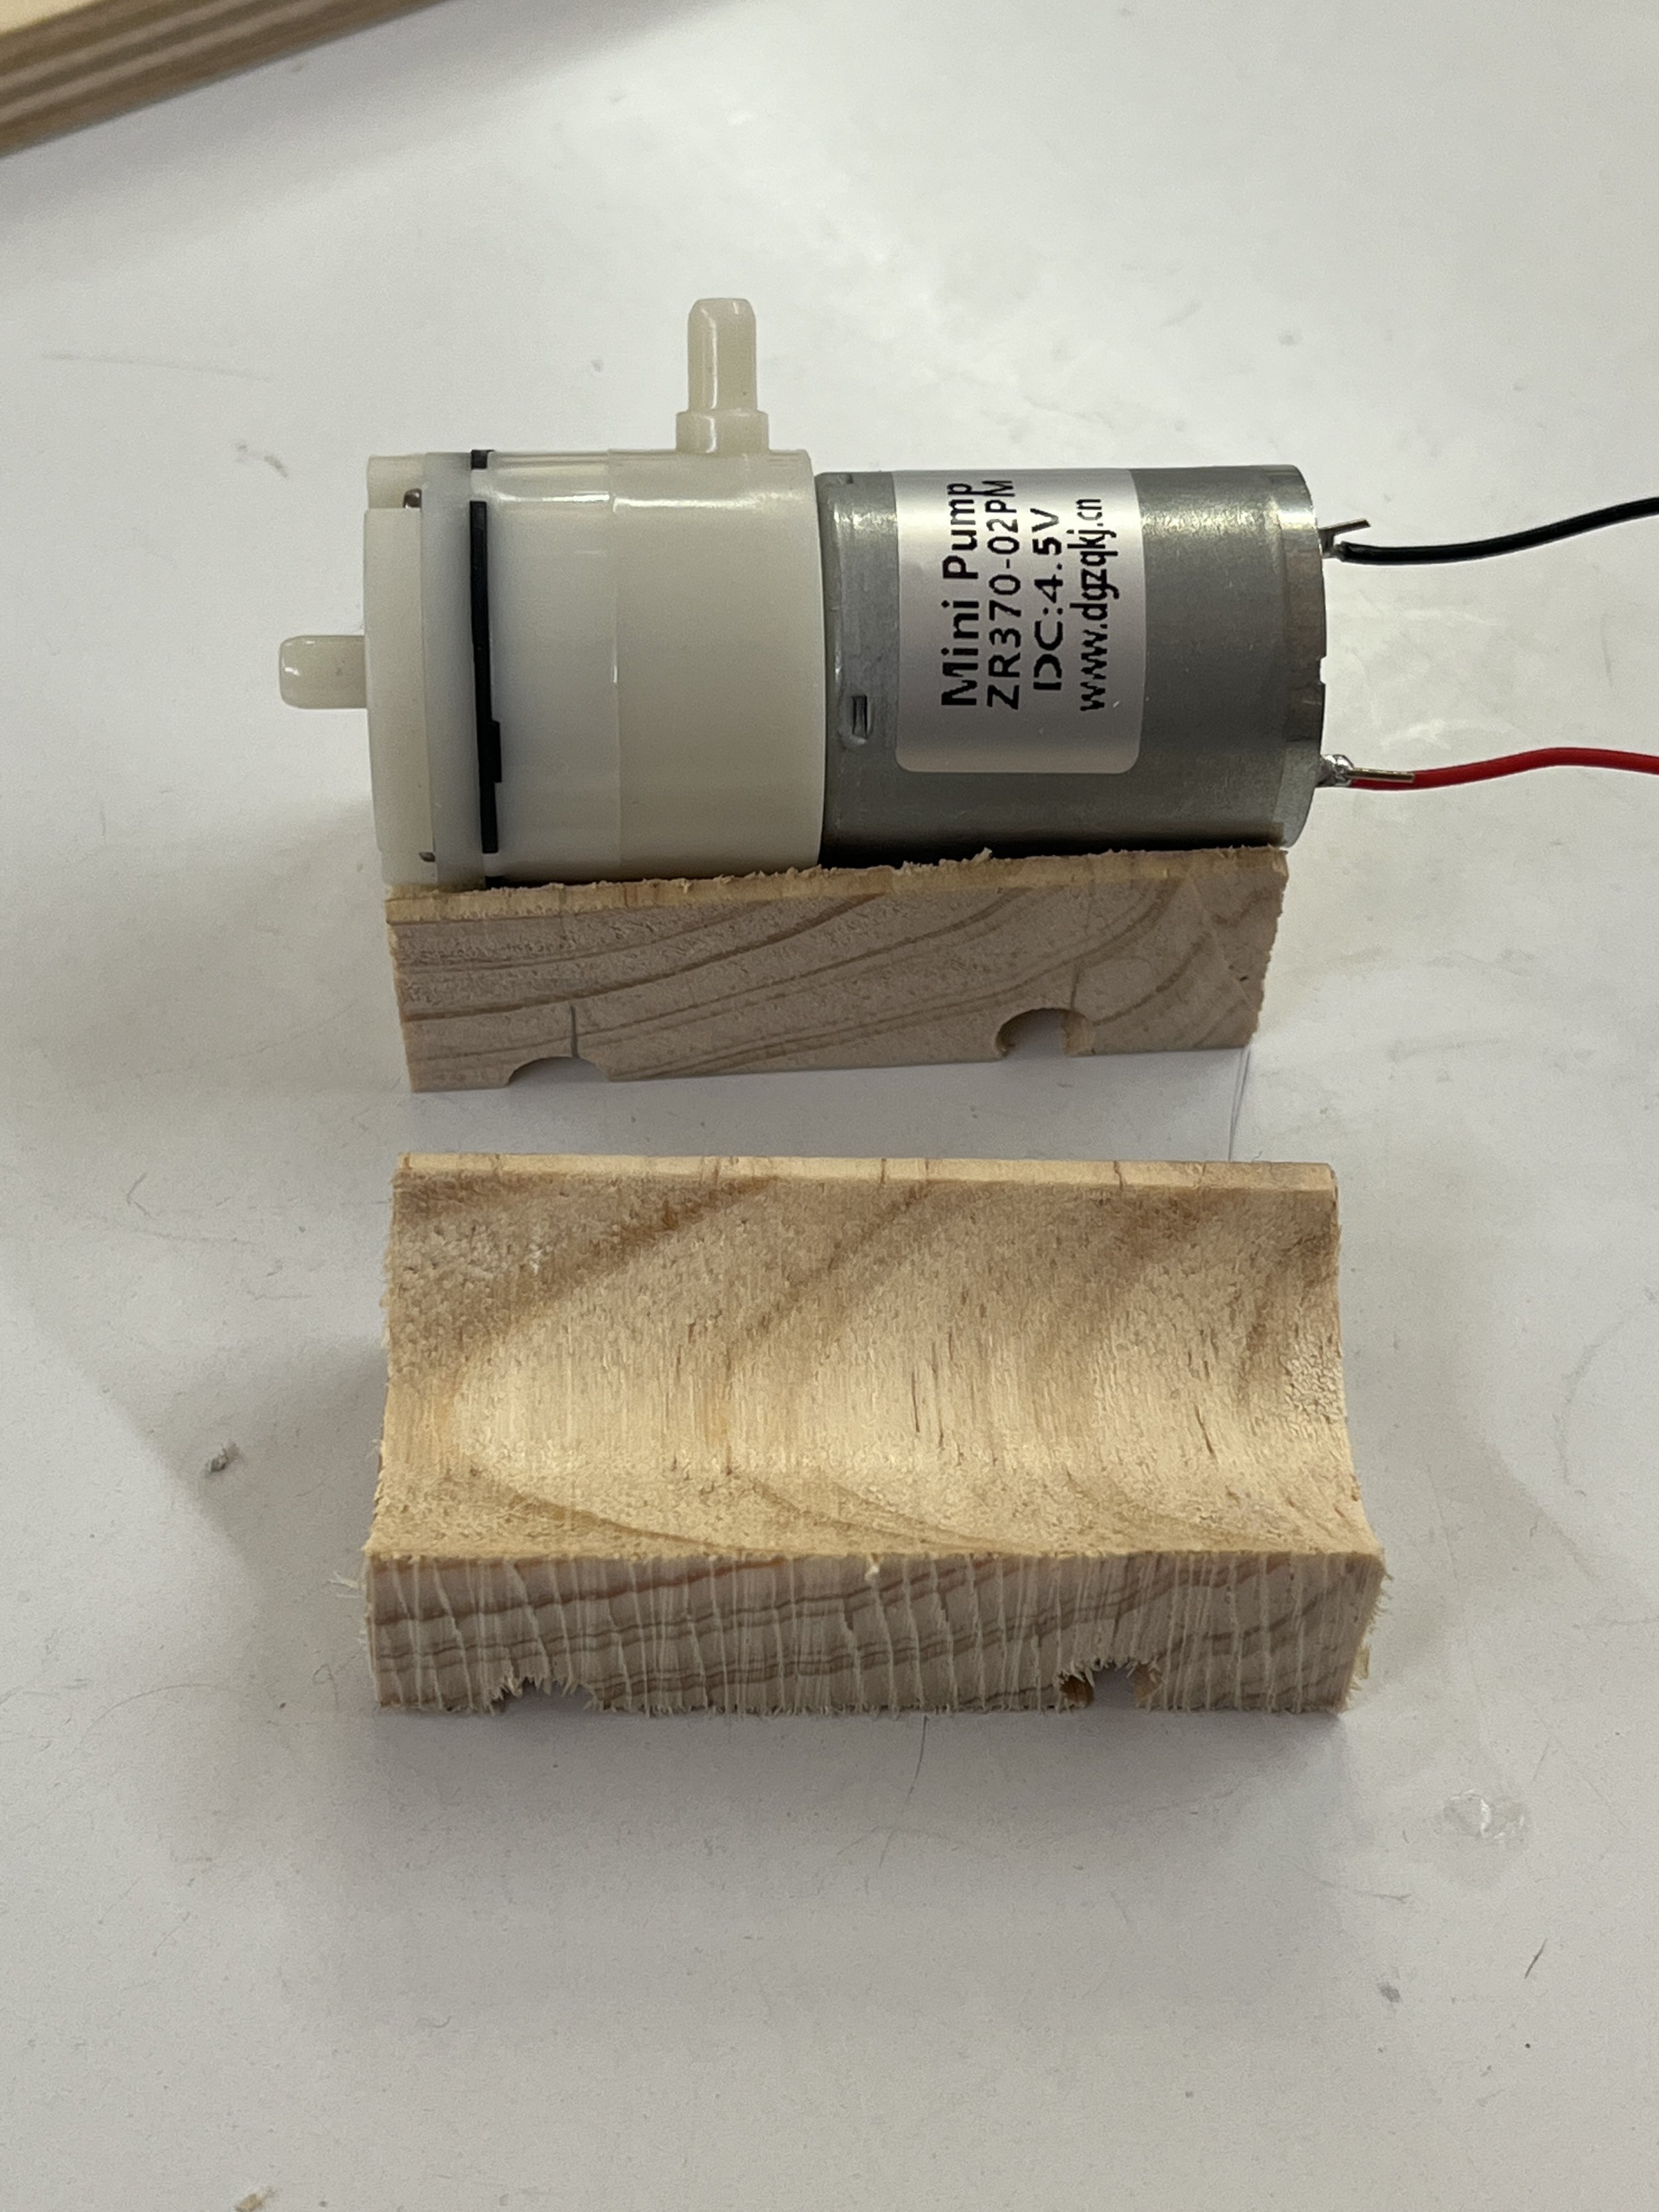
Again another fabulous idea from fab master Phil are these pump mounts. I cut them out of some scrap wood using the drill press and band saw exclusively! I attached the pumps using some double-sided foam tape. The holes on the underside of the mounts were meant for some zip ties for extra security but I didn’t end up needing them. I just screwed these mounts down to the sculpture platform.


I also soldered together a protoboard for this project so that the circuit would be more reliable than a bread board with jumper wires. I also screwed this into place using some stand offs. I cut all the wires and tubing to length and mounted them to the bottom panel using some cable clips to get a really clean setup.


Then there’s the acrylic heart. This was always intended to be a sculptural element but I realized quickly that it could be functional. I drew up this design on my iPad and etched it with the laser cutter. I glued a ring of neopixels onto it to indicate the air quality and also serve as a heart beat to indicate the sculpture is still … sculpturing during the off time of the air pumps.


Ribcage
I feel like building the ribcage was really the art part. It was a little daunting at first because I had no idea what I was doing but eventually the sculpting became really organic and freeing! I’ll try my best to explain the process.
Basically, I got this 18 gauge armature wire from Home Depot. I cut it to length using wire cutters and doubled it up and twisted on both ends. I knew I was going to make 6 ribs so I had those positions marked on the pipe. I wrapped the middle part of the wire around the pipe twice and desperately hot-glued it into place. It was a little messy at first and I definitely lost feeling in my finger tips over time, but the hot glue really worked for this build!


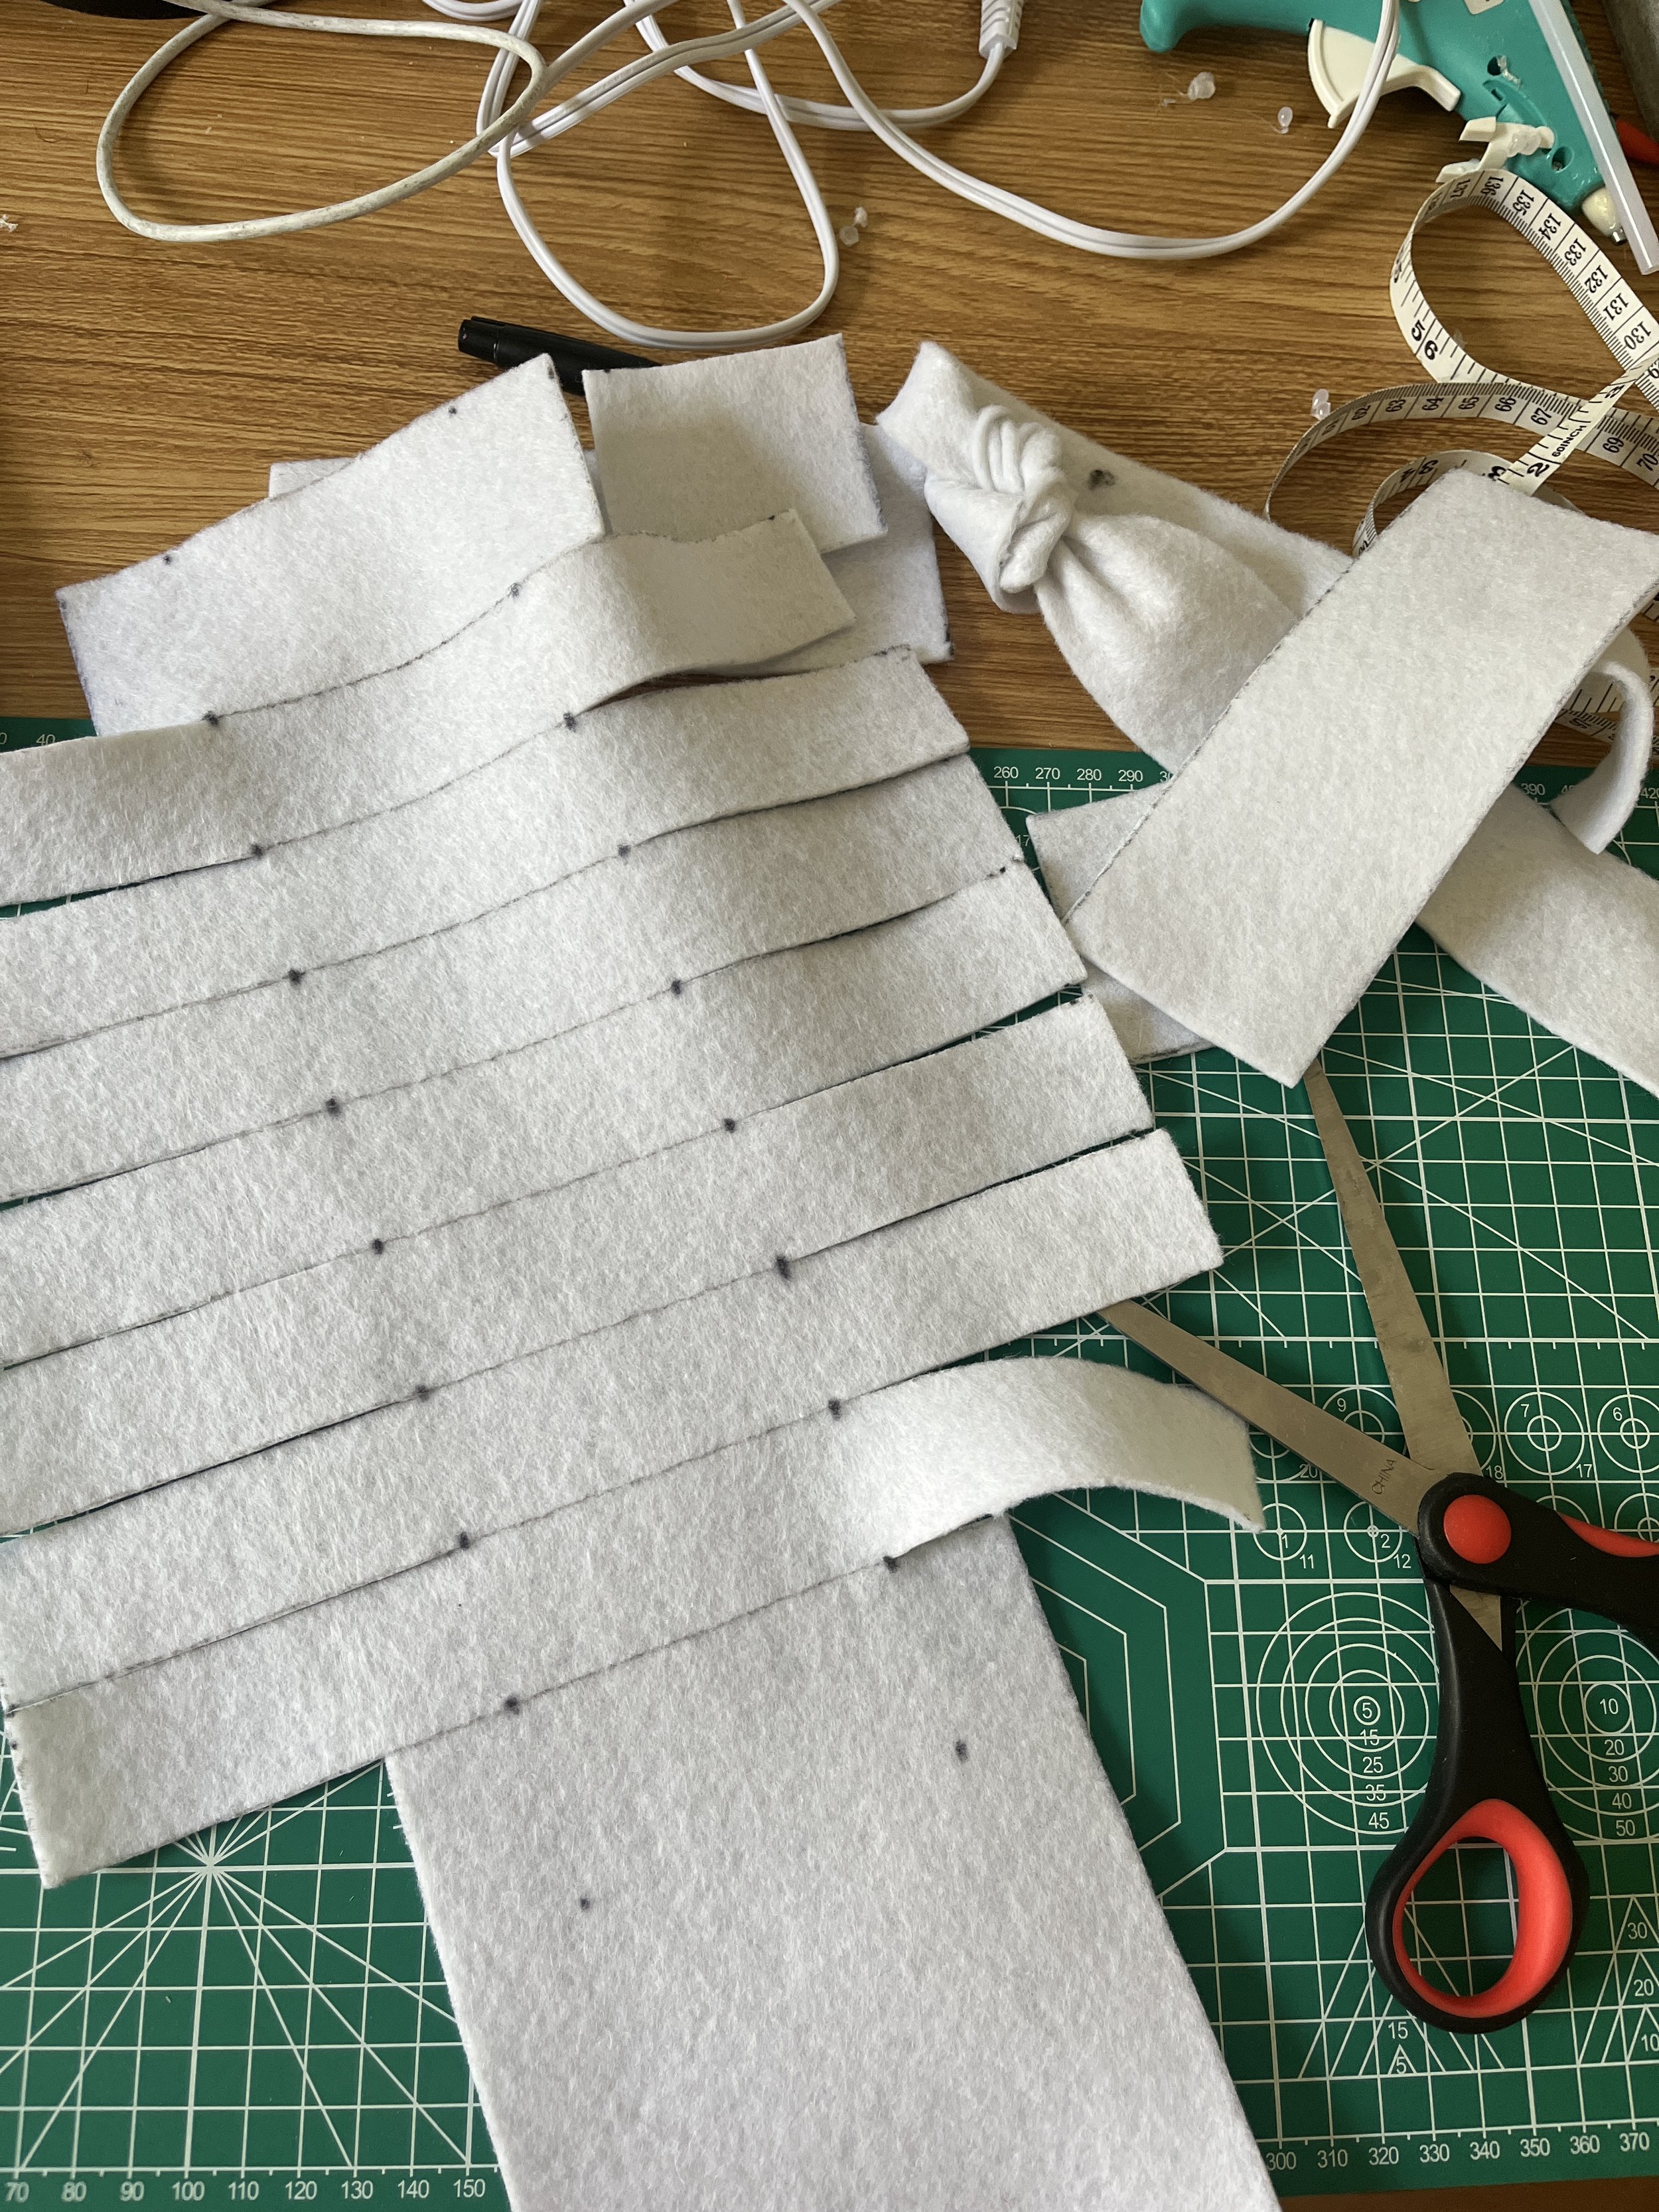
To cover up the pipe I used some white felt. I did a lot of measuring, drawing, and cutting and came up with this pattern. I hot glued it in place and knotted the strips around the ribs. Admittedly, I took some inspiration from tie blankets even though I’ve never made one myself but I thought the knotted felt would make for a good abstraction of the human spine.

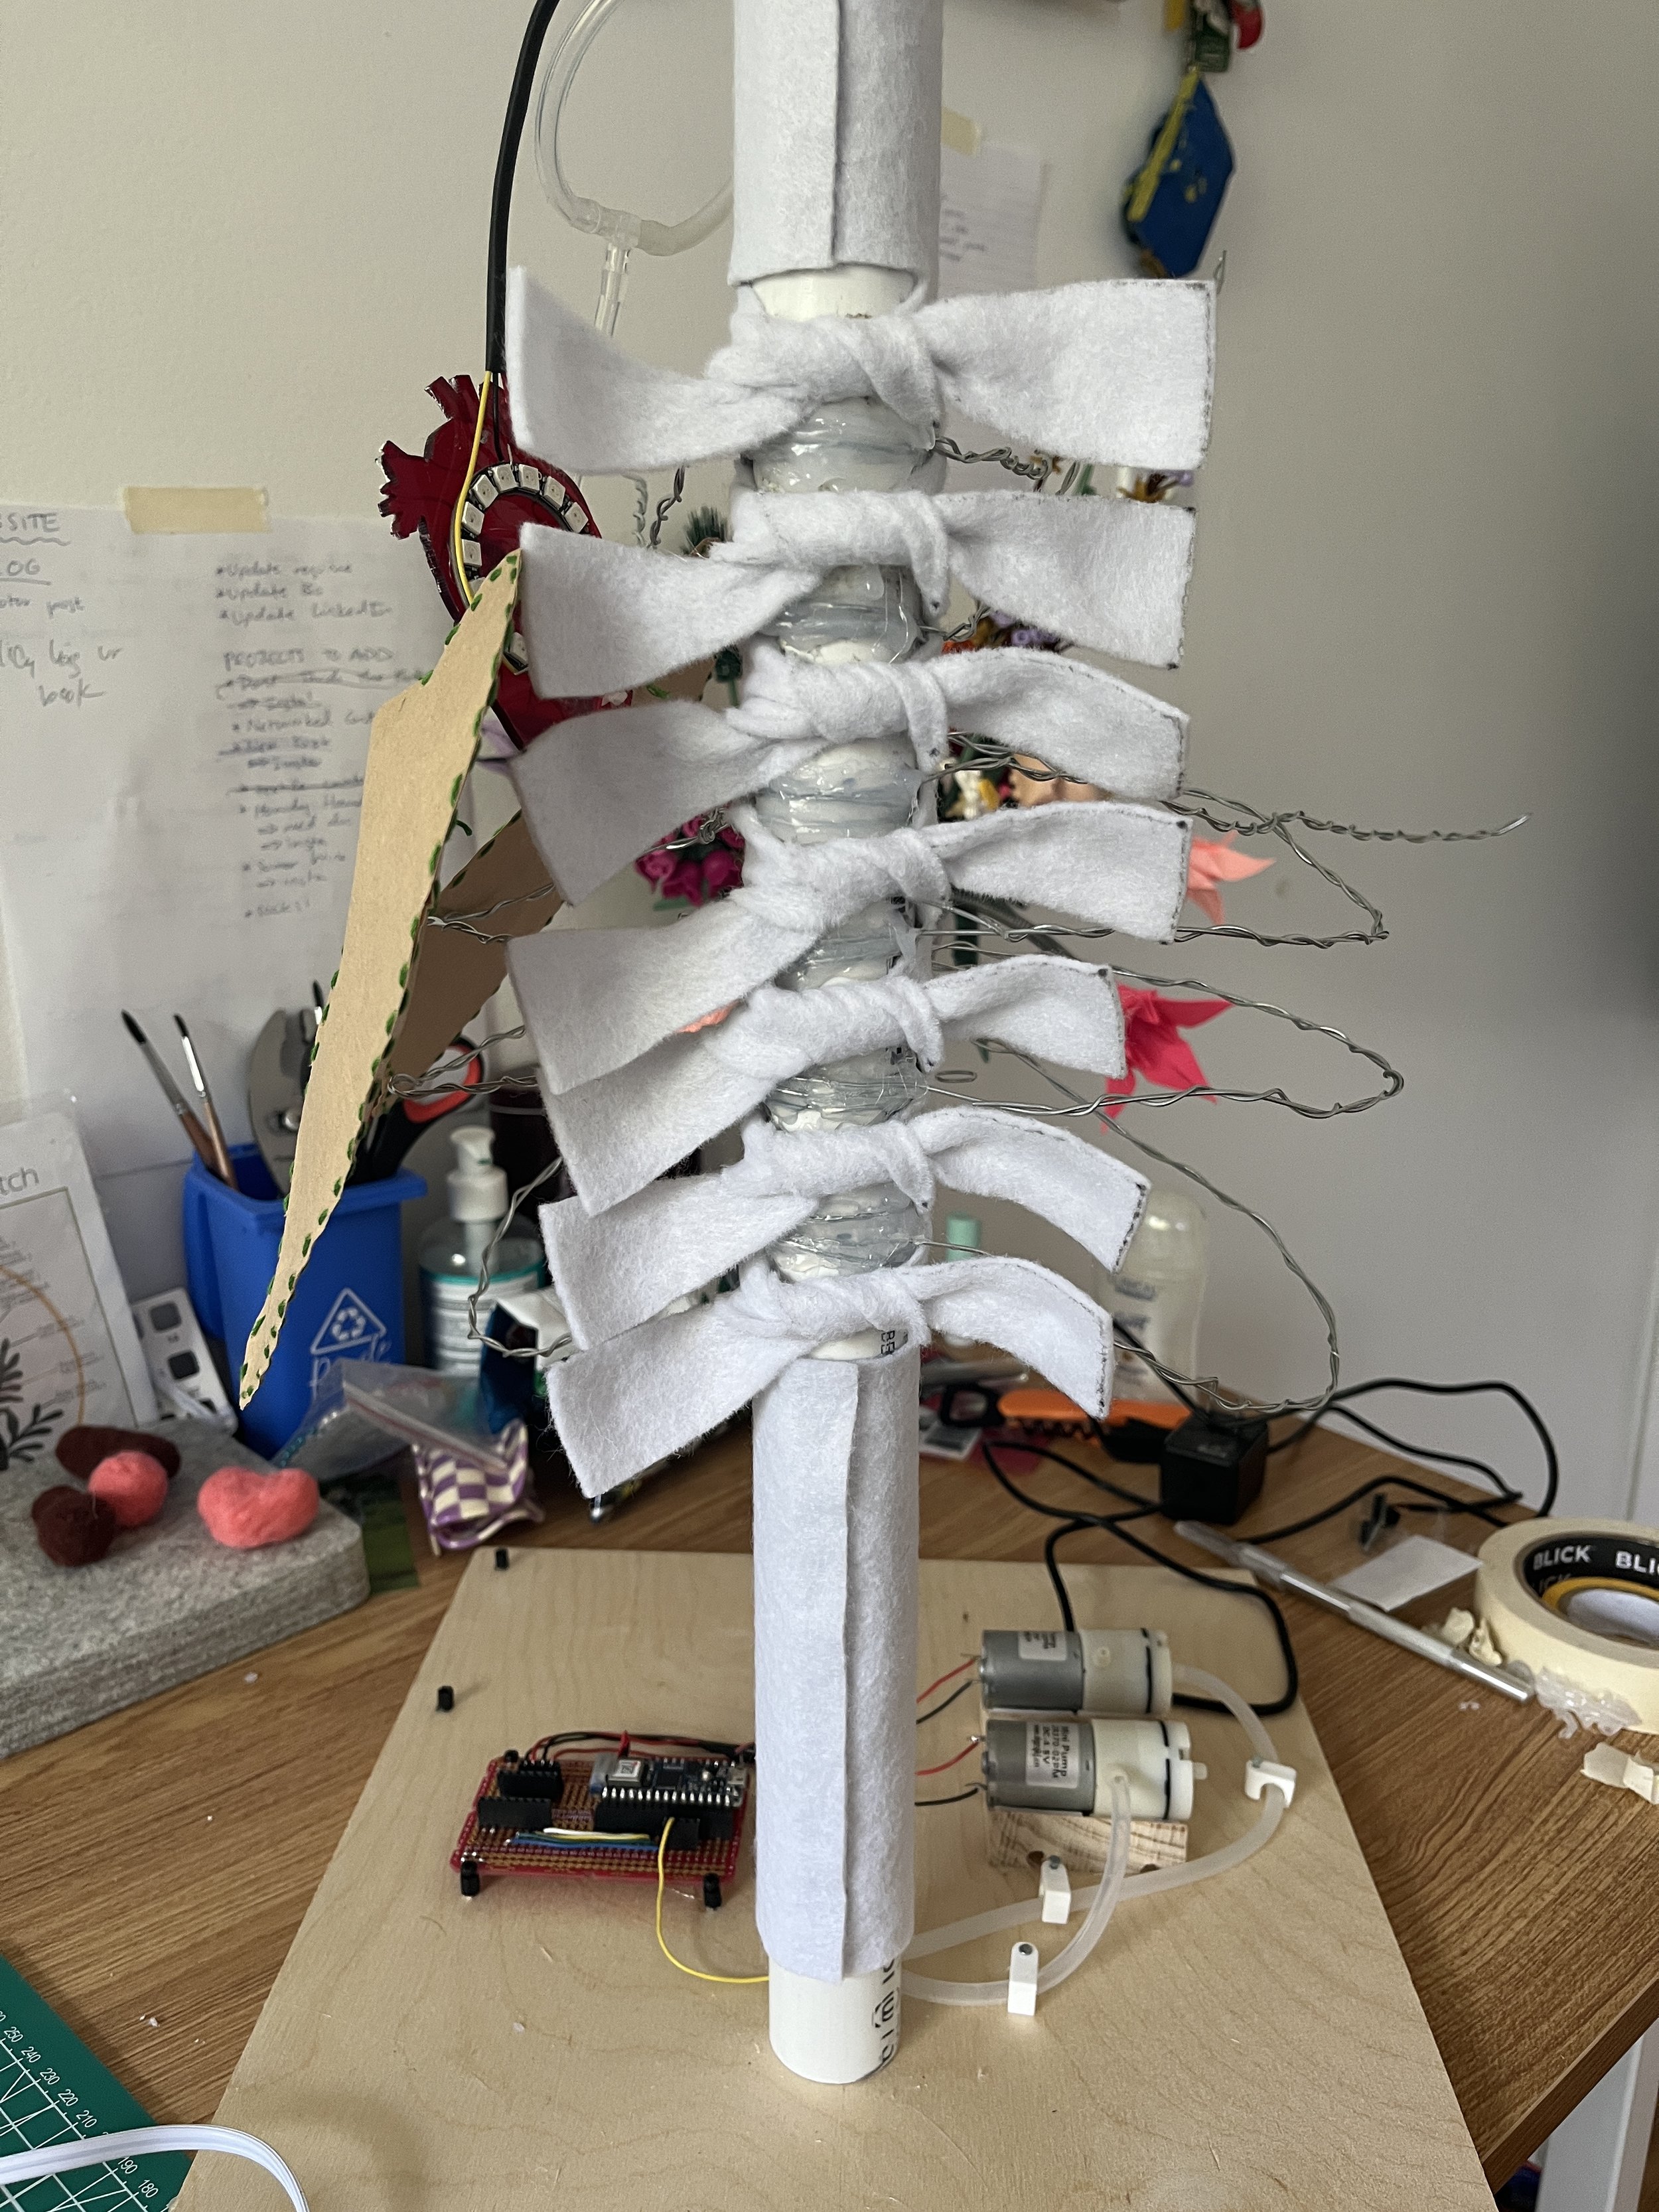
Now I had a soft-presenting spinal column I wanted to achieve the look of soft ribs too. I had originally planned to needle felt the wire ribs but I wasn’t sure of the logistics now that the wire was free-floating and it seemed time consuming. I pivoted and bought some white yarn from Michaels and just wrapped it around the wire. I think the yarn would make it easier to felt onto the ribs in the future.


Code
So I think I’ve been kind of glossing over the additions to the code week-by-week, but here are some important milestones:
First, I integrated the pump and API code. This means that at a specified interval, the Arduino will get the AQI data from the OpenWeatherMap API and run the pumps.
If the AQI is bad, the rate the pumps switch from suck to blow is faster than if the AQI is good.
Remember I’ve implemented a watchdog timer, so that needs to be reset accordingly!
I’ve also implemented the neopixel ring functionality
It does some indication at the start of the code as to the status of the internet connection.
It does a light up animation when it grabs new data from the API. The color of the pixels also indicates the current air quality. Red LEDs indicate an AQI of 5 which is really bad. White LEDs indicate an AQI of 1 which is good air quality.
There’s also a breathing animation that happens during the off time of the air pumps in hopes that the sculpture will still be engaging to look at during that time.
I’ve also uploaded all my code to Github and this is what is currently running on my sculpture.
Final Product
Pneumatic IoT sculpture
A breathing sculpture made out of wood, PVC, wire, and textile. The beating heart changes color and is connected to the internet. It periodically checks the air quality of my hometown in Arizona. Depending on the quality, the breathing turns from frantic and labored to soothing deep breaths. This project is a reminder that what we put into the world will eventually come back to us.
The idea for this piece was inspired by my mom. Though I haven’t lived with her for many years now I still love her so much. At the start of the pandemic she developed a chronic cough. It was really worrisome because it persisted for years. My dad took her to pulmonologists, put a humidifier in each room, and even replaced the windows and screens in our house. She doesn’t suffer from an intense cough anymore, but my parents are convinced it’s because of the worsening air quality in Mesa, AZ. Anyways, it was a very special moment to have my family come to the ITP Spring show and have my mom see my sculpture in person … on Mother’s Day. I can’t make this stuff up! :’)


Future Improvements
Bigger and better lungs. More noticeable breathing. Would stronger pumps do the trick? Do I need to design a custom pneumatic actuator? Should I use a different material that’s crinkly/noisy maybe?
Add in a cough functionality and threshold.
Build an interface to customize the location, potentially dials and screen for changing lat and long.
Retry making ribcage by felting
I intentionally constructed the ribs so that the PVC pipe can be removed (without disturbing the electronics and pneumatics) and start over
Resources
https://www.youtube.com/@juliesfeltedfriends/featured
https://www.youtube.com/watch?v=0I91vk6BaZ8
https://www.youtube.com/watch?v=h6m3pUeebPg
Special Thanks
Phil Caridi, Kari Love, Tom Igoe, Amitabh Shrivastava, Granny Liu, Kay Wasil