
Group member: Gracy Welihan
This is a continuation of my device data dashboard project. My previous blog post can be found here.
Planning
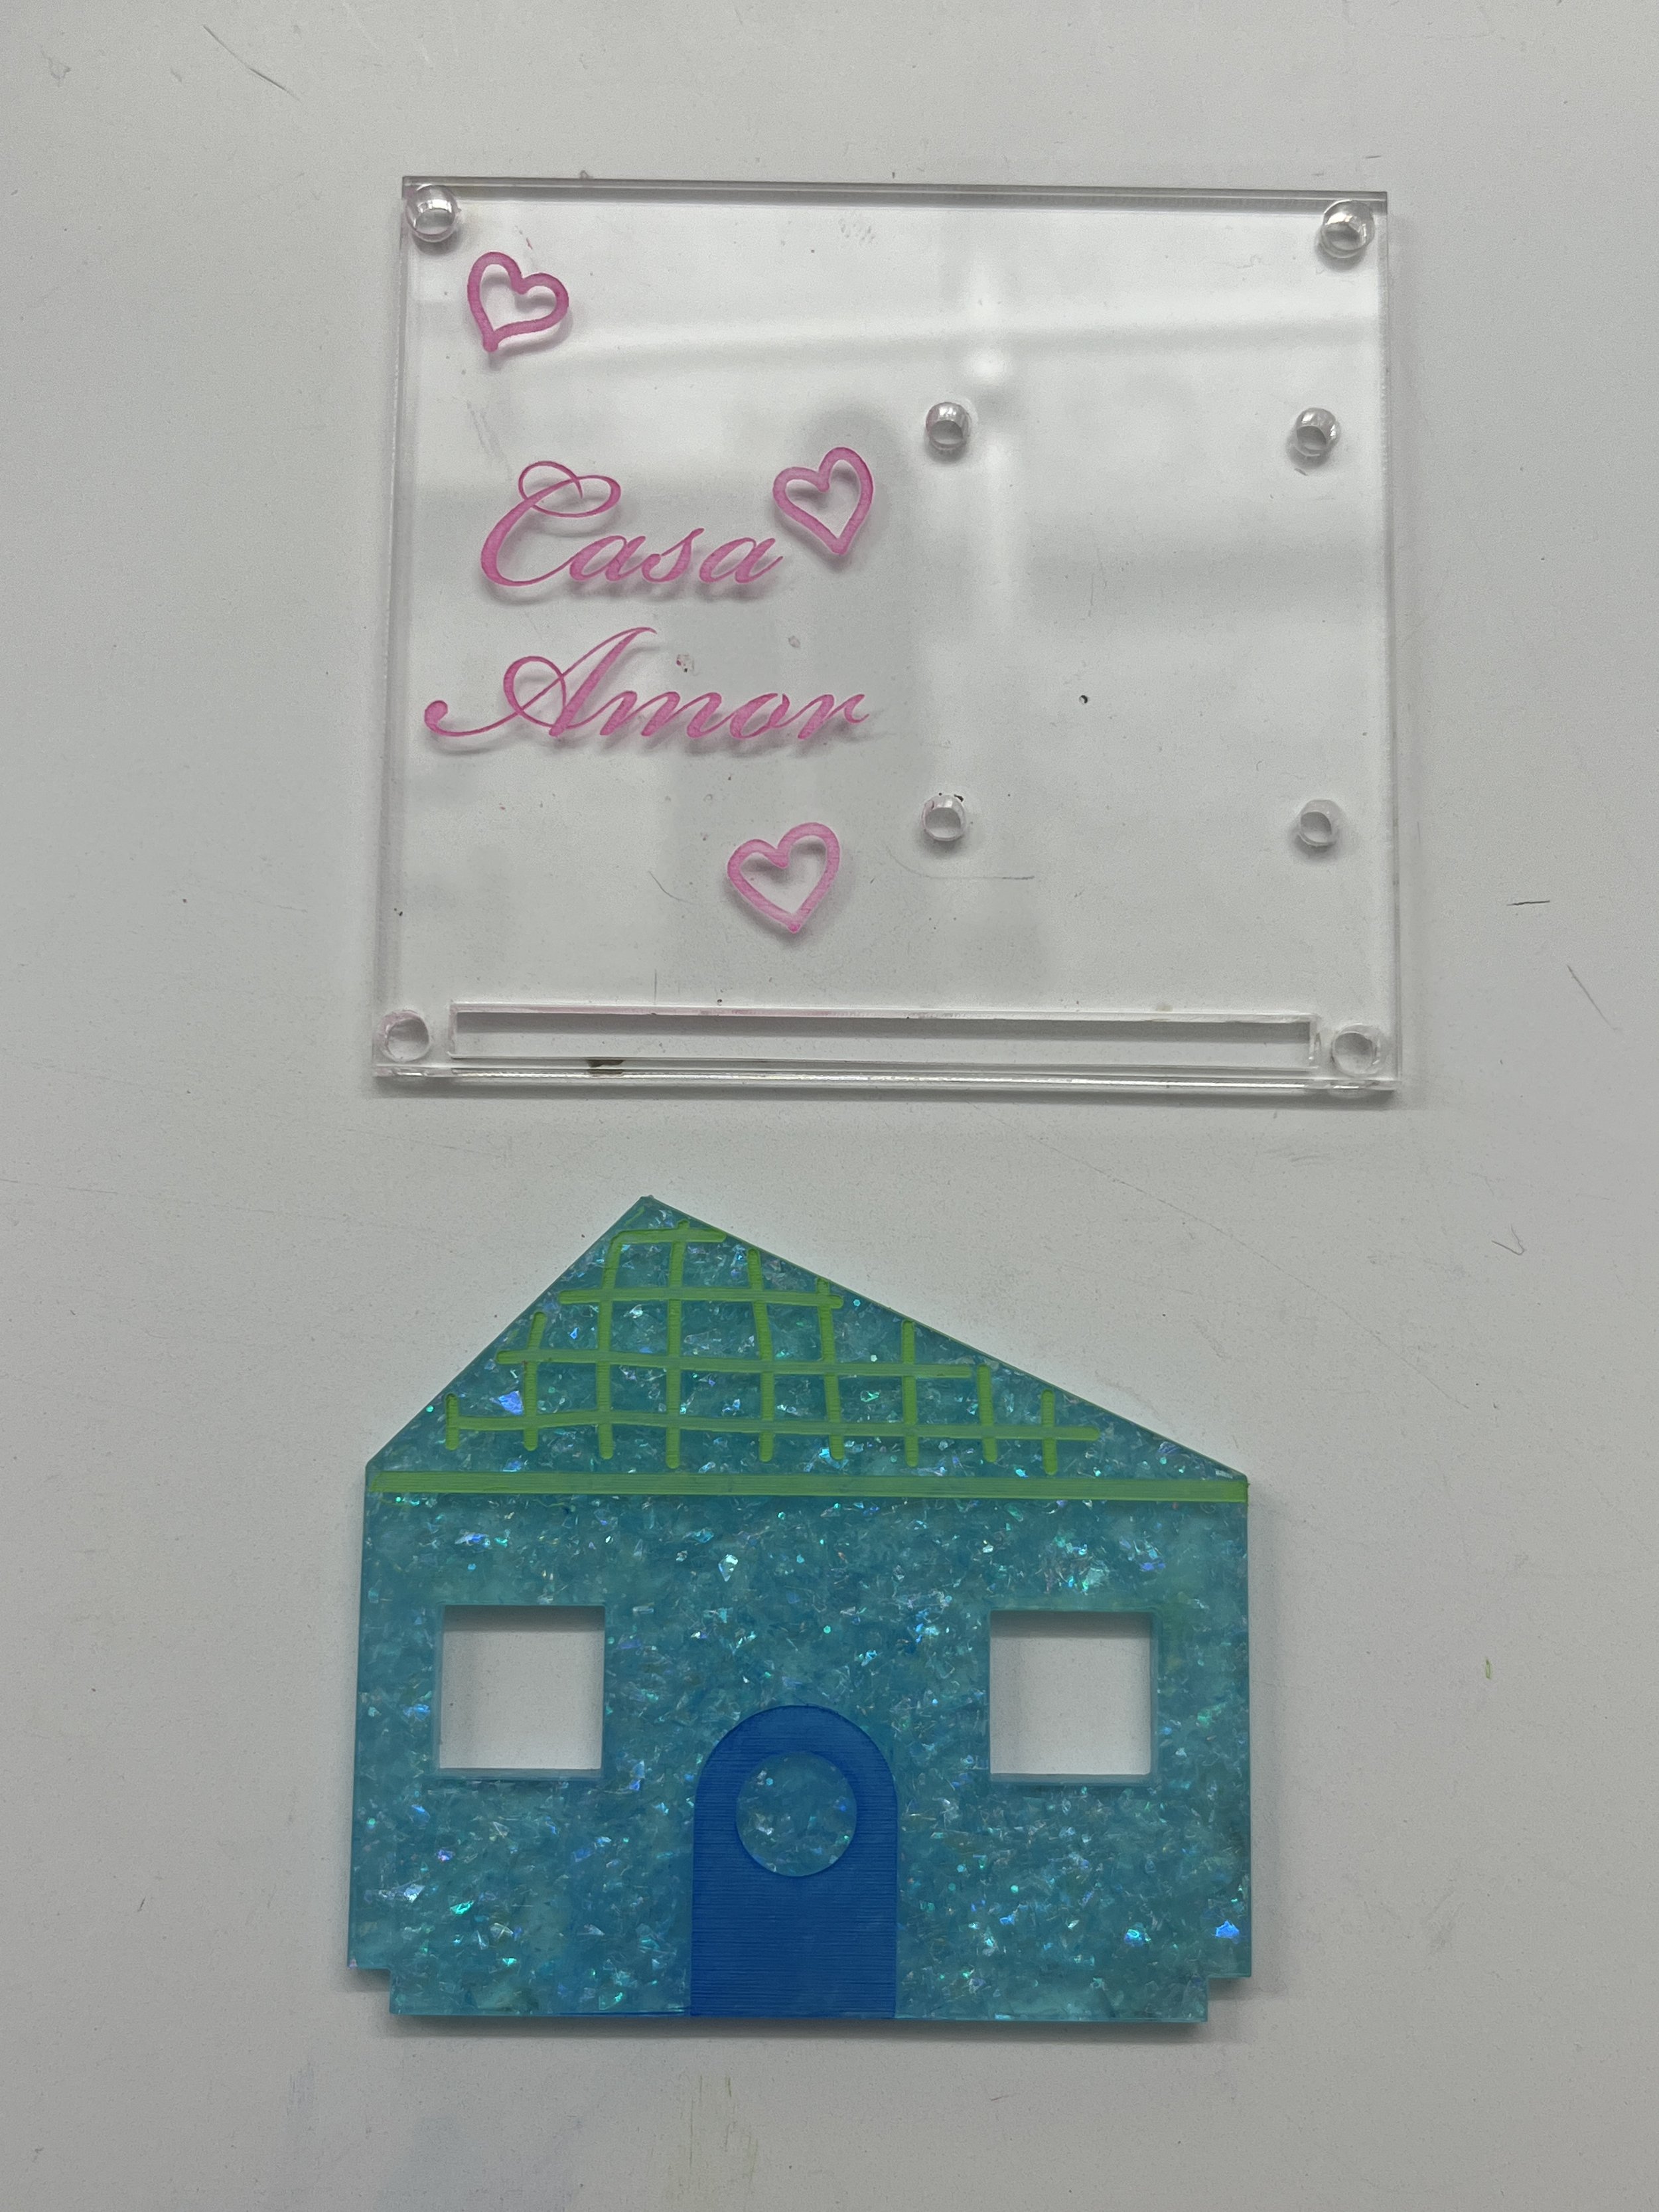
Below are some initial sketches I came up with when thinking about our environmental monitoring devices. We went through a lot of brainstorming. Gracy’s sensor measures temperature and humidity and my sensor measures light and RGB values, everybody’s favorite TCS34275. I always love some sort of gimmick when it comes to making projects, so I thought it could be fun to make the enclosures fun shapes… because you can make any shape with the laser cutter! But then Gracy mentioned making a house and I really liked that idea. Normally with IoT we are monitoring our house but in this case the house is monitoring us!
I also knew I wanted to use a screen in some way because I had never done that before. I got an E-Ink display and a regular OLED from Adafruit but utlimately decided to go with the OLED because the E-Ink is really advanced and has too many pins. I’ll have to save that for some other project.


Protoboard
Since we had already working devices and basic dashboards, I got started with getting the screen running. Adafruit’s monochrome OLED defaults to I2C communication, which is the same as my sensor. This should work in theory, especially since the two devices have different addresses, but as I would plug my sensor in the graphics on the screen would freeze. I cut the two jumpers on the back to put the screen into SPI mode and the system worked much better.
I used Adafruit’s GFX and SSD1306 libraries to get started with the screen. I also uploaded my new Arduino code, with the OLED additions, to Github.

Then I transferred my circuit to something a bit more permanent and soldered together this proto board. A little bit of tacky putty can be your best friend!


Gracy’s circuit consists of an SHT temperature and humidity sensor on the I2C bus and a KY-038 sound sensor on analog pin A0. Here’s that all soldered together.

Fabrication


Here are two things that are true:
I’m in love with the laser cutter.
We went crazy with the house idea.
Our enclosure needed at least one outward facing wall to get the house idea across. I remembered this slot-ing technique we had learned in intro to fab during enclosure week and that really worked like a charm with our cardboard prototype. I also tested out this technique of painting over the acrylic. After wiping the excess paint off with a rag, the color remains on the etched part of the material. Yay, multicolored house!
Assembly was a little bit tricky because sourcing the right mechanical hardware is always a challenge for me. For one, I had three different sized holes in my design that all needed the correct screw size (…some metric, some imperial). We also needed larger standoffs than were available in the shop but we eventually figured out a solution by mix and matching different spacers. I was also tipped off by Phil to use some hot glue as stand offs/attachment for the proto boards.
My laser cutter files are also on Github for anyone following along.
Final Product


Dashboard
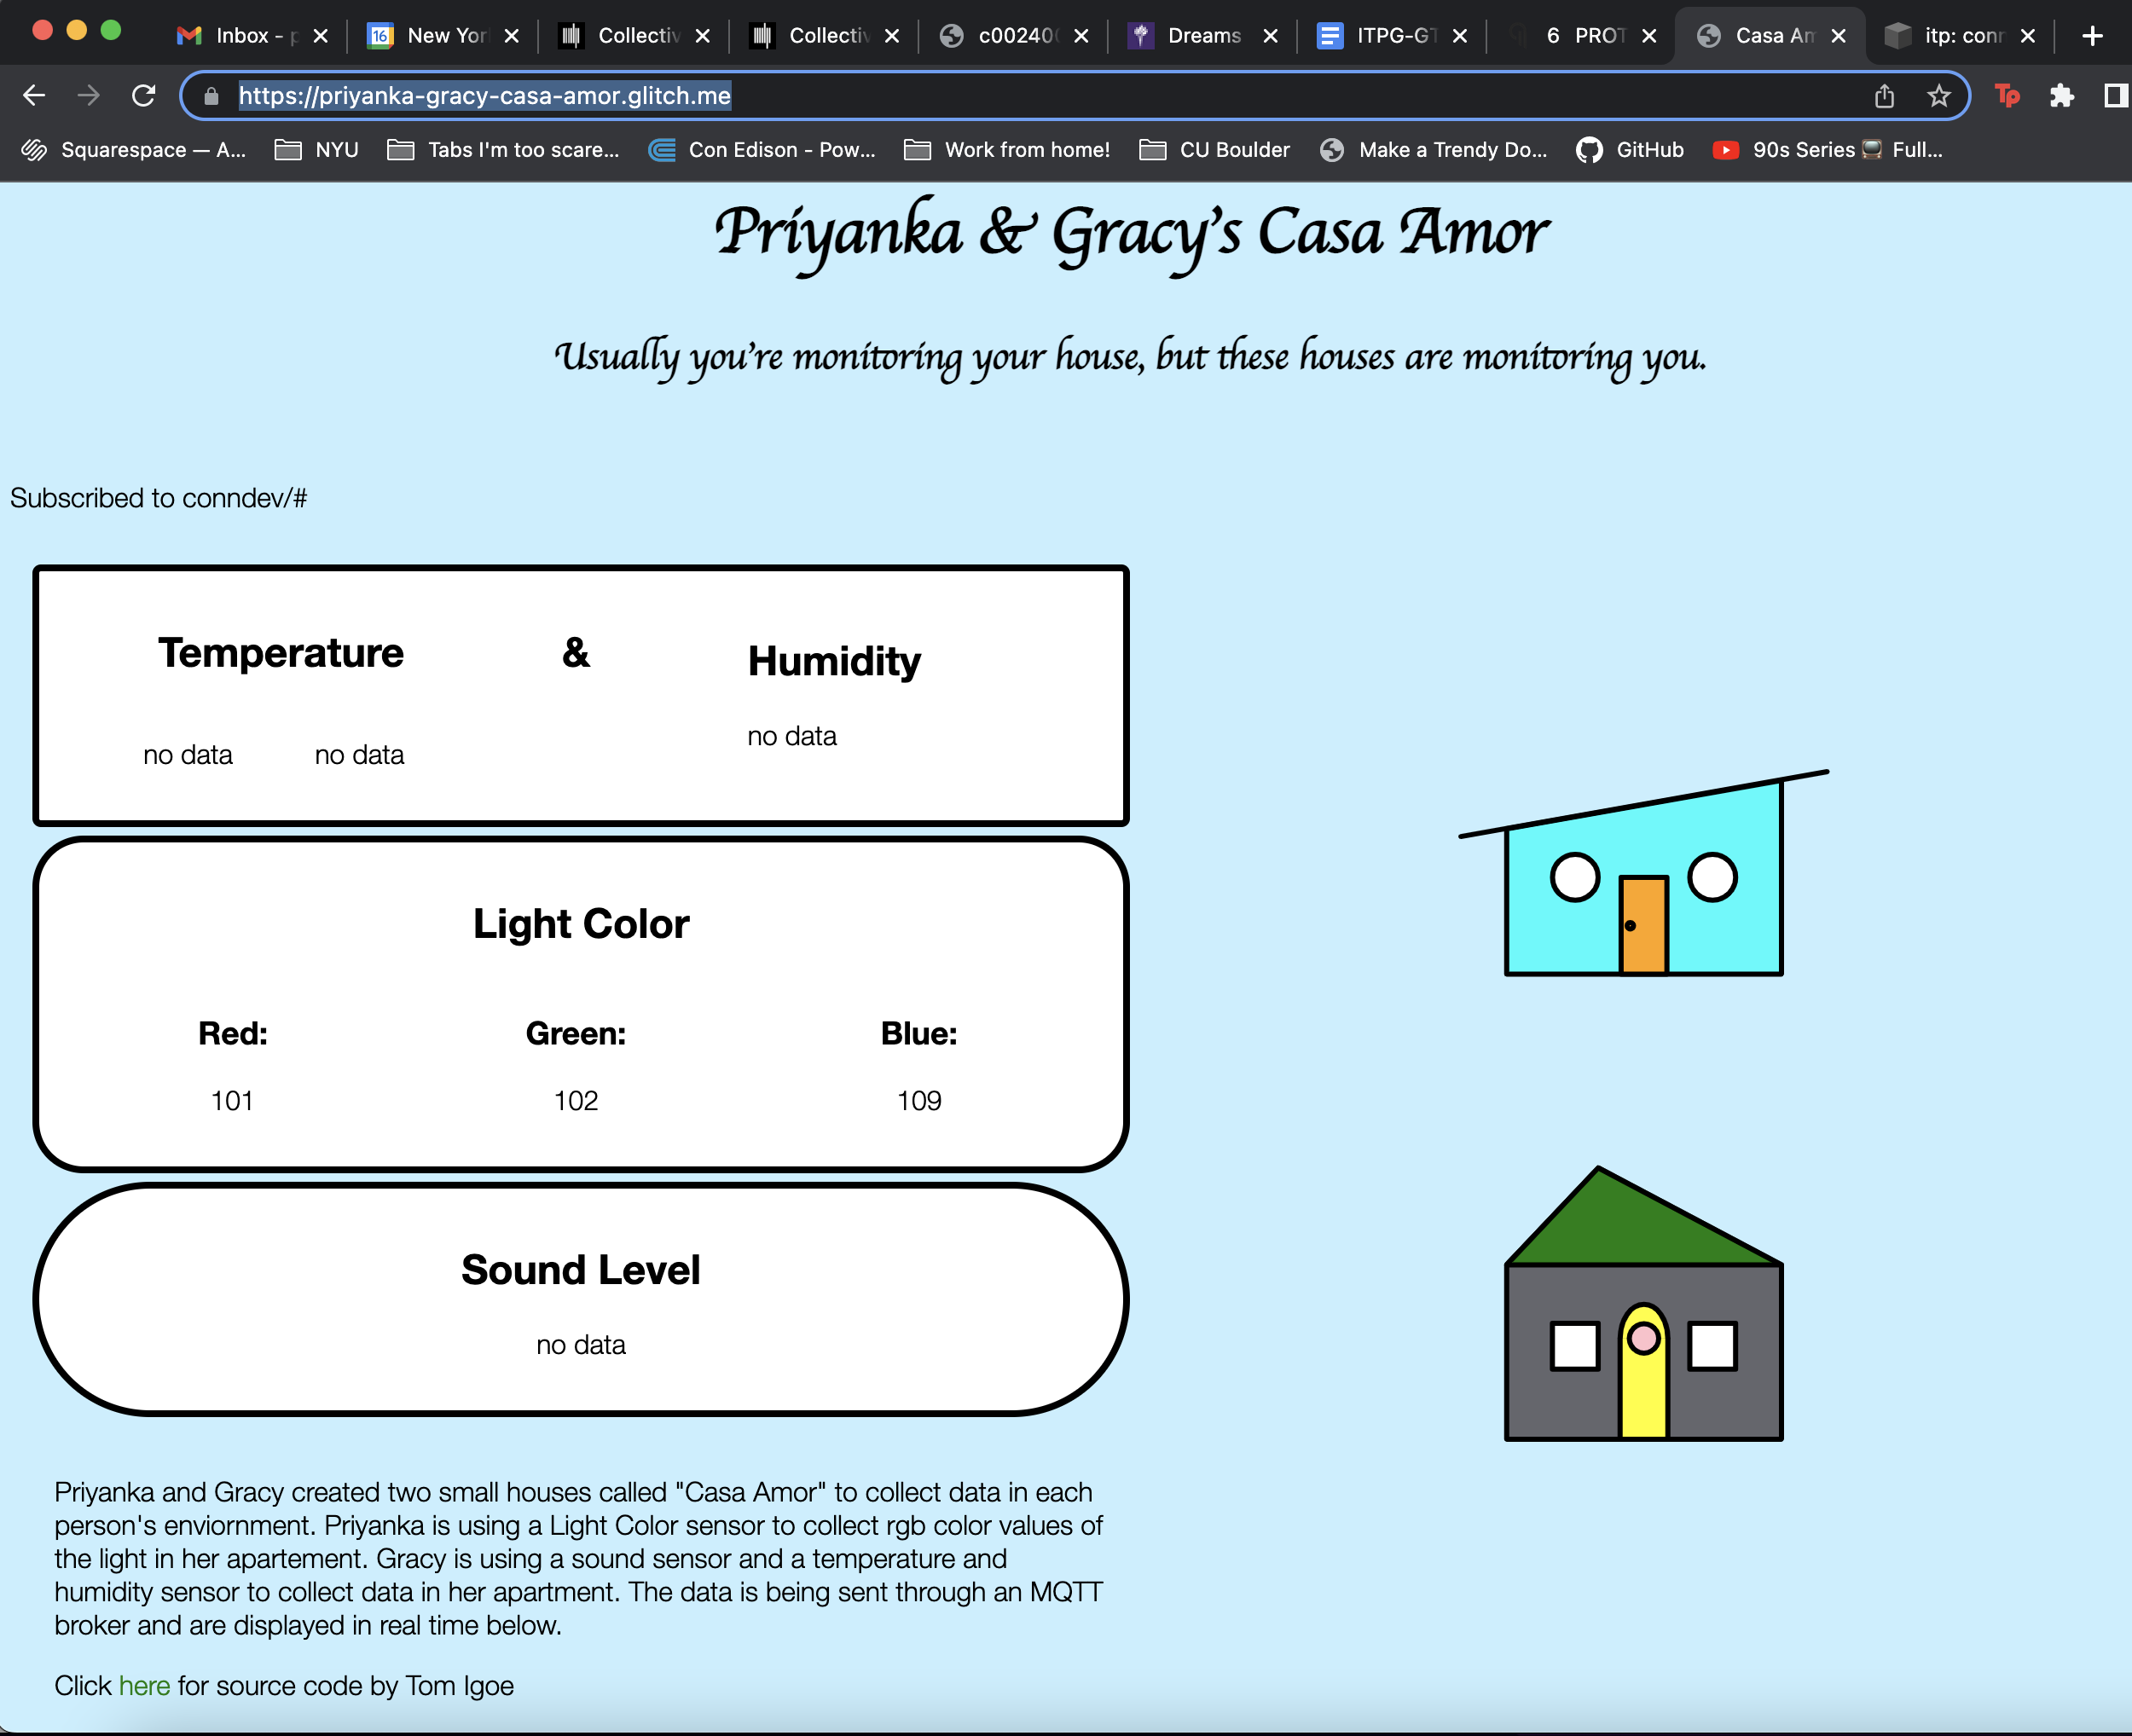
My very simplistic, original dashboard is still live on my private server. But Gracy created a super cool and cutting edge online dashboard that displays all the data from our various sensors and both houses! You can find it here. Looks like Gracy’s house isn’t live at the moment.
You can find my final blog post with data analysis here.
Resources
https://github.com/makin-stuff/ITP/tree/main/Connected_Devices/Device_Data_Dashboard
RGB Dashboard: https://priyankais.online/sun/
https://learn.adafruit.com/adafruit-2-13-eink-display-breakouts-and-featherwings/overview
https://learn.adafruit.com/monochrome-oled-breakouts/overview
https://learn.adafruit.com/adafruit-gfx-graphics-library/overview